Assembly / adjustments – RIKON Power Tools 10-346 User Manual
Page 11
ASSEMBLY / ADJUSTMENTS
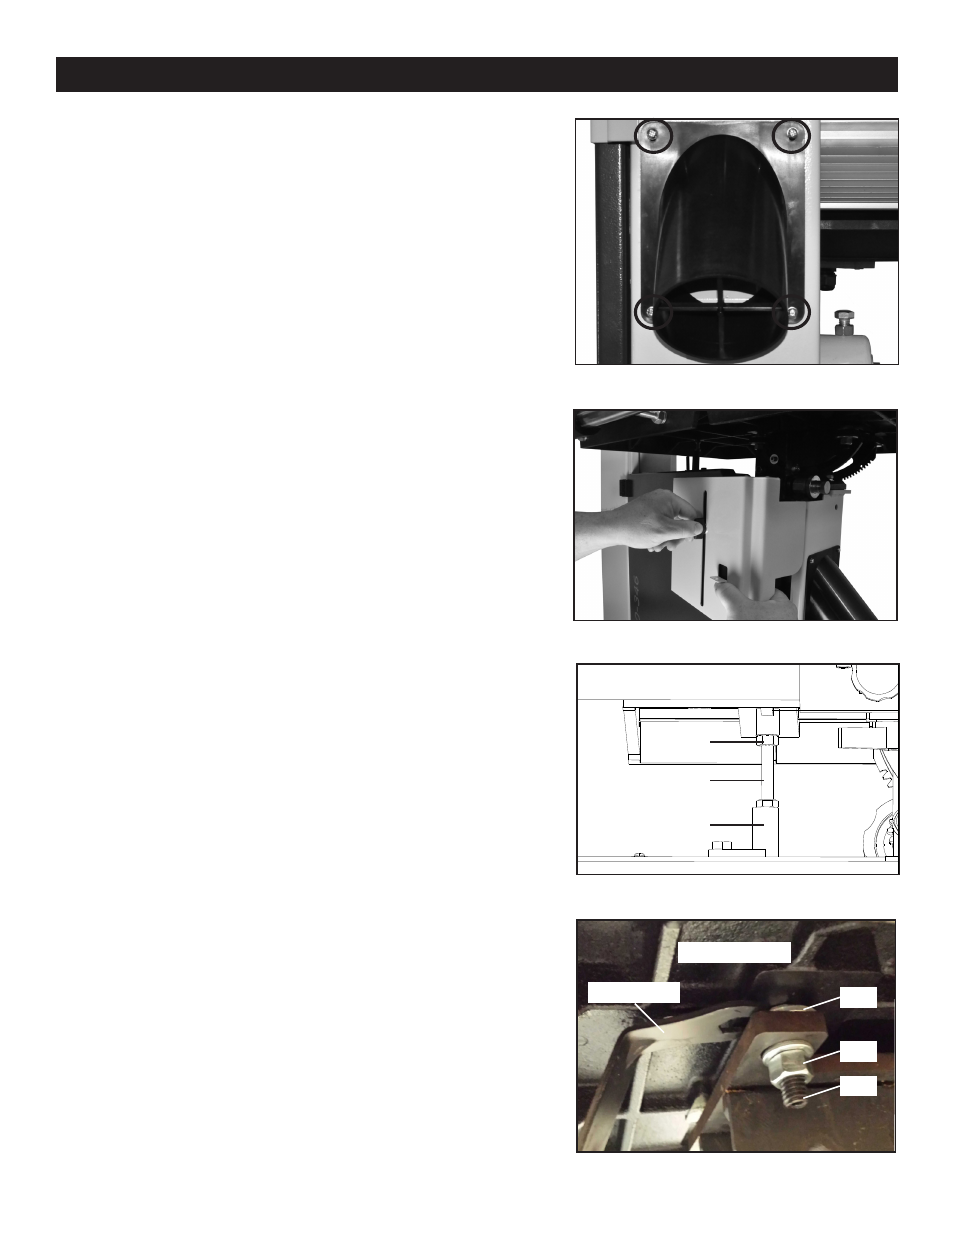
INSTALLING THE 4” DUST PORT
The 4” dust port under the table is installed on the frame
above the lower door knob. Locate four 4mm pan head
screws and four 4mm flat washers from the hardware
pack. Using a Phillips-head screw driver install the
screws through the dust port flange into pre-threaded
holes in the frame.
See Figure 5.
INSTALLING THE LOWER DOOR BLADE GUARD
Hardware for the lower door blade guard has been pre-
installed at the factory. Locate the plastic wing nut part
#16
(refer to parts explosion on page 25 of this manual)
and washer on the lower door and remove. Place the
lower door blade guard part #18 over the threaded hole
in the door in alignment with the long adjustment slot.
Install the plastic wing nut and washer through the long
adjustment slot and thread into the door. See Figure 6.
Adjust as needed to cover the blade under the table.
SETTING THE TABLE SQUARE TO SAW BLADE
The table may be set at 90° to the saw blade sides
by adjusting the table stop screw (A-Fig.7) under the
table. The table stop screw rests on the top of the
quick release adjustment stop (B-Fig.7). First loosen
the locking nut (C-Fig.7) and set a square between
the blade and the work table. Adjust the table stop
screw (A-Fig.7) until the table and blade are set at 90°.
Retighten the locking nut (A-Fig.7) making sure that the
setting is maintained.
The table may also be set at 90° to the back of the saw
blade by adjusting the table mounting bolts. One of
the four table mounting bolts shown in Figure 7. With
the Offset Wrench provided slightly loosen part #160
mounting bolt (refer to parts explosion on page 28 of
this manual).
Using the 6mm “L” wrench provided, turn the trunnion
micro adjusting screw #159, as needed, to achieve
desired setting. Turning the screw clockwise will
raise the trunnion; counterclockwise will lower. Check
table for 90° and tighten part #154 to the top of the
upper trunnion to retain the desired setting. Finish by
tightening part #160.
Figure 5
11
Figure 6
A
B
Figure 7
Figure 8
C
Underside of Table
Offset Wrench
#160
#159
#154