Car shelter part 3, Figure d, Figure e – Rhino Shelter Steel Carport 12W X 20L X 8H User Manual
Page 8: Page 8
3.
Once the holes are drilled, use an air compressor to blow out the concrete dust
with compressed air from each of the holes. WARNING: To avoid inhaling dust
particles, wear a protective mask or face shield. (See Figure C.)
4.
Use a hammer to tap the cement anchors (not included) through the pre-drilled
holes into the concrete slab surface. Continue tapping the cement anchors until
their washers rest against the top edge of the Base Rails (5, 6). (See Figure C.)
5.
Firmly tighten the nuts of the cement anchors (not included) to secure the Base
Rails (5, 6) to the concrete slab surface. (See Figure C.)
6.
When securing to the ground, use the Anchor Stakes (7) in place of the
cement anchors. Please Note: Before set up, be sure that the ground where
the Stakes are installed is free of any underground pipes or wires.
Roof And Wall Assembly:
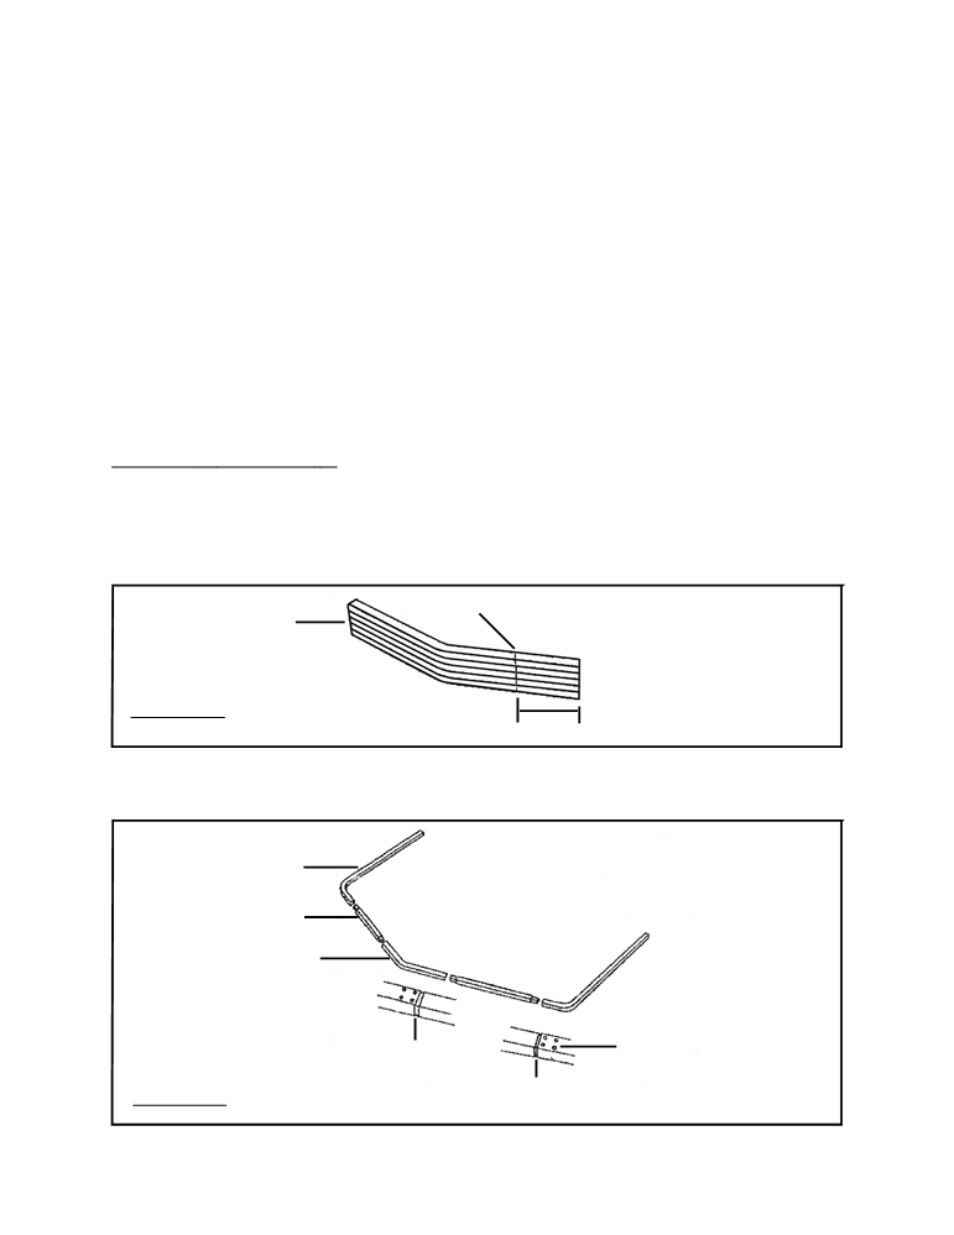
1.
Before assembling the roof and wall sections, stack the Peak Tubes (2). Line up
their ends and mark a line on the top of each Peak Tube 17-1/8” from one end.
This will be the location of the edge of your first run of sheet metal Panels (1) on
the roof of the Car Shelter. (See Figure D.)
STACKED MARK
PEAK TUBES
(2)
FIGURE D
17-1/8”
2.
On the ground, assemble the Peak Tubes (2), Rafters (3), and Side Posts (4)
using the Self Tapping Screws (8). (See Figure E.)
SIDE POST
(4)
RAFTER
(3)
PEAK TUBE
(2)
PEAK TUBE
SELF TAPPING SCREW
TO
(8)
RAFTER
JOINT
SIDE POST
FIGURE E
TO
RAFTER
JOINT
SC122008JJ
Please DO NOT return unit to store or dealer. For all questions or shortages please contact
PAGE 8
Customer Service at: 800-447-7079 or 203-877-7070