Johnson Level & Tool Mfg. 40-6543 User Manual
Page 14

14
©2013 Johnson Level & Tool - Rev. 1
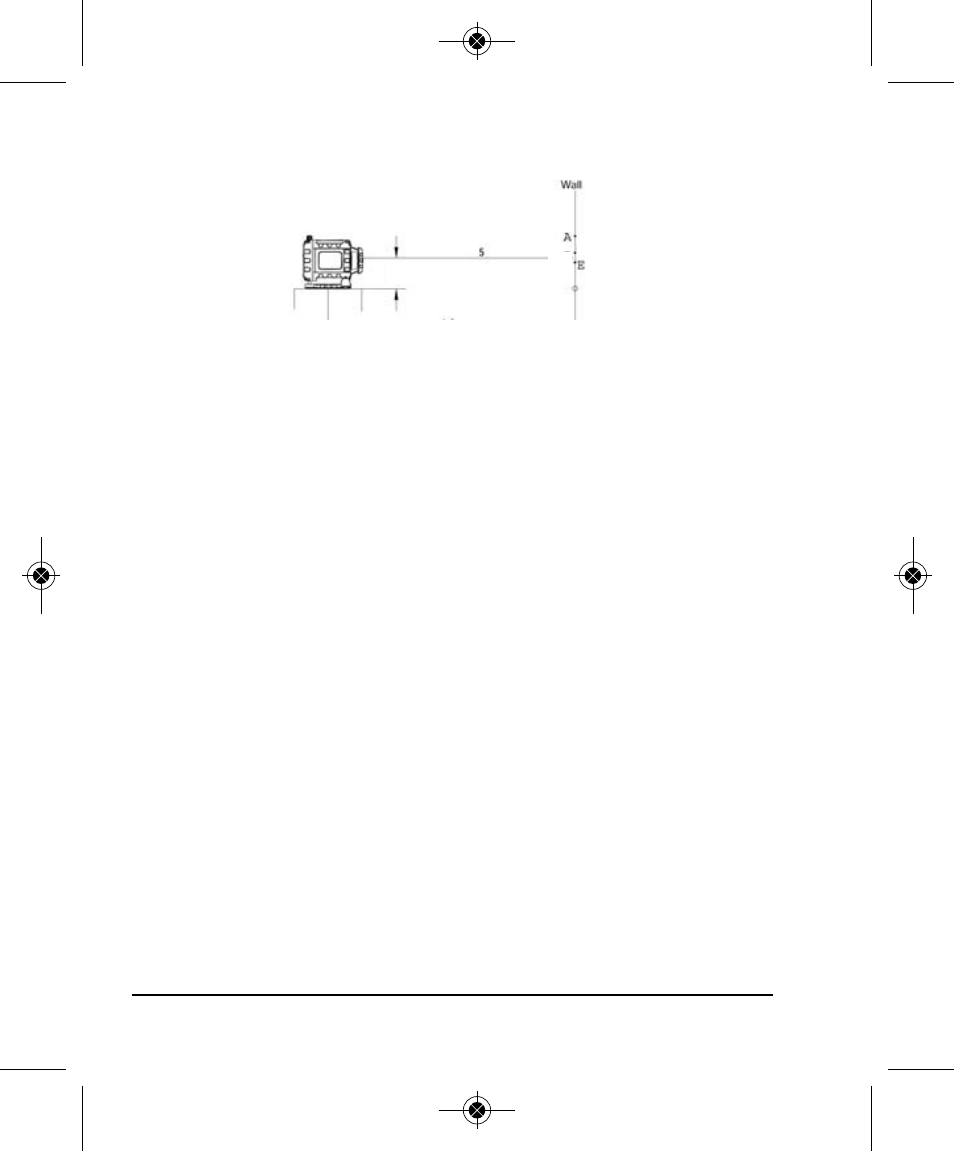
Accuracy Self-check in vertical status
1. Follow the operations as shown above, and measure the distance
“H1” between the laser rotating plane and the platform surface.
2. Set the locking knob to “OFF” position, and place the instrument
in vertical position.
3. Rotate the vertical adjusting knob to center the bubble.
4. Measure the distance “H2” between the top laser beam and
the platform surface.
5. Mark E in the position that is equal to (H1-H2) under the point O.
6. Adjust the adjusting knob to make the laser beam aim at E.
7. Check the bubble to see if it is centered. If it is not yet -
instrument will need to be sent in for calibration.
H1
H2
E
30’ (10m)
7365H-English_Manuals 10/14/13 2:43 PM Page 14
See also other documents in the category Johnson Level & Tool Mfg. Tools:
- 1750-1000 (2 pages)
- 40-6900 (16 pages)
- 40-6926 (12 pages)
- 40-6926 (12 pages)
- 40-6910 (16 pages)
- 40-6936 (38 pages)
- 40-6250 (12 pages)
- 40-6065 (16 pages)
- 1455-0000 (42 pages)
- 1457-1000 (12 pages)
- 40-6060 (12 pages)
- 1880-2400 (12 pages)
- 40-6028 (12 pages)
- 40-6500 (24 pages)
- 40-6080 (16 pages)
- 40-6515 (84 pages)
- 40-6527 (24 pages)
- 40-6580 (30 pages)
- 40-6529 (30 pages)
- 40-6530 (21 pages)
- 40-6502 (22 pages)
- 40-6537 (18 pages)
- 40-6525 (21 pages)
- 40-6522 (26 pages)
- 40-6535 (20 pages)
- 40-0917 (8 pages)
- 40-0922 (14 pages)
- 40-6064 (2 pages)
- 40-6932 (36 pages)
- 40-6004 (24 pages)
- 40-6001 (32 pages)
- 40-6430 (2 pages)
- RAS-1 (67 pages)
- 40-6620 (16 pages)
- 40-6640 (20 pages)
- 40-6662 (20 pages)
- GL100 MX (3 pages)
- L100M MX (4 pages)
- 40-6602 (18 pages)
- 40-6230 (1 page)
- 40-6616 (12 pages)
- 40-6210 (5 pages)
- 40-6200 (5 pages)
- 9100 (3 pages)
- 40-6540 (24 pages)
