Caution, Step 5: position and level the washer – Alliance Laundry Systems H236I User Manual
Page 12
10
685945
Step 4:
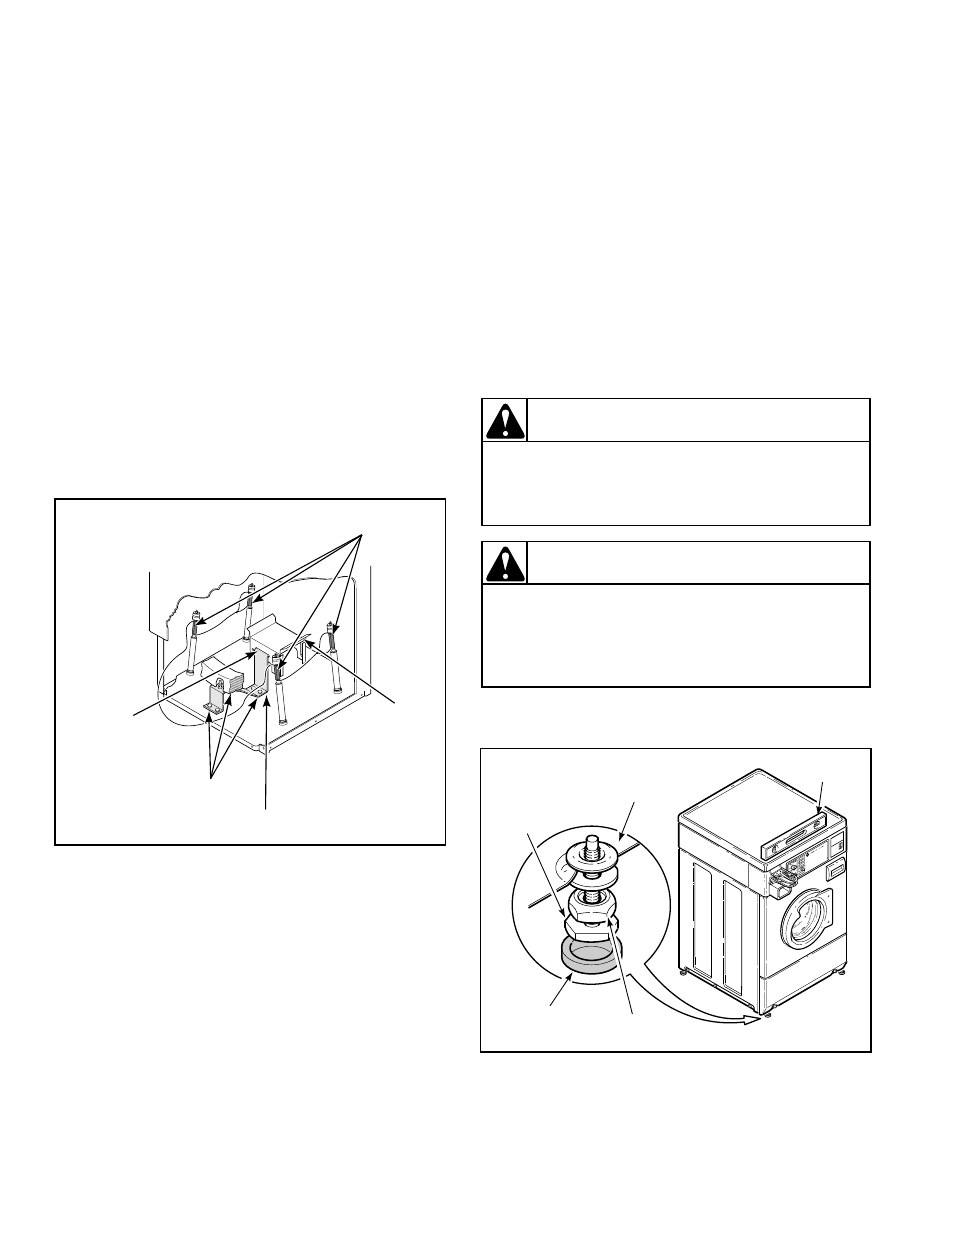
Remove the Shock Sleeves and
Shipping Brace
Remove front access panel by removing the two screws.
Remove bolts and washers from shipping brace with
9/16" wrench and remove brace. Remove shock sleeves
by pulling on the yellow rope. Remove label from front
side of front access panel and place on backside of front
access panel.
NOTE: The shipping brace, bolts, washers and shock
sleeves should be saved and MUST be reinstalled
whenever the washer is moved more than four feet.
Do not lift or transport washer from front or without
shipping materials installed.
Store the shipping materials in the bag provided in the
Accessories Bag. Save materials for use whenever the
washer is moved.
Reinstall front access panel.
NOTE: The shipping materials MUST be reinstalled
whenever the washer is moved. Refer to Moving
Washer to a New Location section for instructions.
Step 5:
Position and Level the Washer
Place washer in position on a clean, firm and reasonably
level floor. Installing the washer on any type of carpeting
is not recommended.
Loosen 9/16" locknuts and adjust the leveling legs until
the washer does not rock.
NOTE: Level must rest on raised portion of top panel.
See illustration.
Tighten the locknuts securely against the washer base
using the 9/16" wrench. If the locknuts are
not tight, washer will move out of position during
operation.
Remove rubber feet from accessories bag and place on all
four leveling legs.
H027IE1B
HOOKED
END OF
SHIPPING
BRACE
BOLTS
SHOCK SLEEVES
MOTOR
MOUNT
WASHERS
DO NOT slide washer across floor if the
leveling legs have been extended, as legs
and base could become damaged.
W248
CAUTION
Use of the dispenser drawer or washer door
as a handle in the transportation of the
washer may cause damage to the dispenser
or door.
W185
CAUTION
3
2
1
OPERATING INSTRUCTIO
Select Wash Temperature
Select Fabric Type
Load Supply Dispenser (See
Insert Coin(s) / Card.
1.
2.
3.
5.
Open Dispenser
Compartment (as
Close Dispenser
1.
2
3
Detergent
Detergent
1.
2.
DISPENSER INSTRUCTION
685942
68
55
57
WASHER
BASE
RUBBER
CUP
LEVEL
H221IE1A
LOCKNUT
LEVELING
LEG