Installing a mini pci card into the system – Elitegroup 259EN User Manual
Page 65
■ chapter 4 upgrading your computer
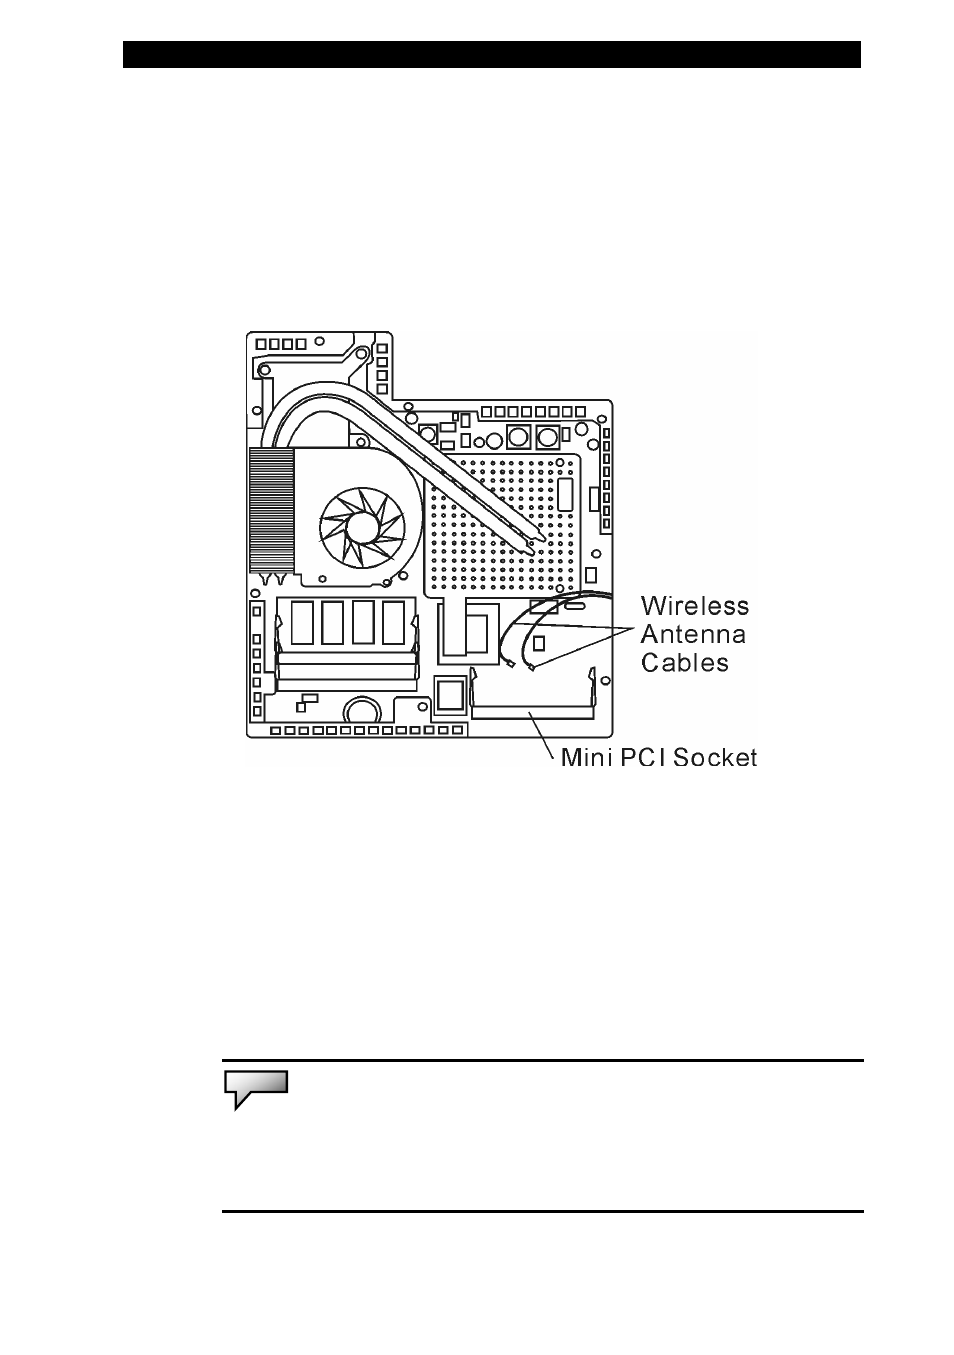
Installing a Mini PCI Card into the System
To install a new Mini PCI card, do the following:
1.
Follow steps in the previous section, Installing a memory
module (DIMM) into the system, to access the Mini PCI Socket.
2.
The mini PCI card will only fit in one direction. Align the
small notch in the module with the socket on the connector and
insert the card at an angle of approximately 30 degrees into the
empty socket. Then press it firmly so that the contact edge is
driven into the receiving socket. Pivot the mini PCI card until
the latches on both sides of the socket snap into place.
Note:
If you want to remove a mini PCI card from the socket, press out on the
latches located on both edges of the socket at the same time. The card should
pop up to an angle of 30 degree.
4-12
- MB50II / IA ID 1 (72 pages)
- MB40II ID 9 (73 pages)
- MB40II / IA ID 8 (73 pages)
- MB40II ID 7 (71 pages)
- MB40II ID 6 (57 pages)
- MB40II ID 5 (56 pages)
- MB40II ID 4 (53 pages)
- MB40II / IA ID 3 (73 pages)
- MB40II / IA - 41II ID 2 (72 pages)
- MB40II ID 1 (73 pages)
- L41II (69 pages)
- U40-50SA (70 pages)
- U41II (65 pages)
- U10IL (84 pages)
- A900 (V2.1) (85 pages)
- A535 (117 pages)
- A531_TM5800 (110 pages)
- 755SI4 v.1 (22 pages)
- 755SI4 v.2 (17 pages)
- 755SI4 v.3 (6 pages)
- 755SI4 v.4 (7 pages)
- 755SI4 v.5 (8 pages)
- 755IN v.1 (22 pages)
- 755IN v.2 (10 pages)
- 755IN v.3 (14 pages)
- 755IN v.4 (10 pages)
- 755IN v.5 (17 pages)
- 755IN v.6 (6 pages)
- 755IN v.7 (7 pages)
- 755IN v.8 (9 pages)
- 755II1 v.1 (22 pages)
- 755II1 v.2 (10 pages)
- 755II1 v.3 (14 pages)
- 755II1 v.4 (10 pages)
- 755II1 v.5 (17 pages)
- 755II1 v.6 (6 pages)
- 755II1 v.7 (7 pages)
- 755II1 v.8 (9 pages)
- 557 (81 pages)
- 536 (71 pages)
- 532 (83 pages)
- 332 (73 pages)
- 331 (77 pages)
- 331 (75 pages)
- 330 (73 pages)