Elitegroup 259EN User Manual
Page 57
■ chapter 4 upgrading your computer
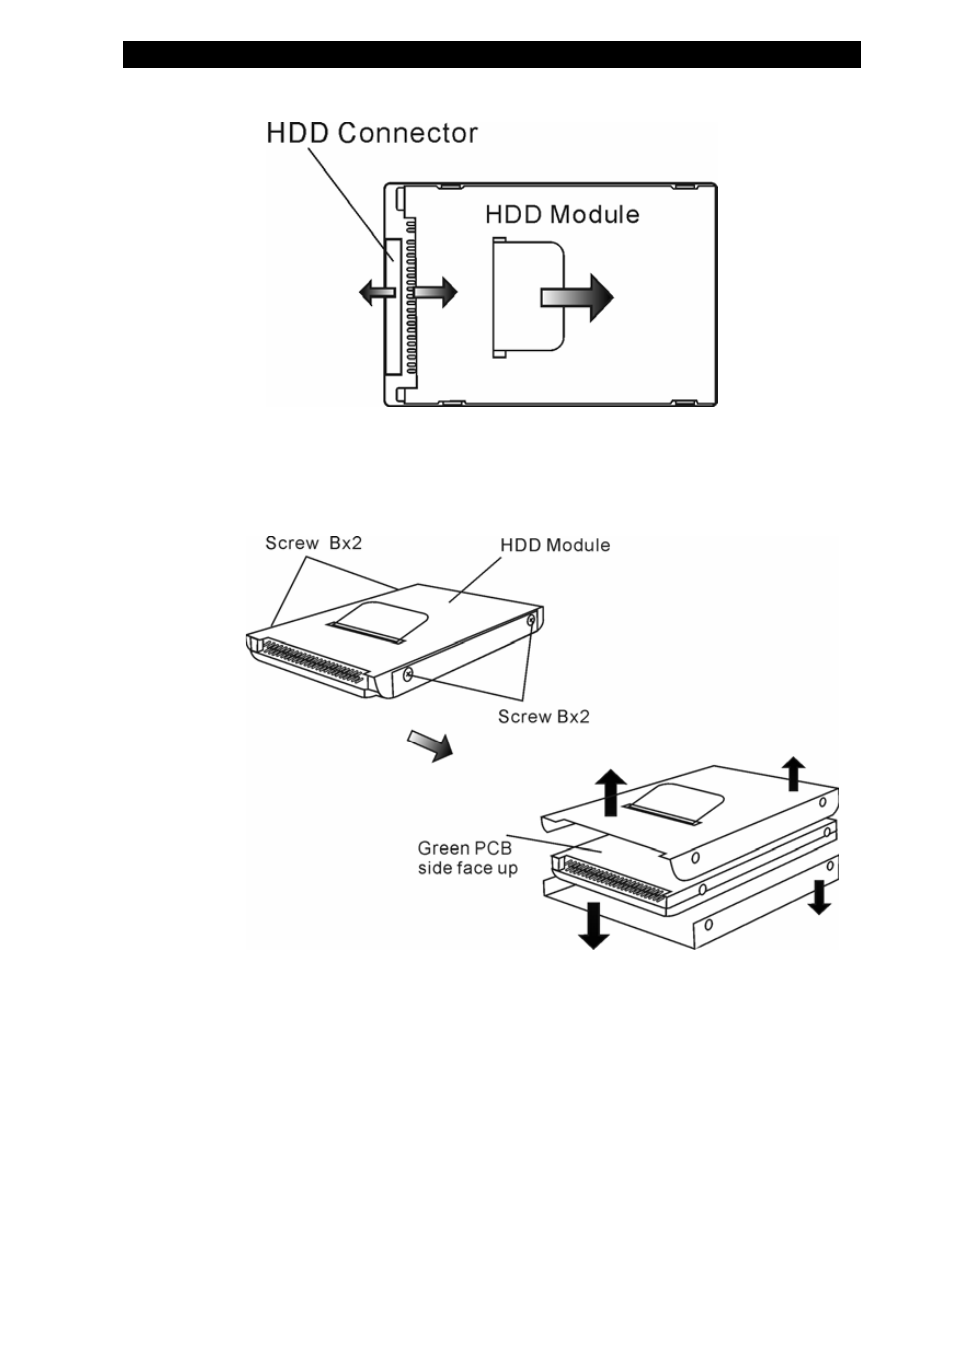
6.
Locate and remove 4 Screw B’s from the HDD module.
Remove the upper and lower metal cases.
7.
Re-attach the metal cases to the new hard drive and
tighten 4 Screw B’s. Note the green PC board of the hard disk
drive is facing up.
8.
Re-attach the HDD module to the HDD connector.
9.
Put the HDD cover back and re-attach Screw A.
Congratulations! You have now completed the hard drive
4-4
See also other documents in the category Elitegroup Notebooks:
- MB50II / IA ID 1 (72 pages)
- MB40II ID 9 (73 pages)
- MB40II / IA ID 8 (73 pages)
- MB40II ID 7 (71 pages)
- MB40II ID 6 (57 pages)
- MB40II ID 5 (56 pages)
- MB40II ID 4 (53 pages)
- MB40II / IA ID 3 (73 pages)
- MB40II / IA - 41II ID 2 (72 pages)
- MB40II ID 1 (73 pages)
- L41II (69 pages)
- U40-50SA (70 pages)
- U41II (65 pages)
- U10IL (84 pages)
- A900 (V2.1) (85 pages)
- A535 (117 pages)
- A531_TM5800 (110 pages)
- 755SI4 v.1 (22 pages)
- 755SI4 v.2 (17 pages)
- 755SI4 v.3 (6 pages)
- 755SI4 v.4 (7 pages)
- 755SI4 v.5 (8 pages)
- 755IN v.1 (22 pages)
- 755IN v.2 (10 pages)
- 755IN v.3 (14 pages)
- 755IN v.4 (10 pages)
- 755IN v.5 (17 pages)
- 755IN v.6 (6 pages)
- 755IN v.7 (7 pages)
- 755IN v.8 (9 pages)
- 755II1 v.1 (22 pages)
- 755II1 v.2 (10 pages)
- 755II1 v.3 (14 pages)
- 755II1 v.4 (10 pages)
- 755II1 v.5 (17 pages)
- 755II1 v.6 (6 pages)
- 755II1 v.7 (7 pages)
- 755II1 v.8 (9 pages)
- 557 (81 pages)
- 536 (71 pages)
- 532 (83 pages)
- 332 (73 pages)
- 331 (75 pages)
- 330 (73 pages)
- 331 (77 pages)