Davey RAINBANK WALL MOUNTED CABINET SYSTEM User Manual
Page 12
12
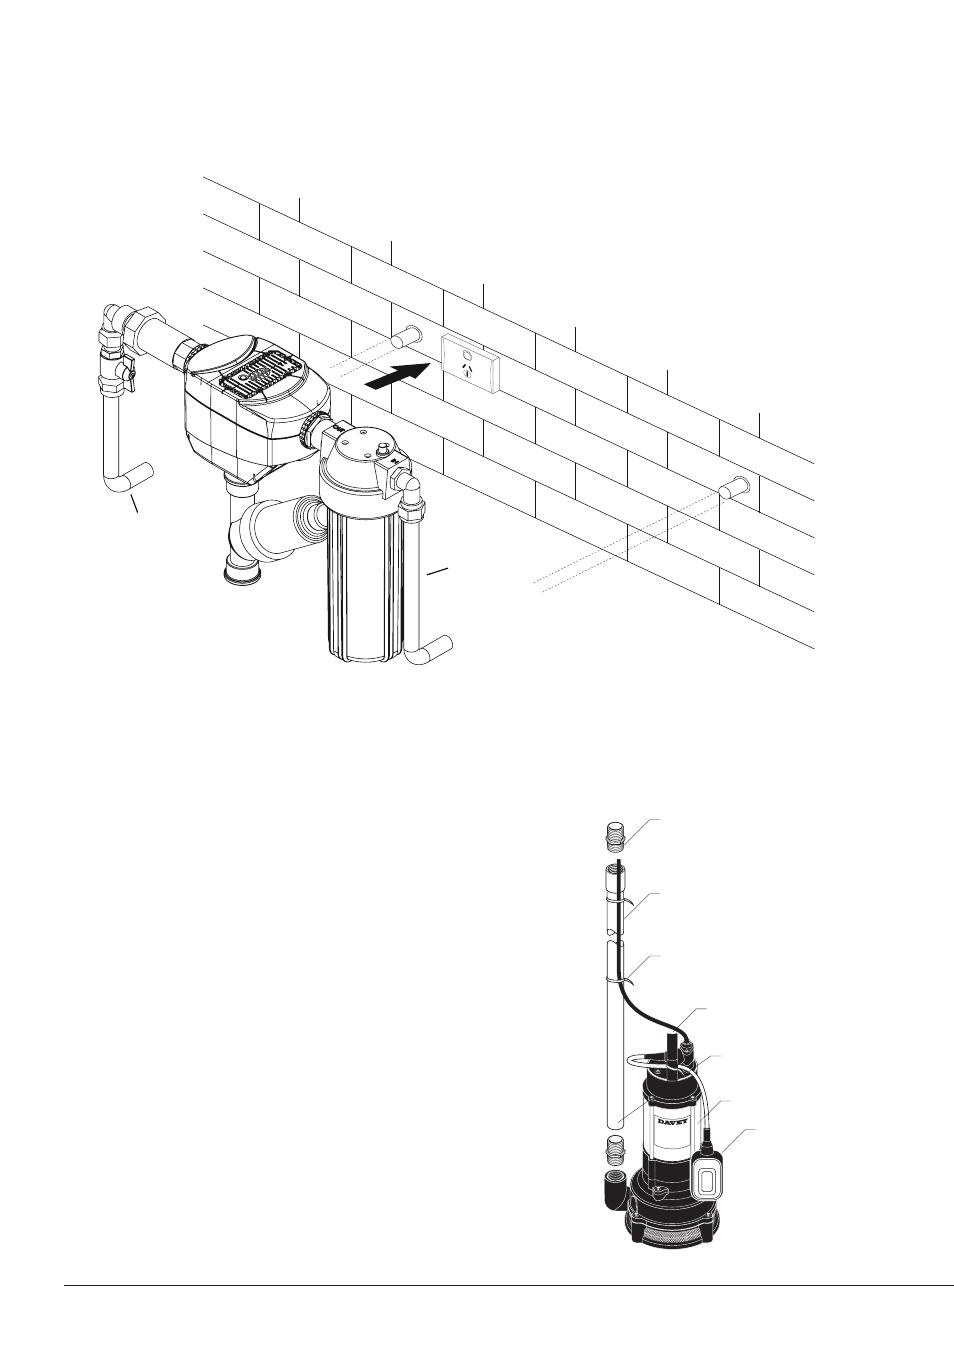
Cable tie
PVC pipe
Union
Float switch
Pump
Handle
2mm hole
3. Plumb 3/4” copper pipes to RainBank
®
compression fittings.
Note: It is critical that pipes do not interfere with filters to allow access for
maintenance.
4. Once RainBank
®
is mounted and plumbed, install cabinet to the wall over the
RainBank
®
using the four fixing holes provided. Allow at least 50mm clearance
between the base of the cabinet and the 10” filter housing. This allows the
filter to be removed for regular cleaning and maintenance.
5. Connect a cable or chain to the submersible pump
– so that it can be lowered into the rainwater tank –
Important: handling the pump by straining the
power lead will damage the pumps water seals
and cause premature failure not covered by
warranty.
6. Connect PVC or suitable plumbing to the pump
outlet and lower the assembly into the rainwater tank.
Cable tie the pump power lead to the pipework.
7. Connect pipework from tank to the Y strainer at the
base of the RainBank
®
cabinet. Secure to the wall
to prevent sagging and pipe vibration.
Copper
pipe
Copper
pipe