Electrical installation, Step 10 – Burcam 506221S S.W. CAST IRON JET PUMP 3/4HP 115/230V User Manual
Page 6
FOR INFORMATION TEL: 514.337.4415 FAX: 514.337.4029
6
We recommend that a licensed electrician be employed to do the proper wiring to the
pressure switch, and to permanently ground the motor in accordance to the electrical codes
in your area.
Do not use an extension cord to connect your pump to the power source. From your
distribution panel to the pressure switch, we recommend a wire gauge not smaller than 14
gauge.
This is a dual voltage 115/230 pump. The voltage selection switch is located inside the
terminal box. The motor is factory wired on 115V. For 230V selection, please open the
terminal cover and set the switch to the proper voltage. (See above drawing on right ).
Pressure switch setting (start/stop 20/40 or 30/50) has been made at the factory. Adjustments
may be done to give other operating pressures.
Adjustment or modification of start/stop setting of pressure switch have to be done carefully.
Turn adjustment nut half turn at a time.
Turn nut 1 clockwise to raise start and stop pressure setting. Never turn nut 2. This will
change the 20 PSI range between start and stop presssure and may damage your
tank’s bladder or modify the efficiency of your water system. Check system operation
after each adjustment.
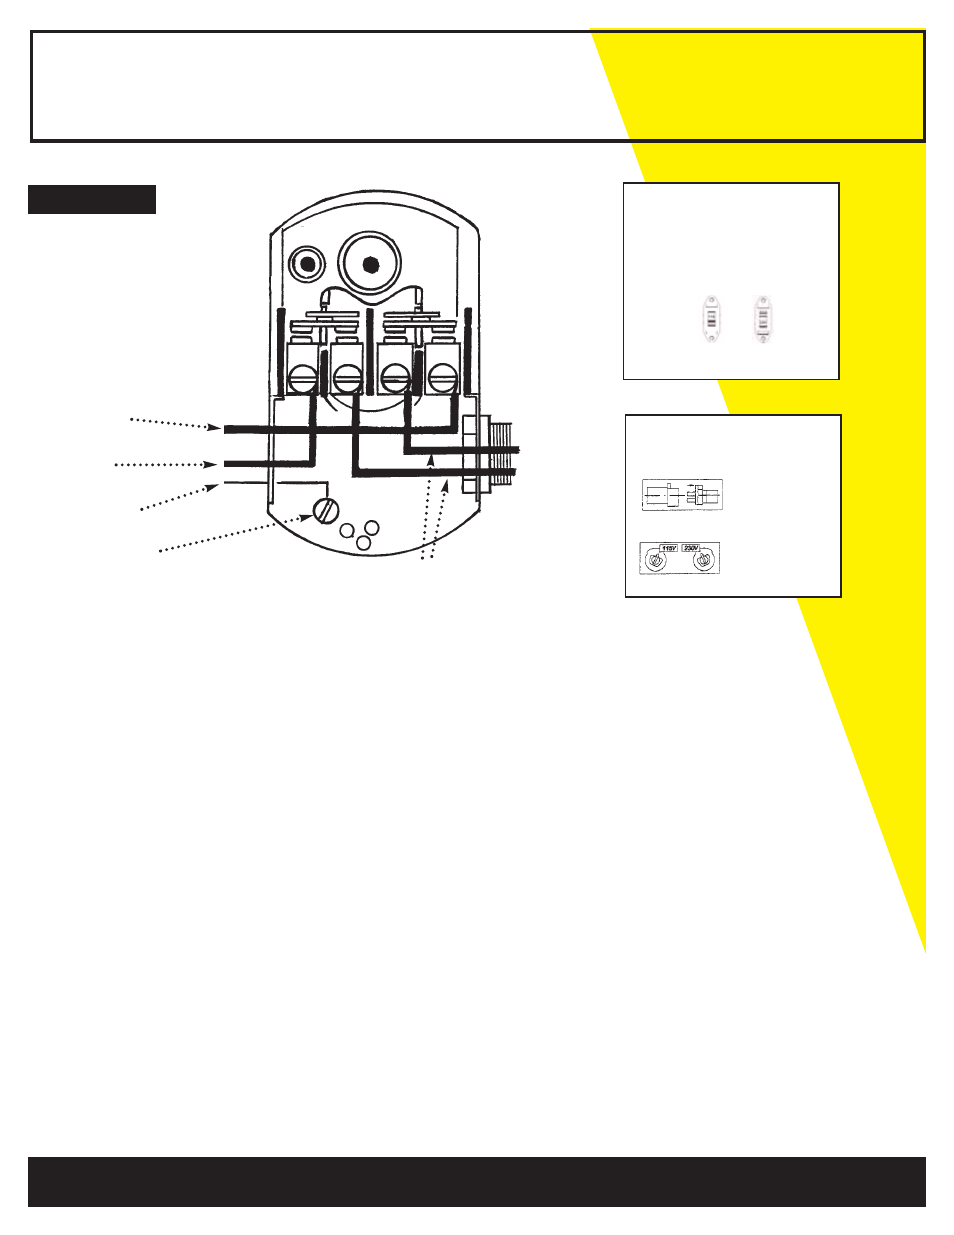
STEP 10
ELECTRICAL INSTALLATION
1
Electrical line
from home
distribution
panel.
BLACK
RED
GREEN
GROUND
To motor lead
2
VOLTAGE SELECTION SWITCH
models since 2006
1. POWER off
2. PULL selector plug out
3. Please SELECT the up knob position
for 115 V or down knob position for 230 V.
4. PUSH plug in to desired voltage.
VOLTAGE SELECTION SWITCH
models before 2005
1. POWER off
2. PULL selector plug out
3. ROTATE plug to align arrow to
desired voltage
4. PUSH plug in to desired voltage.