Installing and connecting an sfp+ transceiver – Brocade VDX 6730 QuickStart Guide (Supporting VDX 6730-32 and VDX 6730-76) User Manual
Page 10
10 of 12
Brocade VDX 6730 QuickStart Guide
Publication Number: 53-1002315-02
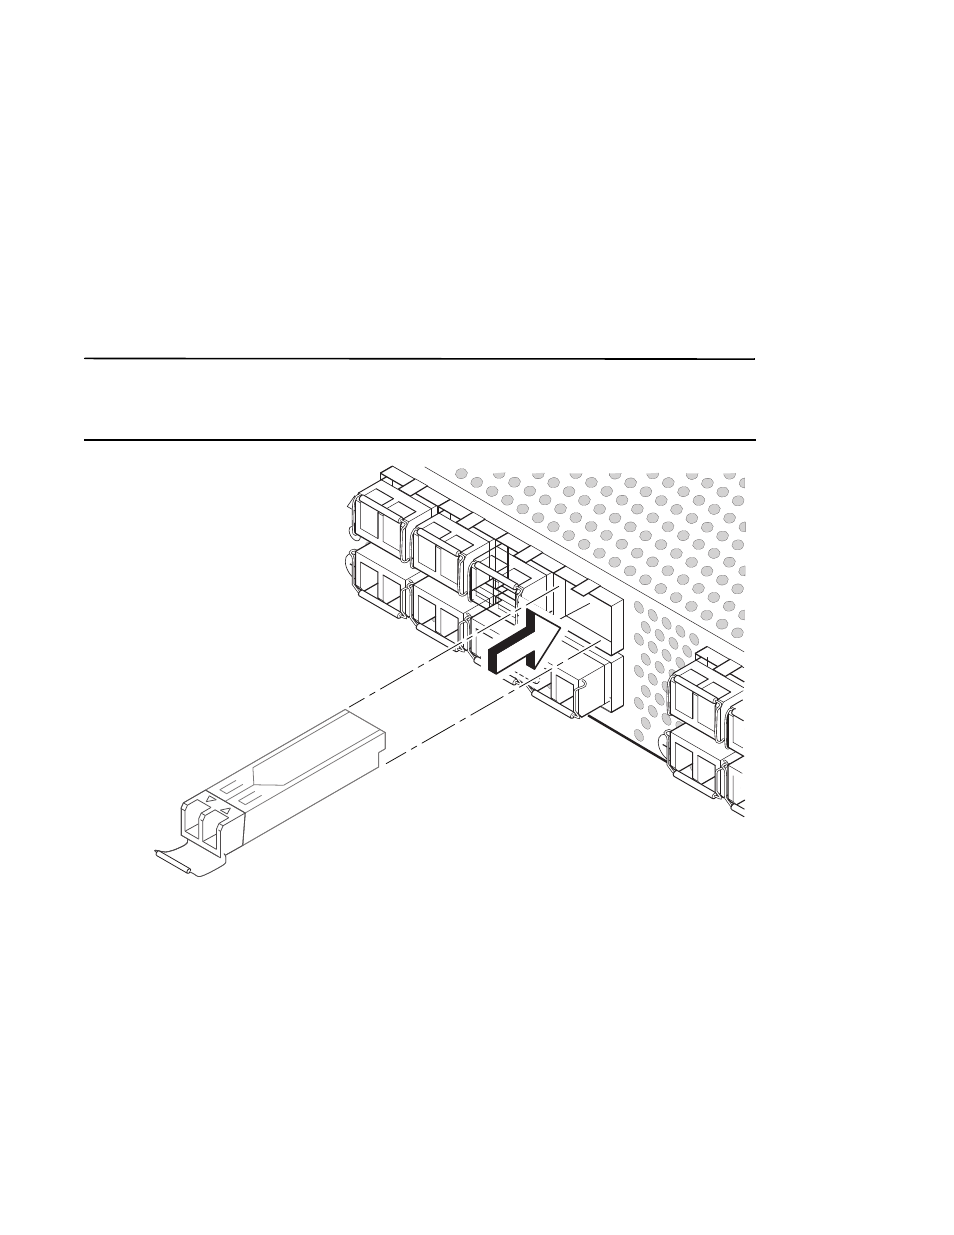
Installing and connecting an SFP+ transceiver
To monitor the transceivers, the show media command output shows the transceiver information for all interfaces
on the switch. Any unqualified transceiver may be disabled and a log message is generated.
Complete the following steps to install an SFP+ transceiver.
1. Remove any protector plugs from the transceivers and the ports.
2. Making sure that the bail (wire handle) is in the unlocked position, place the SFP+ transceiver in the correctly
oriented position on the port, as shown in
.
3. Slide the SFP+ transceiver into the port until you feel it click into place; then close the bail.
NOTE
Each SFP+ transceiver has a 10-pad gold-plated edge connector on the bottom. The correct position to insert an
SFP+ transceiver in the upper row of ports is with the gold-plated edge down. The correct position to insert an SFP+
transceiver in the lower row of ports is with the gold-plated edge up.
FIGURE 1
Installing an SFP+ transceiver in the upper row of port slots
4. If this is not a direct-attach unit, remove the protective caps from the cable end and position the cable so that it
is correctly oriented to the transceiver.
5. Insert the cable into the transceiver until it is firmly seated and the latching mechanism clicks.
!