Rear view – STI UB-2PN User Manual
Page 3
- 3 -
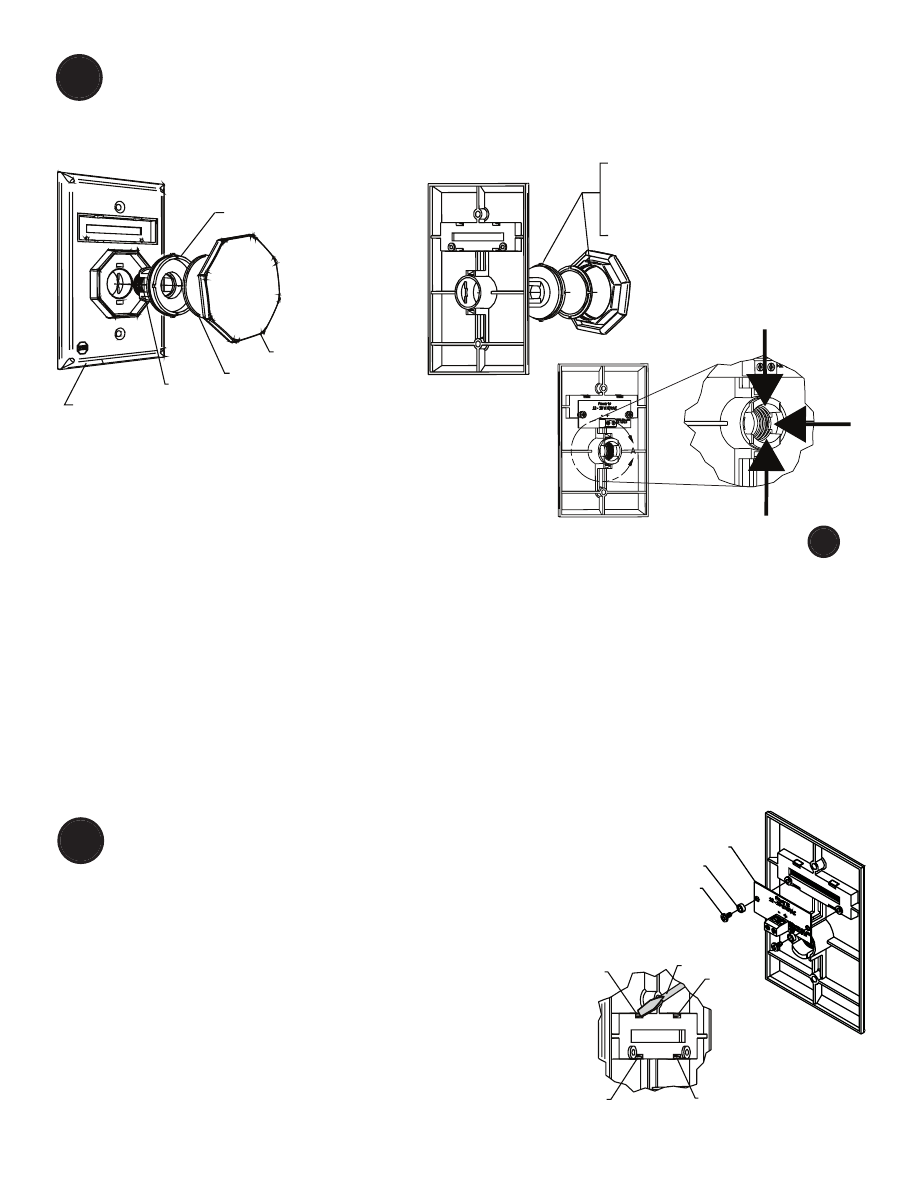
1. Choose button message and color. If same as existing, proceed to
2. To remove push button actuator assembly, squeeze actuator tabs in
direction of #1 arrows.
3. Push acutator through plate in direction of #2 arrow.
4. Align actuator cap to push button actuator. Align button slots to tabs on
push button actuator.
5. Snap button onto push button actuator and rotate right to lock.
6. Insert spring into push button actuator.
7. Squeeze legs of push button actuator and align into die cast plate.
TO CHANGE BUTTON COLOR AND ROUND MESSAGE
CHANGE TOP MESSAGE
.
1. Remove LED circuit board.
2. Remove current message by pushing in and
down on tabs 1 and 2 with a small screw-
driver. If necessary, also push in and down
on tabs 3 and 4. Once message is loose,
remove from the front of the plate.
3. Select new message and snap into place.
Blank plates are included to create your
own custom message.
BUT
1
2
3
4
SCREWDRIVER
1
BUT
BUTTON ACTIVATED
M
UB-1L LED PCB
NYLON WASHER
SCREW
1
2
2
DIE CAST PLATE
SPRING
PUSH BUTTON ACTUATOR
ACTUATOR CAP
2 in. BUTTON
ALIGN TAB ON ACTUATOR
WITH SLOT BUTTON.
TURN CLOCKWISE TO LOCK
INSERT ASSEMBLY WITH
SPRING INTO PLATE.
REAR VIEW
1
1
2