Replacing the wlan module, Replacing the dimm modules – Acer 7715Z User Manual
Page 128

118
Chapter 3
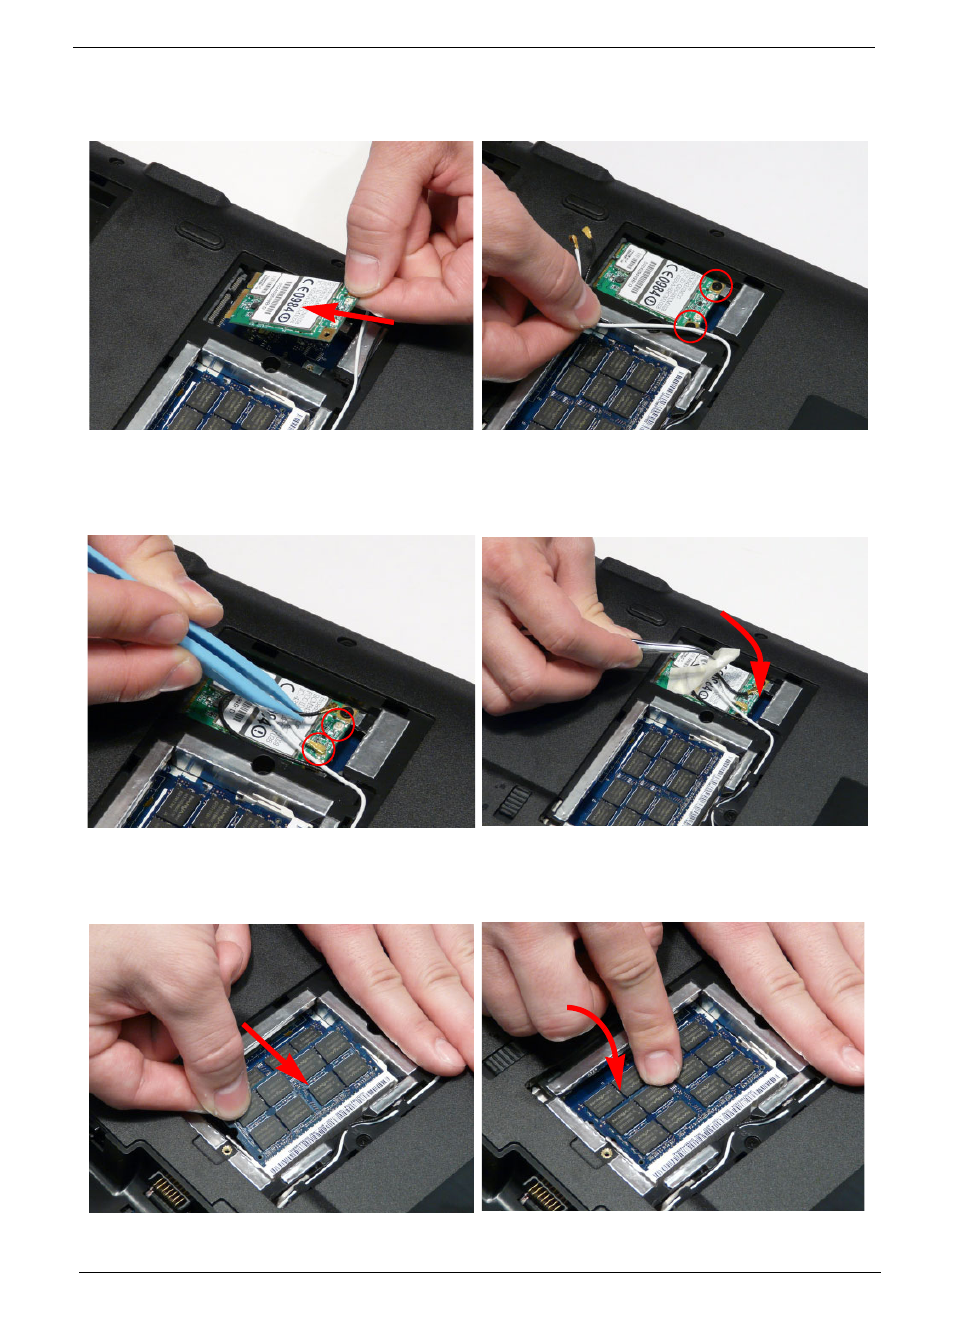
Replacing the WLAN Module
Replacing the DIMM Modules
1. Insert the WLAN Module into the WLAN socket.
2. Replace the two screws to secure the module.
3. Connect the two Antenna cables to the module.
NOTE: The black cable connects to the upper
terminal (MAIN) and the white cable to the
lower terminal (MAIN).
4. After connecting the cables to the terminals,
secure the cables in place with adhesive tape to
avoid trapping.
1. Insert the DIMM Module in place.
2. Press down to lock the DIMM module in place.
3. Repeat steps for the second DIMM module if present.
This manual is related to the following products:
See also other documents in the category Acer Computers:
- ICONIA (110 pages)
- ICONIA (66 pages)
- easyStore H340 (148 pages)
- AT350 F2 (37 pages)
- AT350 F2 (20 pages)
- ASPIRE 5625 (326 pages)
- Aspire 4820TG (1 page)
- 5330 (152 pages)
- Aspire ASE360 (164 pages)
- Altos G610 (156 pages)
- Aspire T100 (30 pages)
- 6000 (103 pages)
- 7800 Series (96 pages)
- AT350 (23 pages)
- Aspire X3812 (26 pages)
- 3200 (96 pages)
- 7600 series (116 pages)
- 500L (91 pages)
- Altos G701 (124 pages)
- Altos MU.R230E.001 (146 pages)
- Altos G320 Series (132 pages)
- Aspire T600 (22 pages)
- Aspire T330 (21 pages)
- Altos R710 (214 pages)
- Altos R910 (192 pages)
- Altos R910 Series (192 pages)
- Altos G520 series (186 pages)
- ASM 7 (32 pages)
- Altos G710 (198 pages)
- Altos G5450 Series (150 pages)
- 4730Z (198 pages)
- Aspire X1440 (32 pages)
- Altos 1100 Series (114 pages)
- Altos G300 (108 pages)
- Altos G510 series (134 pages)
- 3610 (93 pages)
- Altos G700 (14 pages)
- Altos G700 (122 pages)
- AN1600 (17 pages)
- Altos G540 Series (146 pages)
- AZ5700-U2102 Desktop BTS 2010 (3 pages)
- Altos R700 (130 pages)
- Aspire R3600 (36 pages)
- Aspire R3600 (30 pages)