Nexo PS-R2 User Manual
Page 35
PS
S
ERIES HARDWARE SETUP PROCEDURE
Page
35/82
or
7.3.3 PS10R2 and PS15R2 mounted on a ceiling (vertical or horizontal)
Required items
Ceiling Cable suspension:
• 1 or 2 x VNI-LBRK (holes for cable suspension are 10mm diameter);
• 2 or 4 slings and corresponding shackles (not provided)
Ceiling Rigid suspension
• 1
VNI-ABRK
IMPORTANT
Ensure that the ceiling is strong enough to hold PS cabinet weight and that the cable
suspension system required to install the cabinet under the ceiling is properly
dimensioned.
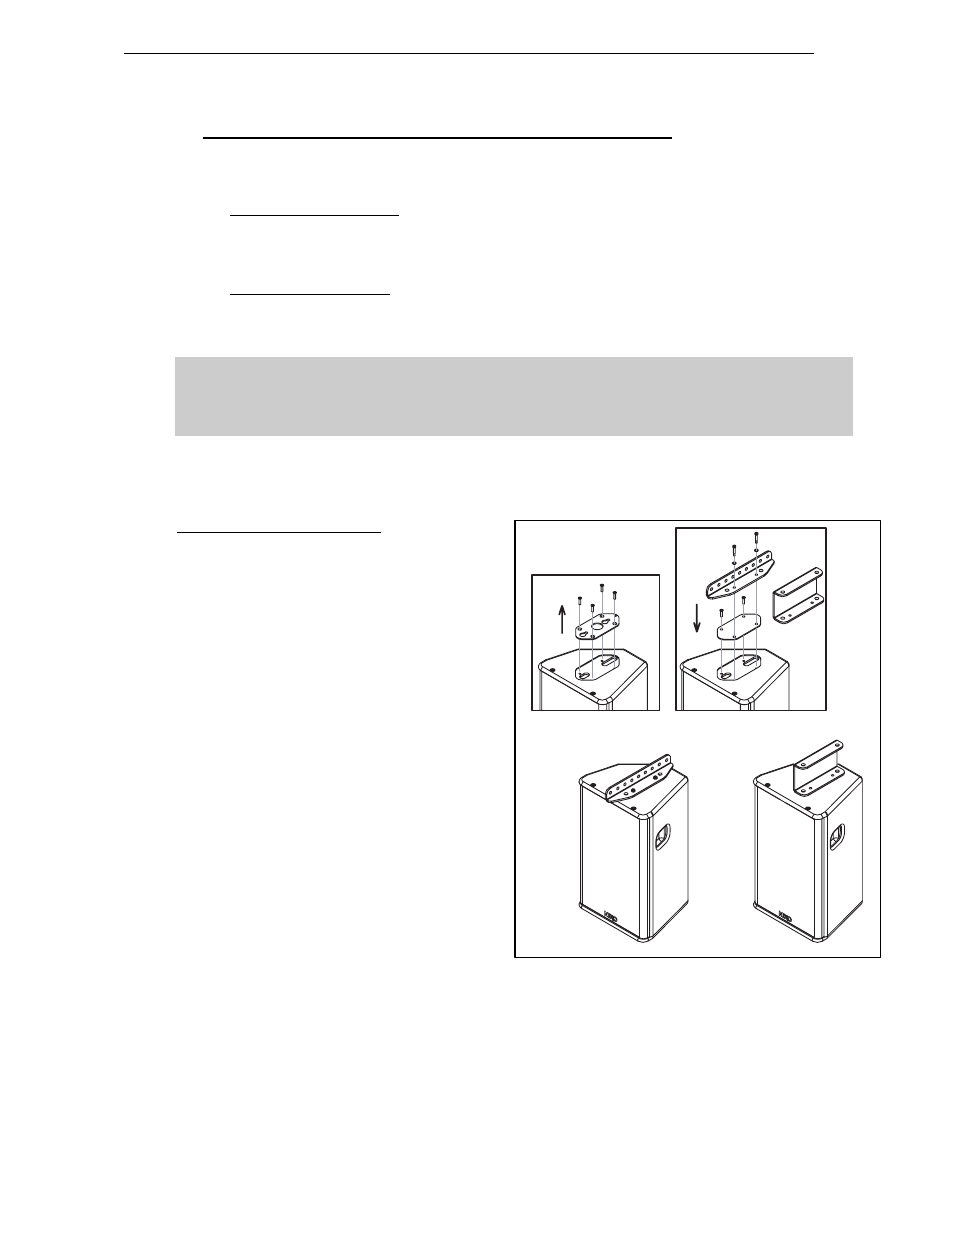
Procedure
Vertical (PS10R2 and PS15R2)
• Remove the four TORX screws holding
connector plate on upper side of PS;
• Remove the connector plate from PS
cabinet;
• Fill each screw hole with Locktite 243 or
equivalent;
• Position external plate from VNI--LBRK
kit or VNI-ABRK kit and secure it using
the 2 of the 4 shoulder screws supplied
with this kit;
• Position bracket from VNI-LBRK kit, or
VNI-ABRK and secure it to the cabinet
using the 2 remaining shoulder screws
supplied with this kit.
• Slings and shackles (not provided) are
required to secure the cable
suspension under the ceiling;
CABLE SUSPENSION MOUNTING PROCEDURE 2