En g l is h english – Pfister 016-300K User Manual
Page 3
E
N
G
L
IS
H
ENGLISH
ENGLISH
8
9
10
11
12
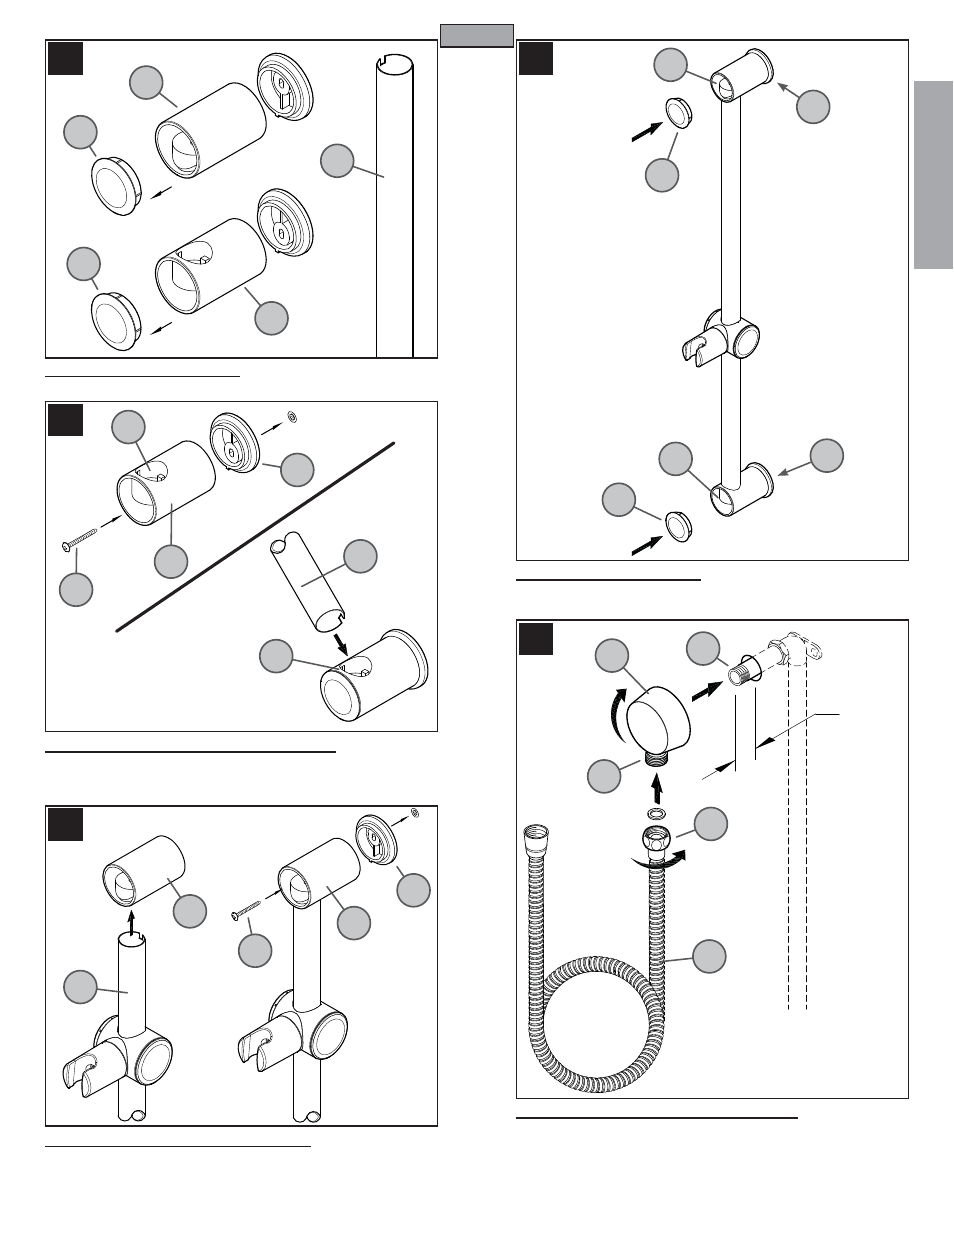
8 SLIDE BAR PREPARATION
Remove Posts (8A) from Slide Bar (8B). Remove Decorative Button (8C) from Posts (8A).
9 BOTTOM POST AND BAR INSTALLATION
Orient Bottom Post (9A) so that the Support Socket (9B) faces up. Insert Mounting Screw
(9C) through the hole on Bottom Post (9A) and Back Flange (9D) and tighten until is fl ush
with the wall. Do Not Over Tighten! Insert one end of Bar (9E) into Support Socket (9B).
10 TOP POST AND BAR INSTALLATION
Insert the Top Post (10A) into the other end of the Bar (10B). Insert Mounting Screw (10C)
through the hole on Top Post (10A) and Back Flange (10D) and tighten until is fl ush with
the wall. Do Not Over Tighten!
11 BUTTON INSTALLATION
Insert Decorative Buttons (11A) into Posts (11B). Apply with a small bead of silicone around
outer edge where post meets wall (11C).
12 DROP ELBOW & HOSE INSTALLATION
Apply PTFE plumbers tape on both ends of Pipe Niple (12A) (not included). Screw Pipe
Niple (12A) into the elbow inside the wall. The Pipe Niple (12A) is to project
1
/
4
"-
3
/
8
" from
the fi nished wall. Screw Drop Elbow (12B) onto Pipe Niple (12A) and tighten until Drop
Elbow is properly positioned and fl ush to the fi nished wall. Connect Hose (12C) into the
Drop Elbow Outlet (12D) by turning Metal Hose Fitting (12E).
3
8A
9A
10C
11B
12C
8B
8C
8C
8A
9B
9C
9D
9E
9B
10A
10A
10D
10B
11A
11B
11A
12A
12B
12D
12E
1
/
4
” -
3
/
8
”
11C
11C