10 attach the ps-a unit to an arm, 10 attach the ps-a unit to an arm -17 – Proface APL3000B - Node Box PC User Manual
Page 60
Chapter 3 Installation and Wiring
3-17
3.2.10
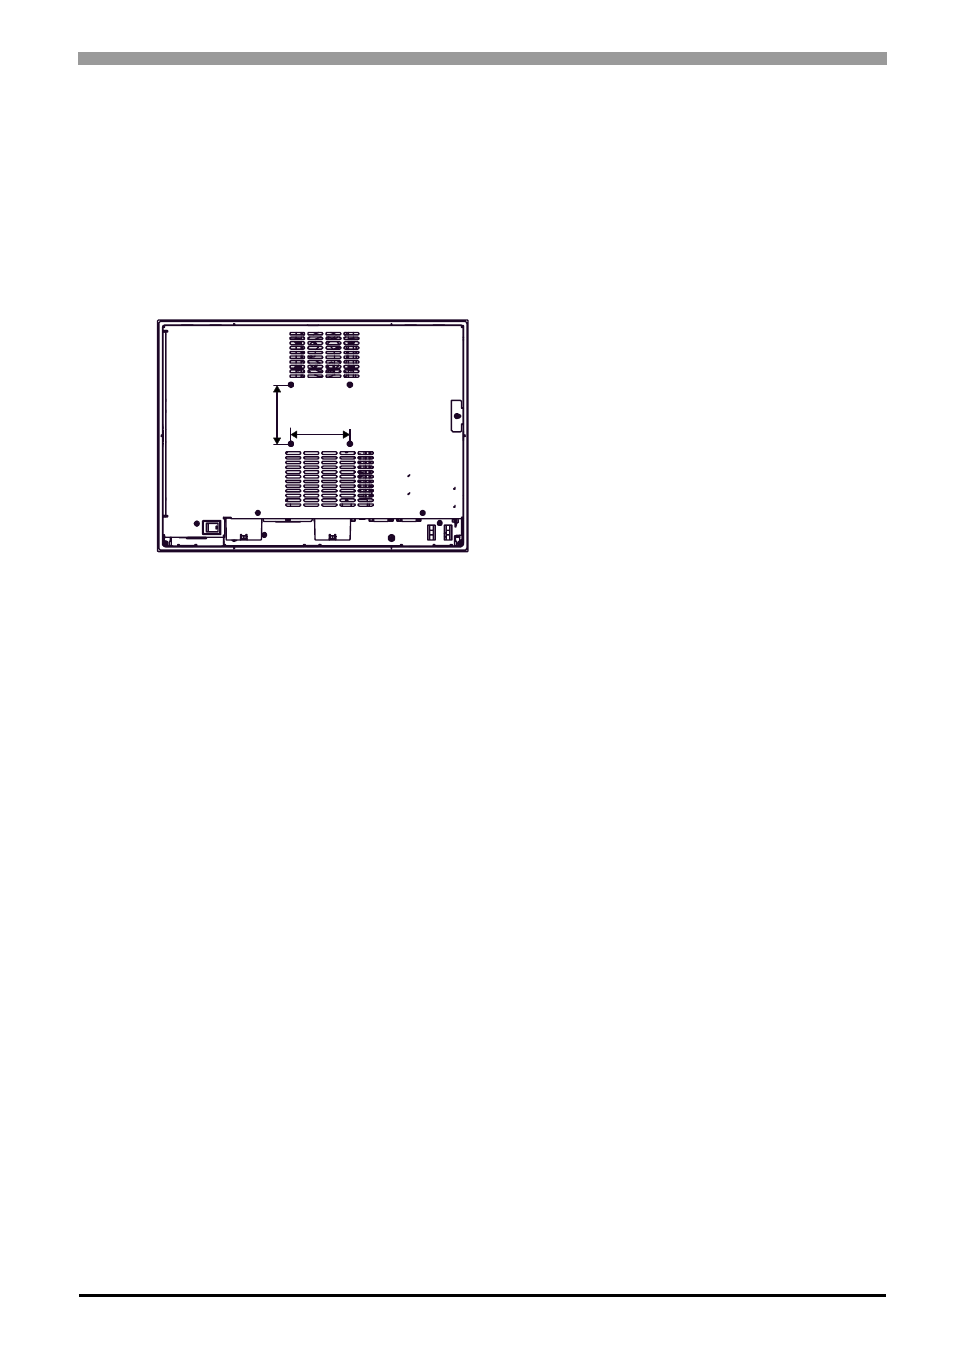
Attach the PS-A unit to an Arm
To attach the PS-A unit to an Arm or to the wall, first remove the seal on the PS-A's rear face, then insert the
attachment screws for a commercial-type arm or wall mount adaptor into the holes. (Holes specifications:
VESA 75mm) For detailed attachment instructions, please refer to that product's installation guide. The
VESA Arm Attachment Hole dimensions are signifies as follows;
Arm Attachment Screw Holes (VESA 75mm).
Attach the four (4) M4 attachment screws. (Screw length: 6mm or less.) The torque required for these screws
is 0.7 to 0.8 N
•m.
Rear
75 [2.95]
(unit: mm [in.])
75 [2.95]