Qualcraft Truss Boss Anchor Kit User Manual
Page 5
WARNING!
I
I
f
f
i
i
n
n
s
s
p
p
e
e
c
c
t
t
i
i
o
o
n
n
r
r
e
e
v
v
e
e
a
a
l
l
s
s
a
a
n
n
u
u
n
n
s
s
a
a
f
f
e
e
o
o
r
r
d
d
e
e
f
f
e
e
c
c
t
t
i
i
v
v
e
e
c
c
o
o
n
n
d
d
i
i
t
t
i
i
o
o
n
n
,
,
r
r
e
e
m
m
o
o
v
v
e
e
t
t
h
h
e
e
T
T
r
r
u
u
s
s
s
s
B
B
o
o
s
s
s
s
R
R
o
o
o
o
f
f
A
A
n
n
c
c
h
h
o
o
r
r
f
f
r
r
o
o
m
m
s
s
e
e
r
r
v
v
i
i
c
c
e
e
s
s
a
a
n
n
d
d
d
d
e
e
s
s
t
t
r
r
o
o
y
y
i
i
t
t
i
i
m
m
m
m
e
e
d
d
i
i
a
a
t
t
e
e
l
l
y
y
.
.
INSTALLATION REQUIREMENTS:
The following requirements outline the proper installation procedures to be followed.
Location: Select a location on an appropriate strength anchorage that will provide overall safety and proper loading. The
anchorage must be free of deformities, weather deterioration, or defects that may weaken the structure.
Structure: The structure to which the anchorage connector is attached must be void of any cracks, corrosion, and defects
that may weaken the structure. Do not install anchor to gable ends, facias, rake ends, overhangs, bottom cords, collar boards,
spliced sections, damaged framing, or framing that is not structurally capable of withstanding anticipated loads in the
direction of the pull.
Installing the Truss Boss Roof Anchor:
Step 1.
Inspect the Truss Boss Roof Anchor before installation. Do not install if there are signs of
damage, defect, or missing parts.
Step 2.
Select a mounting location for the Truss Boss Roof Anchor that meets or exceeds the strength
requirements. Installation sites must be selected to minimize the swing fall hazard and to limit the free
fall distance to less than 6ft.
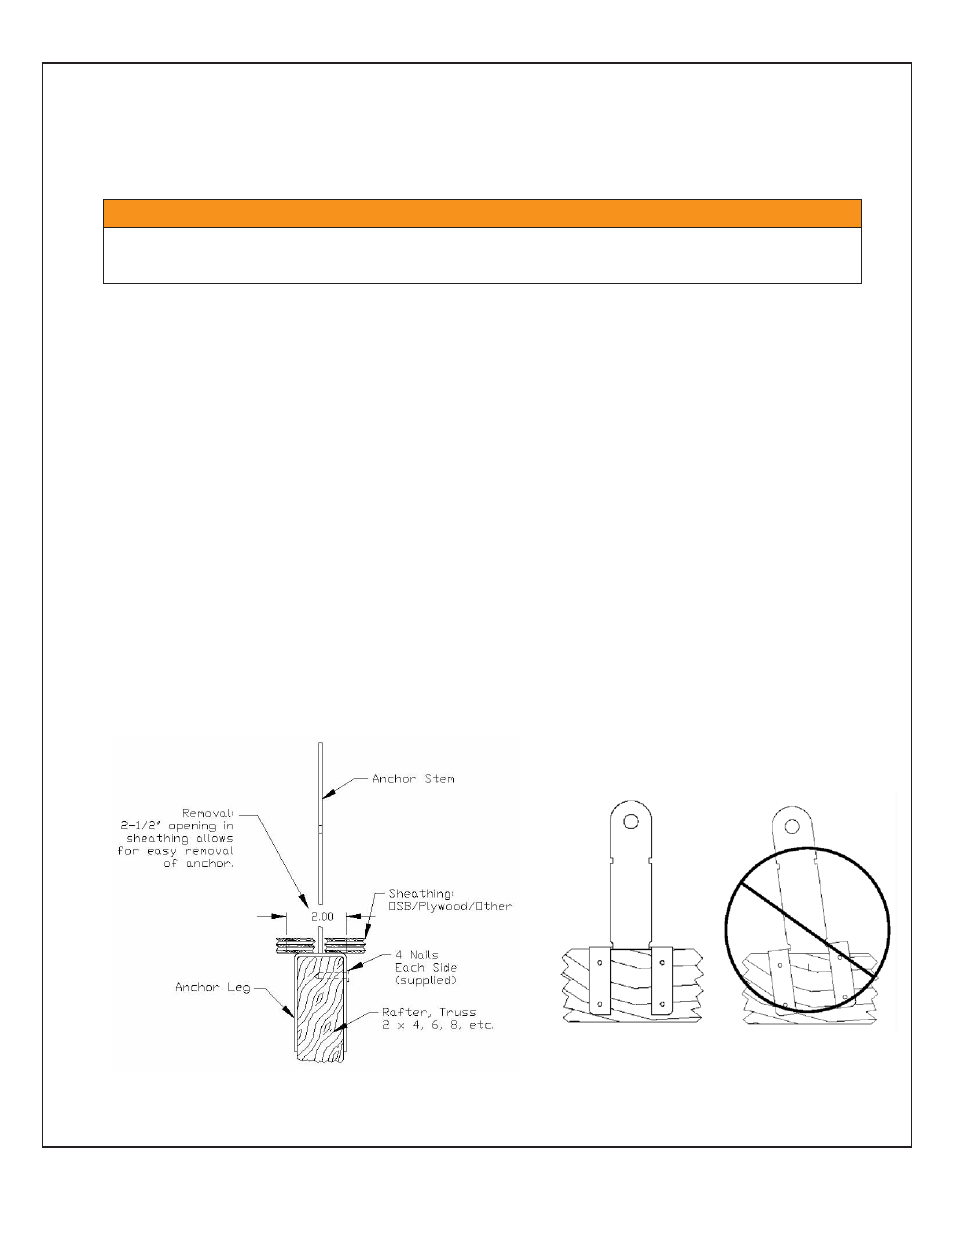
Step 3.
Place the Truss Boss over any standard 2x truss, rafter, or structural member. Ensure that the
roof anchor rests flush on the 2x. Install all eight (8) nails in the pre-punched holes until the nail head is
flat against the anchor.
Step 4.
Install sheathing over the Truss Boss anchor.
Correct Installation
Incorrect Installation
5
*
6
GI
$