Tools required – Otter Outdoors Pro XT 1200 Cottage User Manual
Page 2
Page 2
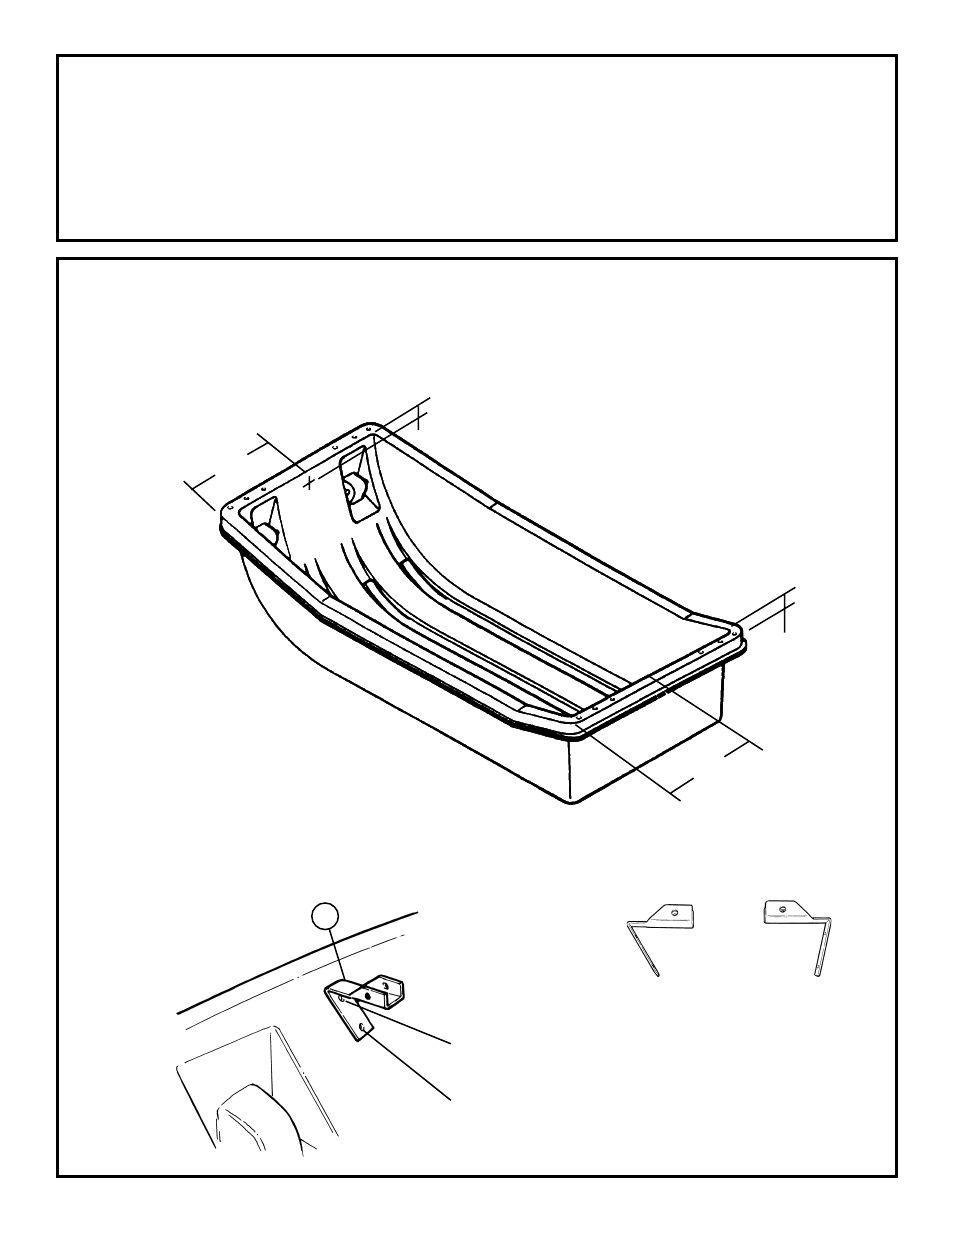
2. Place the seat rail bracket (Item 20) on the first hole and mark second hole location. Note: Bracket for front of
sled has a different bend then the rear of sled. Drill the remaining two 5/16” holes through the sled. Do not attach
the brackets to the sled at this point. Ref. Diagram 2.
Diagram 2
20
Mark second hole and drill 5/16”
Front of sled
bracket
Rear of sled
bracket
First hole
Tools Required:
7/16” Box End Wrench
3/8 Bit
7/16” Socket and Ratchet
5/16 Bit
Drill/Driver
Phillips Bit
3/32 Drill Bit (optional)
Complete Pkg Only
1/2” Wrench
1/2” Socket
1. Position sled as shown in Diagram 1 with curved front to your left. Measure 17” from the front/left corner of the
sled and 1-1/2” down and mark the location for the top hole needed for the seat rail bracket (Item 20). Measure
17-1/2” from the rear/left corner of the sled and 1-1/2” down and mark the location for the top hole needed on the
other side. Check bracket placement to be sure brackets are approximately 3/4” below top edge of sled. Drill the
two 5/16” holes through the sled. Ref. Diagram 1.
Diagram 1
Front
17 in.
1-1/2 in.
1-1/2 in.
17-1/2 in.
Rear
Right
Left