Panther™ push pull gun - operating instructions, Drive roll groove selection – Lincoln Electric IM10033 PANTHER K2874-1, K2874-2, K2874-3, K2875-2 User Manual
Page 13
PANTHER™ Push Pull Gun - OPERATING INSTRUCTIONS
6
Drive Roll Groove Selection
The drive rolls have two grooves. A wider groove for feeding
3/64” (1.2mm) wire and a narrow groove for feeding .035”
(0.9mm) wire to accommodate changes in the wire size used.
Changing between the grooves simply requires reversing the
drive roll.
A. Drive Roll Orientation
1. Drive rolls are scribed with wire groove size. For appropri-
ate groove orientation, ensure desired size callout is facing
up and visible.
B. Changing Drive Rolls
1. Flip lid open
2. Unscrew thumb screw and remove drive roll. Pressure may
have to be applied to drive roll tension access cover.
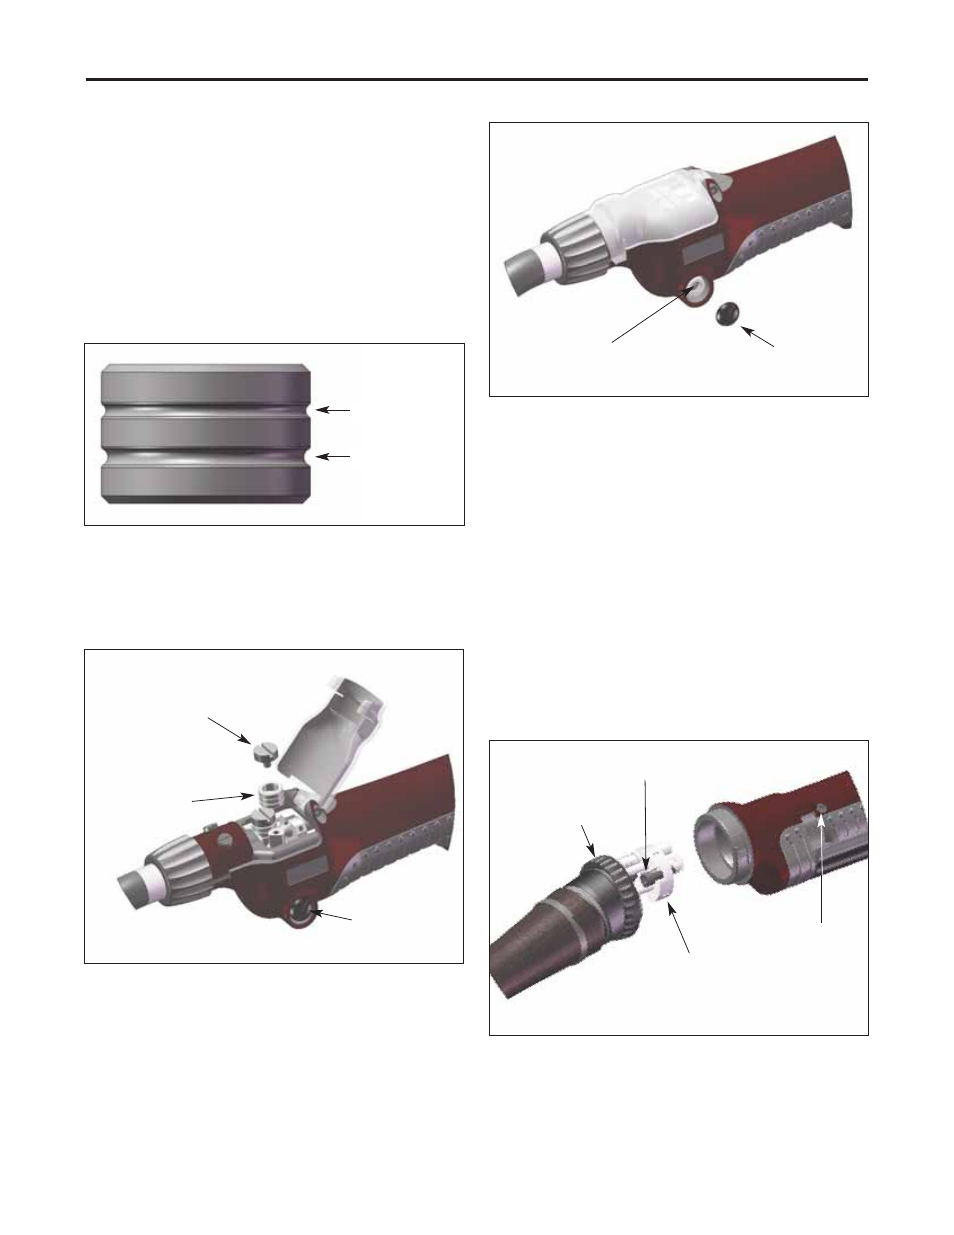
D. Cable Assembly Removal
1. Split leather cable cover at velcro opening approximately
24" (60.96cm) from strain relief.
2. Turn strain relief locking ring counter-clock-wise and slide
down cable assembly approximately 24" (60.96cm).
3. Loosen rear handle screw and pull back ball joint strain
relief to access connections.
4. Disconnect black 8-position electrical connector between
handle and cable assembly - cut off safety connection wire,
then disconnect connector (safety wire can be .035 or 3/64"
aluminum wire).
5. Loosen (2) cable assembly front block retaining screws.
6. Pull cable assembly from rear of gun, assuring not to snag
the 8-pin electrical connector.
DRIVE ROLL
RETAINING
THUMB SCREW
DRIVE ROLL
DRIVE ROLL
TENSION
ACCESS COVER
DRIVE ROLL
TENSION
ACCESS COVER
DRIVE ROLL
TENSION
ADJUSTING
SCREW
STRAIN RELIEF
LOCKING RING
RETAINING
SCREWS (2x)
HANDLE
SCREW
CABLE
ASSEMBLY
FRONT BLOCK
.035"
3/64"
C. Drive Roll Tension Adjustment
NOTE: Drive roll tension is factory set and does not typi-
cally require adjustment. Over-tightening tension can result
in distortion of welding wire.
1. Unscrew drive roll tension access cover.
2. Using M4 allen wrench supplied in tool kit, rotate drive roll
tension adjustment screw clockwise to increase tension,
counter-clock-wise to descrease tension.
NOTE: Make sure to lubricate o-rings before installing cable.