Extron Electronics SW2 VGA DA2 AF R Setup Guide User Manual
Setup guide — sw2 vga da2 af r, Installation, Step 1 — mount the unit
Setup Guide — SW2 VGA DA2 AF R
This guide provides basic instructions for an experienced
installer to set up and operate the Extron
SW2 VGA DA2 AF R switcher.
10
0-2
40
50
/60
H
z 0
.5A
INPU
T 2
1
2
A
S
AS/
REM
OTE
OUT
PUT
S
B
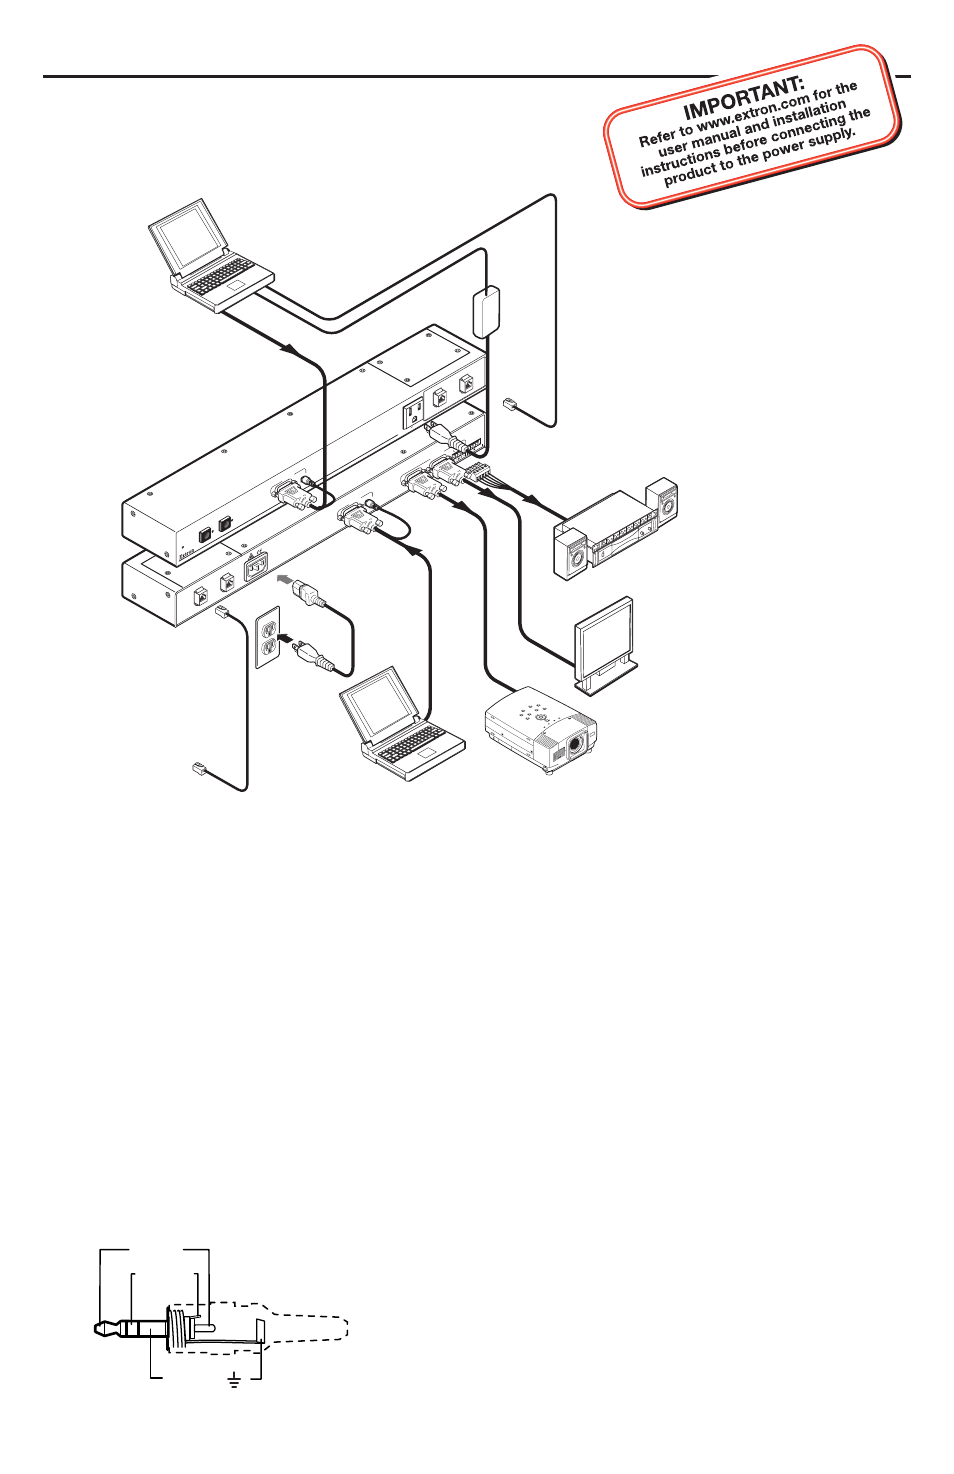
Rear
Power
Network
Connection
LCD Projector
Laptop or VGA Computer
Monitor
Stereo Audio
UN
SW
ITC
HE
D
10
0-2
40
0.5A
M
AX
.
AUT
O SWITC
H
ACT
IVE
SW
2
VG
A
DA
2 A
F R
1
2
INP
UT
1
Extron
SW2 VGA DA2 AF R
Switcher
Front
AC
Power
LBC w/ Audio
Cable
Network
Connection
Laptop
Installation
Step 1 — Mount the unit
Turn off all equipment or disconnect it from power sources and mount the switcher as desired.
See “Installing Adapter Plates” and “Mounting the SW2 VGA DA2 AF R” in the
SW2 VGA DA2 AF R User’s Manual
for details:
• On desk —
Place 4 rubber feet (provided) onto the four corners of the switcher.
• Rack —
Use the optional 1U Rack Shelf, part #70-485-01.
• Under-desk —
Use the optional Under-Desk Mount Kit, part #70-212-01.
Step 2 — Video inputs
Connect an RGBHV, RGBS, RGsB, or RsGsBs video input to each 15-pin HD input connector, as
desired. One connector is on the front panel and a second connector is on the rear panel.
Step 3 — Audio inputs
Connect an unbalanced stereo input to each 3.5 mm stereo mini jack, as desired. One jack is on
the front panel and a second jack is on the rear panel. Wire the audio plug as shown below.
Sleeve ( )
Ring (R)
Tip (L)
(Continued on reverse side)