Ensuring accurate monitoring – ZOLL E Series Monitor Defibrillator Rev H SPO2 User Manual
Page 7
Ensuring Accurate Monitoring
9650-1211-01 Rev. H
5
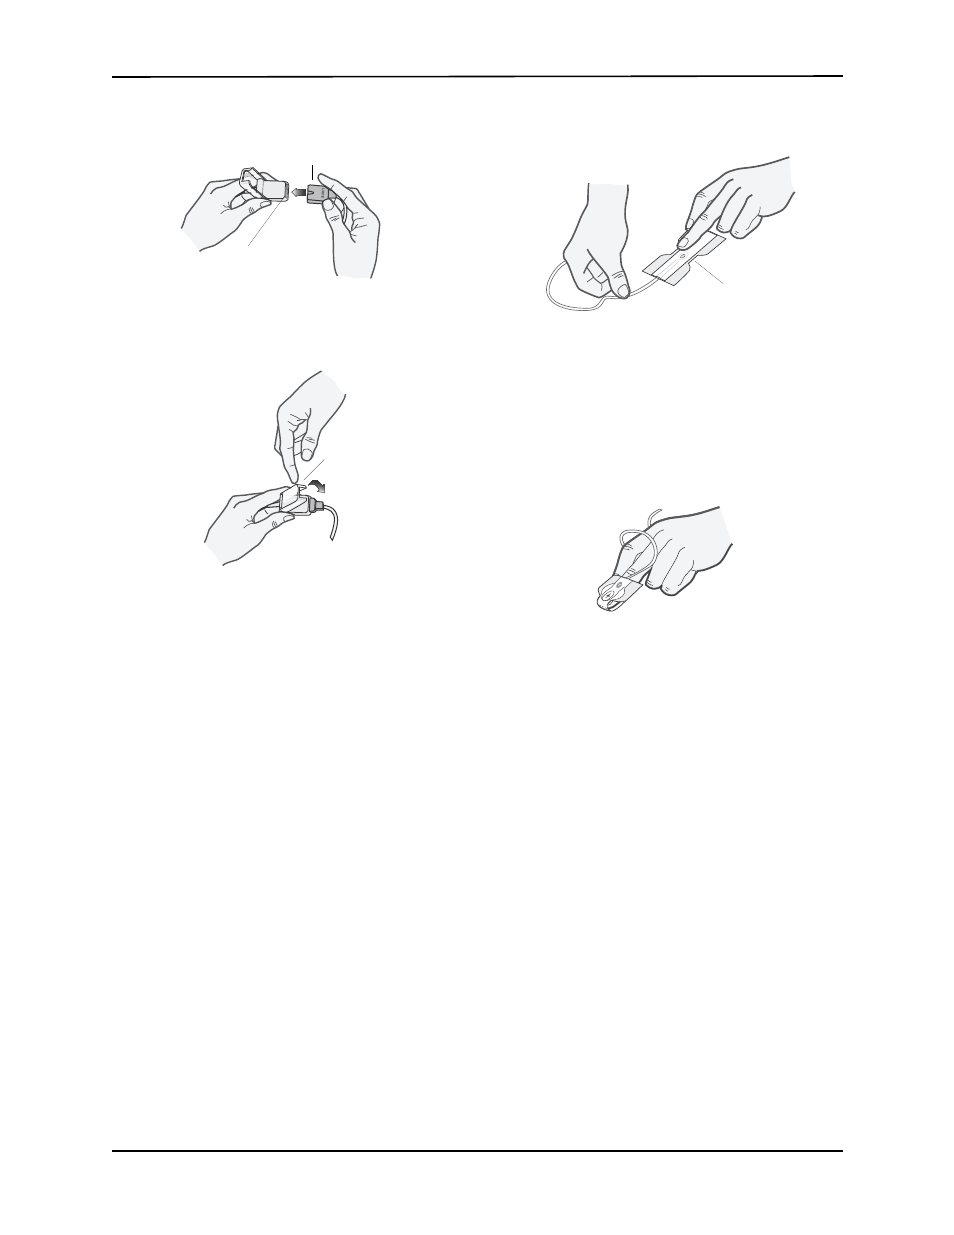
cable’s male connector all the way into the patient
cable connector (see Figure 5).
Figure 5
5. Lower the clear plastic protective cover over the
connection to secure it (see Figure 6).
Figure 6
6. Connect the patient cable to the CO-Oximetry
connector on the back of the E Series unit as shown
in Figure 2 on page 4.
Applying a Disposable Sensor
You can use a disposable LNCS sensor for SpO
2
monitoring or a disposable Rainbow sensor to monitor
SpO
2
, SpCO, and SpMet. Do not wrap the adhesive too
tightly as this can cause venous pulsations that could
lead to inaccurate saturation measurements.
You can reapply a disposable sensor to
the same patient
if the emitter and detector windows are clear and the
adhesive still adheres to the skin.
You can partially rejuvenate the adhesive by wiping it
with an alcohol wipe and allowing the sensor to
thoroughly air dry prior to replacement on the patient.
Note: LNCS Adult disposable sensors are not intended
for use across a child's hand or foot. For
instructions on proper application of neonatal
sensors, refer to the Directions for Use included
with each LNCS sensor.
1. Open the pouch, and remove the sensor.
2. Holding the sensor with the printed side downward,
bend the sensor backward and remove backing
material from the sensor.
3. Orient the sensor so that the digit can be attached to
the detector side of the sensor first (see Figure 7).
Figure 7
4. Press the detector onto the fleshy part of the finger
near the tip of the finger. To ensure accurate data,
you must have complete coverage of the detector
window.
5. With the emitter positioned over the fingernail, secure
the wings around the finger (see Figure 8).
Figure 8
When positioned properly, the:
•
emitter and detector are vertically aligned
•
digit completely covers the detector window
•
connector tab is located on the top side of the
finger
6. Lift the clear plastic protective cover from the female
end of the patient cable, then plug the sensor cable’s
male connector all the way into the patient cable
connector (see Figure 5).
7. Lower the clear plastic protective cover over the
connection to secure it (see Figure 6).
8. Connect the patient cable to the CO-Oximetry
connector on the back of the E Series unit as shown
in Figure 2 on page 4.
Note: For the Rainbow patient cable and Rainbow
disposable sensor, plug the sensor cable’s male
connector all the way into the patient cable
connector until it clicks.
Ensuring Accurate Monitoring
The following points aid in ensuring oximetry monitoring
success:
•
Choose a site that is well perfused and allows for
proper alignment of the light emitter and detector.
•
Select a site that has unrestricted blood flow.
ZM 040022A
Sensor Cable Connector
Patient Cable
Connector
Clear Protective
Cover
ZM 040024A
Detector Window