Archive – Ransburg 9040 Cascade LV Control Unit 76580 User Manual
Page 21
CP-97-04.3
18
18
18
18
18
9040 Cascade Low Voltage Control Unit - Installation
> DO NOT
DO NOT
DO NOT
DO NOT
DO NOT operate the Analog Input
Feature with the jumpers removed from
JP2 or JP3, or with the jumpers in any
other positions that those shown on the
PC board silkscreen.
C A U T I O N
C A U T I O N
C A U T I O N
C A U T I O N
C A U T I O N
!!!!!
5. Connect the positive analog control input
(source) to TB1-6 and the negative analog input
(common or return) to TB1-7. Route the wiring
through the external wiring grommet on the rear
of the 9040 control unit.
>
To eliminate problems caused by
external noise, a twisted, shielded pair
should be used for the analog input con-
trol wiring. Connect the shield to ground
at the analog control source ONLY.
N O T E
N O T E
N O T E
N O T E
N O T E
> DO NOT
DO NOT
DO NOT
DO NOT
DO NOT use the analog input board
as a method for turning high voltage ON
and OFF. The control unit has specific
inputs for this purpose (see “Pneumatic
Connections and External High Voltage
Control” in this section).
> ALWAYS
ALWAYS
ALWAYS
ALWAYS
ALWAYS turn the control unit’s AC
Power ON/OFF switch to the OFF
position before flushing, cleaning, or
serving the applicator.
C A U T I O N
C A U T I O N
C A U T I O N
C A U T I O N
C A U T I O N
!!!!!
5.
An interlock line with the control unit power and
overload signal is provided across terminals TB1-
4 and 5. This line can be used to indicate that high
voltage is ready (control unit is on and not in
overload state) if desired.
6. Slide the chassis back into the cabinet, secure
the front panel screws, replace the fuse, and plug
the control unit in.
The Analog Input board is now ready for use. A
0-10 VDC or 4-20 mADC input signal will produce
an applicator output of 0 to rated kV.
>
The input resistance of the Analog Input
Board feature is:
0-10 VDC Operation: 200 Kilohms
4-20 mADC Operation: 249 Ohms
N O T E
N O T E
N O T E
N O T E
N O T E
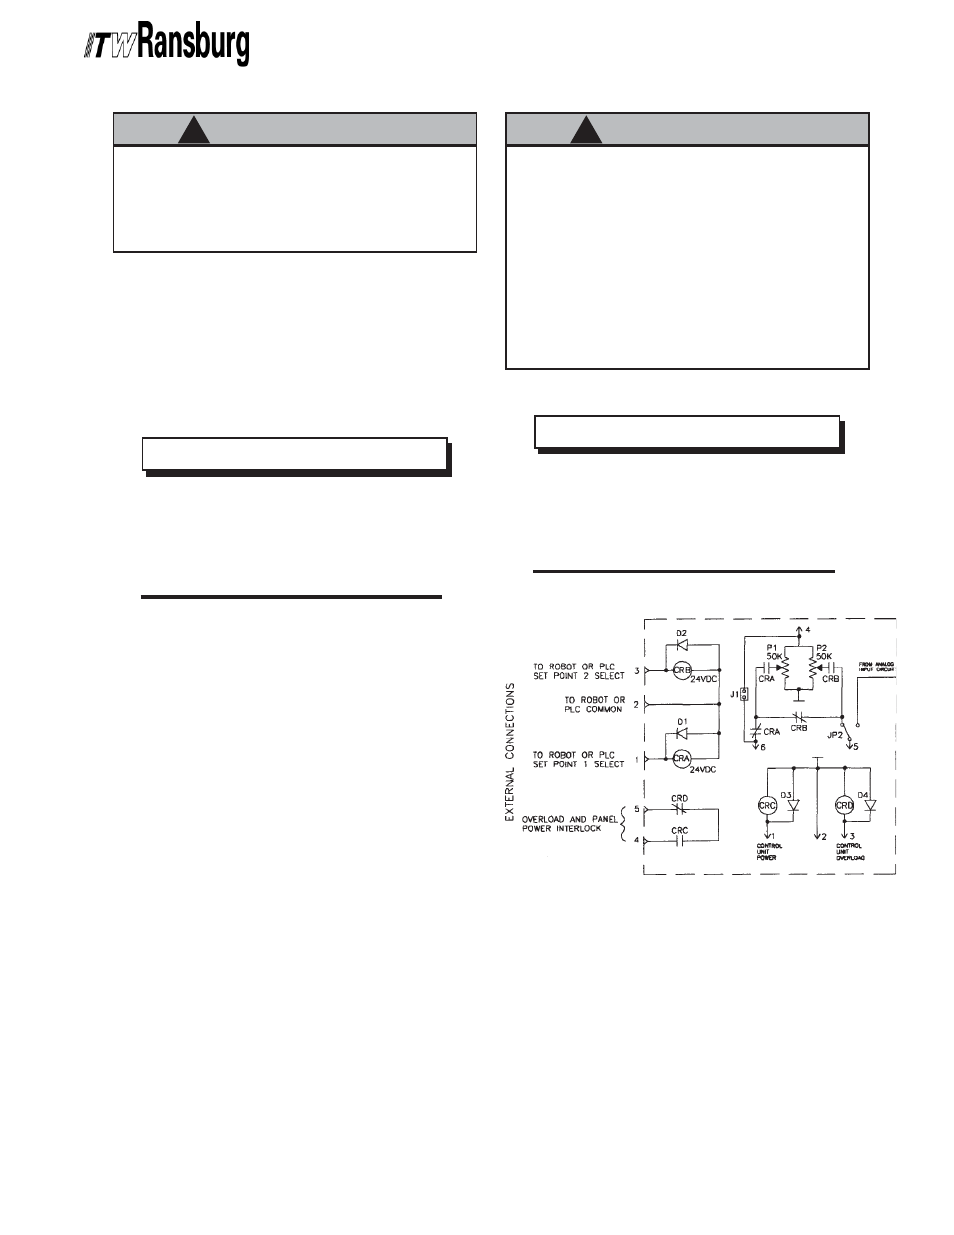
Figure 5a: Triple Setpoint Schematic
Figure 5a: Triple Setpoint Schematic
Figure 5a: Triple Setpoint Schematic
Figure 5a: Triple Setpoint Schematic
Figure 5a: Triple Setpoint Schematic
ARCHIVE