Figure 3- top view of tank figure 4 – Lanair 215 Gallon Tank With Metering Pump User Manual
Page 6
®
Section 3 - Plumbing Installation
QUESTIONS?... Contact Customer Service at 1-800-753-1601 M-F 8:00 am- 4:30 pm CST
6
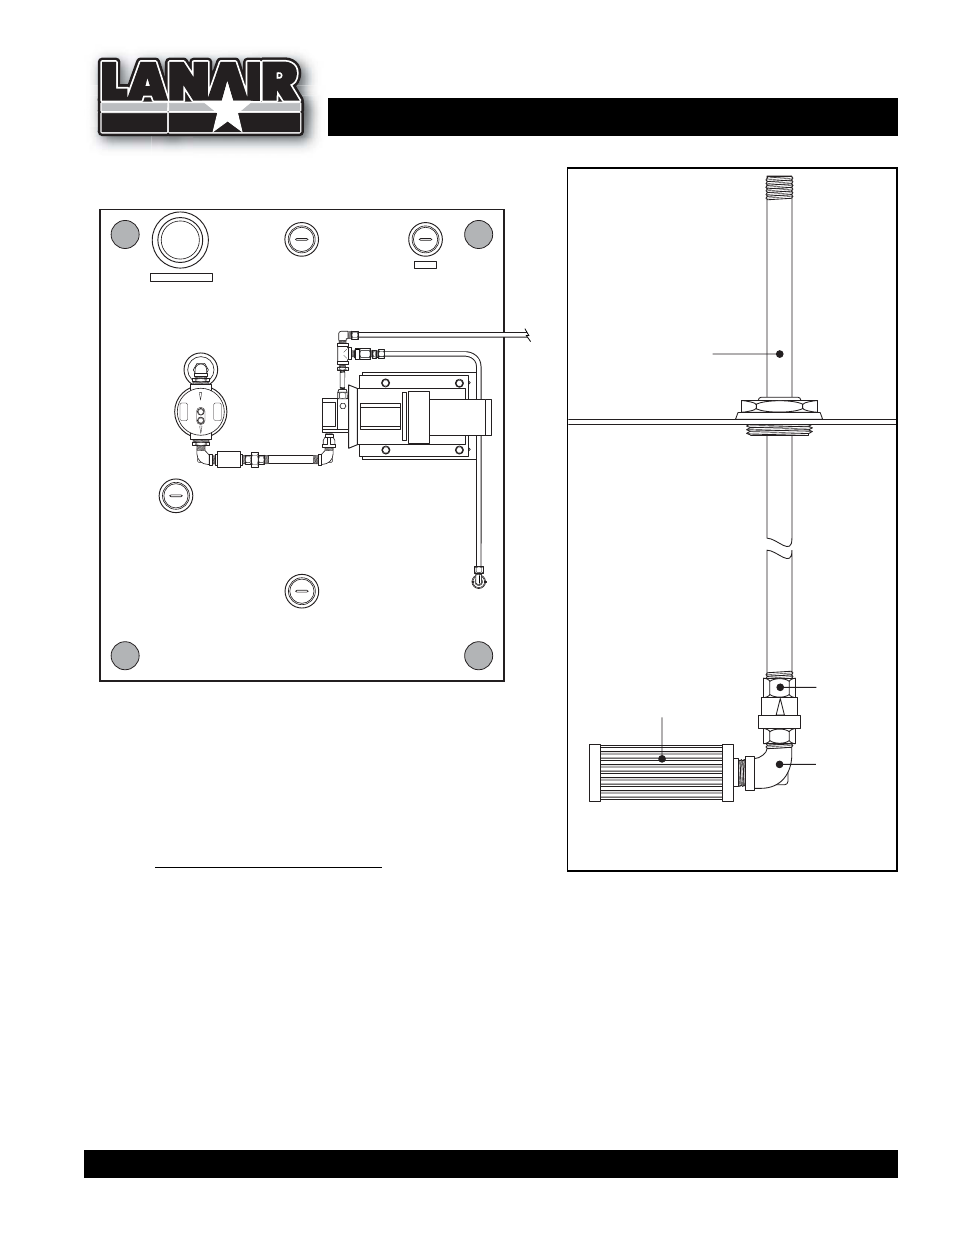
PLUMBING INSTALLATION - Pick-Up Tube Assembly
1. Unpack and lay out all of the parts shipped with your tank
and heater. Before beginning assembly, make sure all lines
and fittings are free of dirt and/or burrs. NOTE: When
making plumbing connections, use the thread seal com-
pound (P/N 5277) included in the plumbing kit on all
joints. DO NOT USE TEFLON TAPE.
2. Locate the pick-up tube assembly (P/N 9030). This tube will have a 2" bushing welded onto it.
3. Attach the brass check valve (P/N 8662 - included in the heater accessory kit) to the bottom of the
pick-up tube assembly (P/N 9030). NOTE: The arrow on the check valve must point in the direction of
the oil flow (up) or the check valve will not work properly (see Fig. 4).
4. Attach the 1/2" elbow (P/N 8902) to the check valve. Attach the suction line strainer (P/N 8748 -
included in the heater accessory kit) to the 1/2" elbow (P/N 8902) as indicated in Fig. 4.
5. Insert the pick-up tube assembly into the 2" bung (hole) and tighten (see Fig. 3 for bung location).
P/N 8902
Elbow Street
1/2"
FIGURE 3- Top View of Tank
FIGURE 4
P/N 9030
Pick-Up Tube
Tank Top
P/N 8748
Suction Line Strainer
P/N 8662
Check Valve
(arrow
pointing up)
2" Bushing
EMERGENCY VENT
VENT
METERING
PUMP
ASSEMBLY
PRIMARY
STRAINER
PICK-UP TUBE
FILL BUNG
PUMP HEAD