J) and (l), I) (k) (m) – Elite Screens Evanesce Series User Manual
Page 7
7
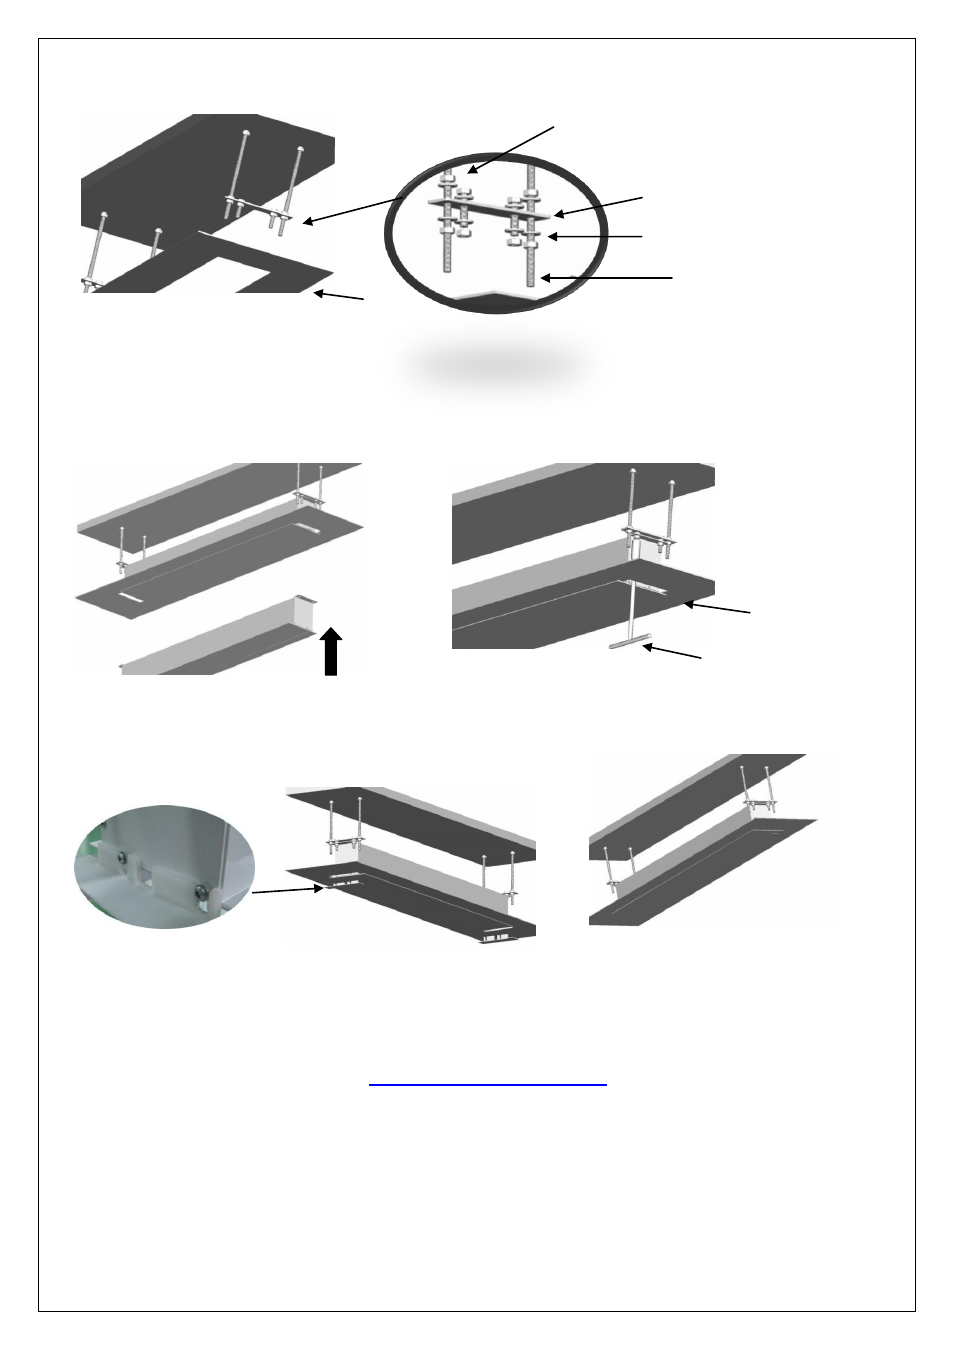
4. Push the screen up into the space. Use the threaded rods (I) to attach the screen assembly to the ceiling.
The hexagonal screws (K) will connect the screen to the rest of the assembly. Once firmly in place, use the
nuts (J) to ensure a firm connection. Use the socket wrench (N) to make sure that the bolts are firmly
tightened.
5. Install plastic cover panel (O) to complete the installation.
For local Elite Screens contact or Technical Support, please visit
Ceiling
Socket wrench (H)
Push
Ceiling
(
J) and (L)
(I)
(K)
(M)
See also other documents in the category Elite Screens Multimedia:
- Manual B Series (2 pages)
- Manual Series (8 pages)
- Manual SRM Series (8 pages)
- Manual SRM Pro Series (5 pages)
- Spectrum Series (9 pages)
- Spectrum Series (8 pages)
- CineTension2 Series (10 pages)
- Evanesce Tension B Series (9 pages)
- Evanesce Tension (U.S) (12 pages)
- VMAX2 Series (9 pages)
- Spectrum2 Series (7 pages)
- Starling Series (4 pages)
- Evanesce Tension (EU) (10 pages)
- VMAX Plus Series (8 pages)
- Starling Tension Series (5 pages)
- Evanesce Plus Series (6 pages)
- Home2 Series (9 pages)
- Evanesce B Series (9 pages)
- PowerMax Series (16 pages)
- SableFrame Series (7 pages)
- Lunette Series (9 pages)
- Starbright 7 Series (13 pages)
- SableFrame2 Series (7 pages)
- ezFrame Plus Series (8 pages)
- Tripod Series (6 pages)
- QuickStand Series (10 pages)
- Pico Sport Series (2 pages)
- ezCinema Series (7 pages)
- DIY Series (6 pages)
- Yard Master(Front) (3 pages)
- ezCinema Plus Series (7 pages)
- DIY Wall Series (2 pages)
- Yard Master(Rear) (5 pages)
- Reflexion Series (6 pages)
- PicoScreen™ Series (6 pages)