N) (k) (h) – Elite Screens Evanesce Series User Manual
Page 6
6
(N)
(K)
(H)
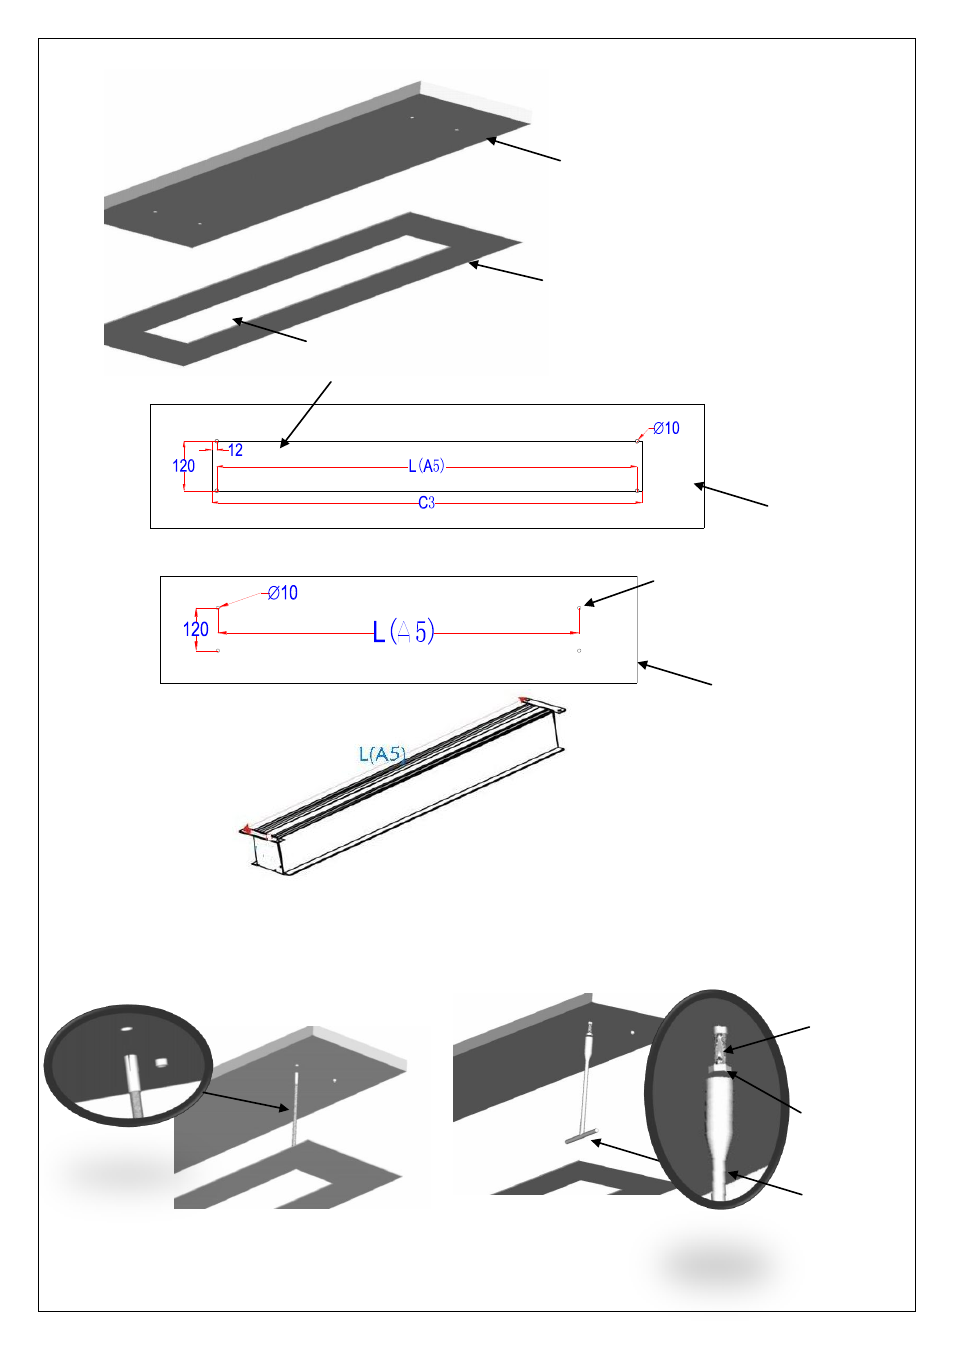
The ceiling wall
Install screw holes
Ceiling
Ceiling installation space
2. Drill 4 holes in the ceiling that correspond with the attachments on the various casing sizes.
3. The expanding bolts (H) mount into thick wood beams, stone or concrete and will support the screen. Use
the Socket wrench (N) to attach the hexagonal screws (K). The expanding bolts should be firmly tightened
and tested to make sure that they will hold the weight of the screen.
Ceiling Panel
The ceiling truss
See also other documents in the category Elite Screens Multimedia:
- Manual B Series (2 pages)
- Manual Series (8 pages)
- Manual SRM Series (8 pages)
- Manual SRM Pro Series (5 pages)
- Spectrum Series (9 pages)
- Spectrum Series (8 pages)
- CineTension2 Series (10 pages)
- Evanesce Tension B Series (9 pages)
- Evanesce Tension (U.S) (12 pages)
- VMAX2 Series (9 pages)
- Spectrum2 Series (7 pages)
- Starling Series (4 pages)
- Evanesce Tension (EU) (10 pages)
- VMAX Plus Series (8 pages)
- Starling Tension Series (5 pages)
- Evanesce Plus Series (6 pages)
- Home2 Series (9 pages)
- Evanesce B Series (9 pages)
- PowerMax Series (16 pages)
- SableFrame Series (7 pages)
- Lunette Series (9 pages)
- Starbright 7 Series (13 pages)
- SableFrame2 Series (7 pages)
- ezFrame Plus Series (8 pages)
- Tripod Series (6 pages)
- QuickStand Series (10 pages)
- Pico Sport Series (2 pages)
- ezCinema Series (7 pages)
- DIY Series (6 pages)
- Yard Master(Front) (3 pages)
- ezCinema Plus Series (7 pages)
- DIY Wall Series (2 pages)
- Yard Master(Rear) (5 pages)
- Reflexion Series (6 pages)
- PicoScreen™ Series (6 pages)