Flush mount to the ceiling – Elite Screens Spectrum2 Series User Manual
Page 4
Rev.042613-JA
4
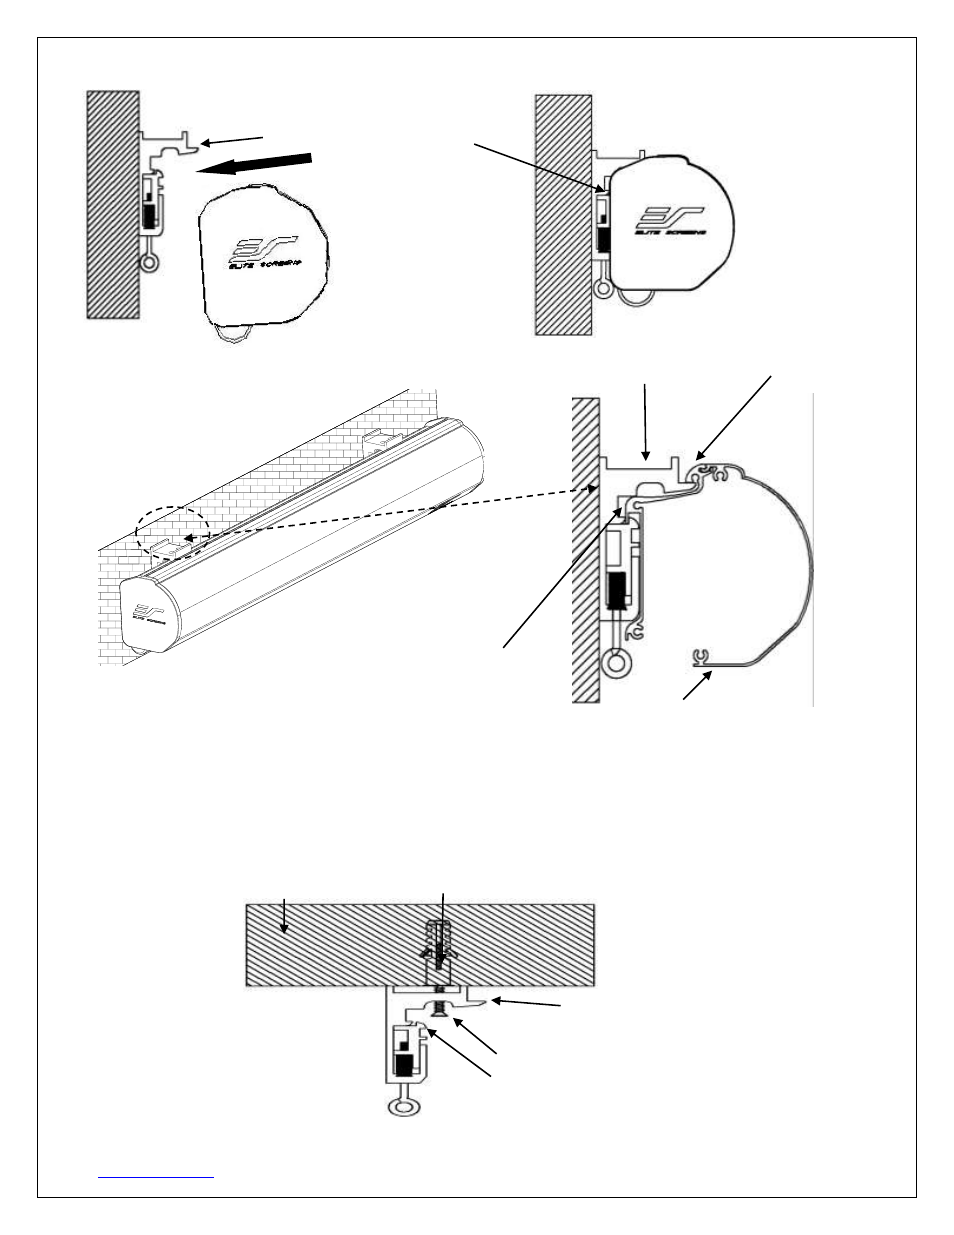
Mounting Bracket
Mounting Bracket
Fix Plate 1
Fix Plate 2
Mounting Bracket
Case Slot 1
Case Slot 2
Flush Mount to the Ceiling
1. Mark the location of where the screen is to be installed, drill your holes, and insert the M10
Anchors (c).
2. Install the Mounting Brackets (a) to the ceiling and secure with the M4x50 Screws (b).
Ceiling
M10 Anchor
Screen Case
M4x50 Screw
Mounting Bracket
Fix Plate 1
Mounting Bracket
Fix Plate 2
See also other documents in the category Elite Screens Multimedia:
- Manual B Series (2 pages)
- Manual Series (8 pages)
- Manual SRM Series (8 pages)
- Manual SRM Pro Series (5 pages)
- Spectrum Series (9 pages)
- Spectrum Series (8 pages)
- CineTension2 Series (10 pages)
- Evanesce Tension B Series (9 pages)
- Evanesce Tension (U.S) (12 pages)
- VMAX2 Series (9 pages)
- Starling Series (4 pages)
- Evanesce Tension (EU) (10 pages)
- VMAX Plus Series (8 pages)
- Evanesce Series (7 pages)
- Starling Tension Series (5 pages)
- Evanesce Plus Series (6 pages)
- Home2 Series (9 pages)
- Evanesce B Series (9 pages)
- PowerMax Series (16 pages)
- SableFrame Series (7 pages)
- Lunette Series (9 pages)
- Starbright 7 Series (13 pages)
- SableFrame2 Series (7 pages)
- ezFrame Plus Series (8 pages)
- Tripod Series (6 pages)
- QuickStand Series (10 pages)
- Pico Sport Series (2 pages)
- ezCinema Series (7 pages)
- DIY Series (6 pages)
- Yard Master(Front) (3 pages)
- ezCinema Plus Series (7 pages)
- DIY Wall Series (2 pages)
- Yard Master(Rear) (5 pages)
- Reflexion Series (6 pages)
- PicoScreen™ Series (6 pages)