Pump cleaning, Clean-in-place procedure for pumps, Pump disassembly – Server PUMPS (88521/88200) User Manual
Page 2
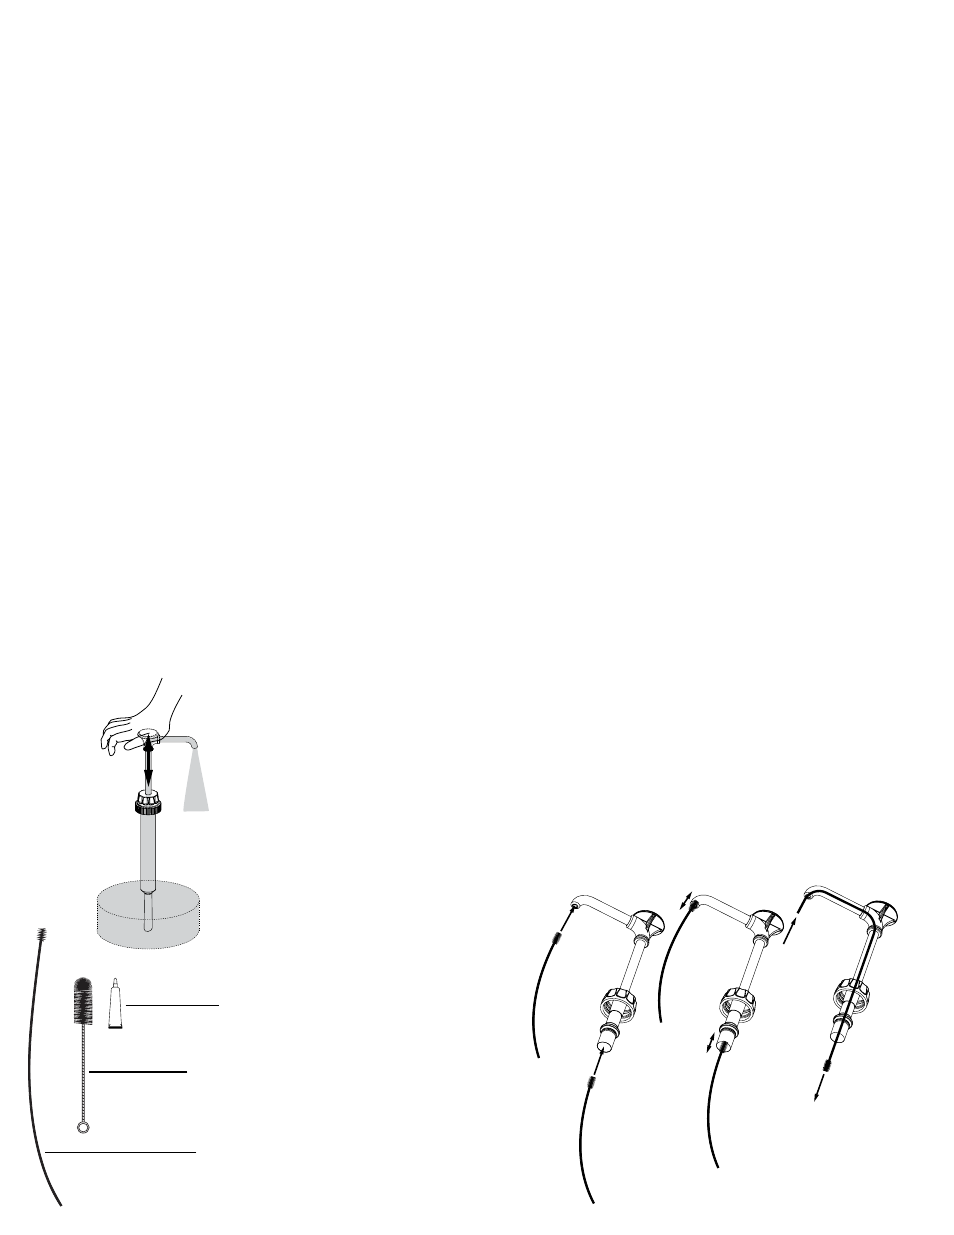
PUMP CLEANING
BEFORE FIRST USE AND AFTER USE DAILY, DISASSEMBLE
AND CLEAN PUMP.
STAINLESS STEEL PARTS CAN CORRODE.
IT IS IMPORTANT TO CLEAN, RINSE, SANITIZE, AND DRY
THESE PARTS DAILY AND PROPERLY.
FAILURE TO COMPLY WITH ANY OF THESE
INSTRUCTIONS MAY VOID UNIT WARRANTY.
1
SEE PUMP DISASSEMBLY.
2
WASH AND SCRUB ALL PARTS WITH DISHWASHING
DETERGENT AND HOT WATER DAILY.
• Wash small parts in a pan or other container to
prevent part loss.
• Use supplied brushes to clean all confined
areas. Maintain a clean and efficient pump
by using the brushes supplied with pump to
prevent product build up inside pump.
• IMPORTANT PUMP AREAS TO CLEAN: Clean
inside cylinder thoroughly with brush 82049.
Clean inside discharge tube thoroughly with
brush 82526.
• Do not use abrasive cleansers, scrapers, steel pads,
steel wool, or other cleaning tools that can scratch
surfaces.
• A general purpose, nonabrasive cleaner may be used
on hard to remove food deposits.
• Do not use cleansing agents with high concentrations
of acid, alkaline or chlorine.
These agents can corrode stainless steel.
• Do not use ammonia to clean pump parts.
Ammonia can damage plastic parts.
• A nontoxic glass cleaner may be used for cleaning
any stainless steel parts.
3
FULLY RINSE ALL PARTS THOROUGHLY WITH CLEAR
WATER.
• Fully rinsing all parts can help prevent corrosion.
4
DRY ALL STAINLESS STEEL PARTS WITH A CLEAN
SOFT CLOTH.
• Various elements and minerals, such as chlorides in
tap water, can accumulate on stainless steel parts
and create corrosion.
• To prevent corrosion on any stainless steel parts, it is
important to fully dry with a clean soft cloth regularly.
5
SANITIZE PARTS FOLLOWING LOCAL SANITIZATION
REQUIREMENTS.
ALL PARTS IN CONTACT WITH FOOD MUST BE
SANITIZED.
• Allow parts to fully air dry after sanitization.
CLEAN AND FLUSH PUMP
WITH SOAP, SANITIZER, AND HOT WATER
CLEAN INSIDE
DISCHARGE TUBE
CLEAN INSIDE
TAPERED END
OF DISCHARGE TUBE
CLEAN-IN-PLACE PROCEDURE
FOR PUMPS
CLEAN-IN-PLACE IS A BASIC FOUR STEP PUMP FLUSHING
PROCESS: CLEAN, RINSE, SANITIZE, AND RINSE.
CLEAN:
1
PUMP OUT ALL (IF ANY) REMAINING FOOD PRODUCT
FROM INSIDE PUMP BODY.
2
WASH AND RINSE OFF OUTSIDE OF PUMP BODY.
3
FLUSH AND RINSE ALL INSIDE AND OUTSIDE
SURFACES OF PUMP THOROUGHLY WITH HOT WATER.
• Place lower end of pump into container of hot water
and operate pump until all (if any) remaining product
is expelled and only hot water flows from discharge
tube.
4
MIX 2 OZ (5 ML) OF DISHWASHING DETERGENT
(DAWN DISHWASHING LIQUID) WITH 1 QUART
(.95 L) OF HOT TAP WATER (APPROXIMATELY
110°F/43°C).
5
PLACE LOWER END OF PUMP INTO THIS CLEANING
MIXTURE AND REPEATEDLY OPERATE PUMP UNTIL ALL
CLEANING MIXTURE IS PUMPED THROUGH PUMP.
RINSE:
6
PLACE LOWER END OF PUMP INTO 2 CUPS (.5 L) OF
HOT TAP WATER (APPROXIMATELY 110°F/43°C) AND
REPEATEDLY OPERATE PUMP UNTIL ALL TAP WATER
IS PUMPED THROUGH PUMP.
SANITIZE:
7
MIX ONE 1 OZ (30 ML) PACKET OF KAY-5
SANITIZER/CLEANER (EPA REG NO. 5389-15) WITH
2.5 GALLONS (9.5 L) OF TAP WATER (APPROXIMATELY
ROOM TEMPERATURE).
8
PLACE LOWER END OF PUMP INTO THIS SANITIZING
MIXTURE AND REPEATEDLY OPERATE PUMP UNTIL
1 QUART (.95 L) SANITIZING MIXTURE IS PUMPED
THROUGH PUMP.
RINSE:
9
PLACE LOWER END OF PUMP INTO 1 CUP (.24 L) OF
HOT TAP WATER (APPROXIMATELY 110°F/43°C) AND
REPEATEDLY OPERATE PUMP UNTIL ALL TAP WATER IS
PUMPED THROUGH PUMP.
PUMP DISASSEMBLY
BEFORE FIRST USE AND AFTER USE DAILY, DISASSEMBLE
AND CLEAN PUMP.
DURING DISASSEMBLY, USE A CONTAINER TO COLLECT
SMALL PARTS OF PUMP TO PREVENT ANY LOSS.
1
LOOSEN CAP SECURING PUMP TO LID OR BOTTLE
AND REMOVE PUMP FROM LID OR BOTTLE.
.
2
LOOSEN LOCKING COLLAR AND REMOVE CYLINDER
ASSEMBLY FROM HEAD ASSEMBLY.
3
REMOVE SPRING FROM CYLINDER ASSEMBLY.
4
REMOVE PINCH VALVE FROM HEAD ASSEMBLY
• Pinch and gently turn to pull valve out.
5
REMOVE SEAL FROM HEAD ASSEMBLY BY PRESSING
DOWN AND OFF WITH THUMB.
•
Do not use a sharp tool to remove seal, this may
damage seal.
•
If seal is damaged, product will leak past seal.
6
REMOVE O-RING FROM INSIDE SEAL.
•
Do not use a sharp tool to remove o-ring, this may
damage o-ring.
•
If o-ring is damaged, product will leak past seal.
7
REMOVE GAGING COLLAR(S) FROM HEAD ASSEMBLY.
Food Equipment
Lubricant 40179
Brush 82049 (1 ¼” D)
Brush 82526 (21” D)