Dynamic pressure test (engine on) – Mityvac MV4560 COOLING SYSTEM TEST KIT User Manual
Page 8
Page Number - 8
Form 801625
Fig. 6
Fig. 7
Fig. 8
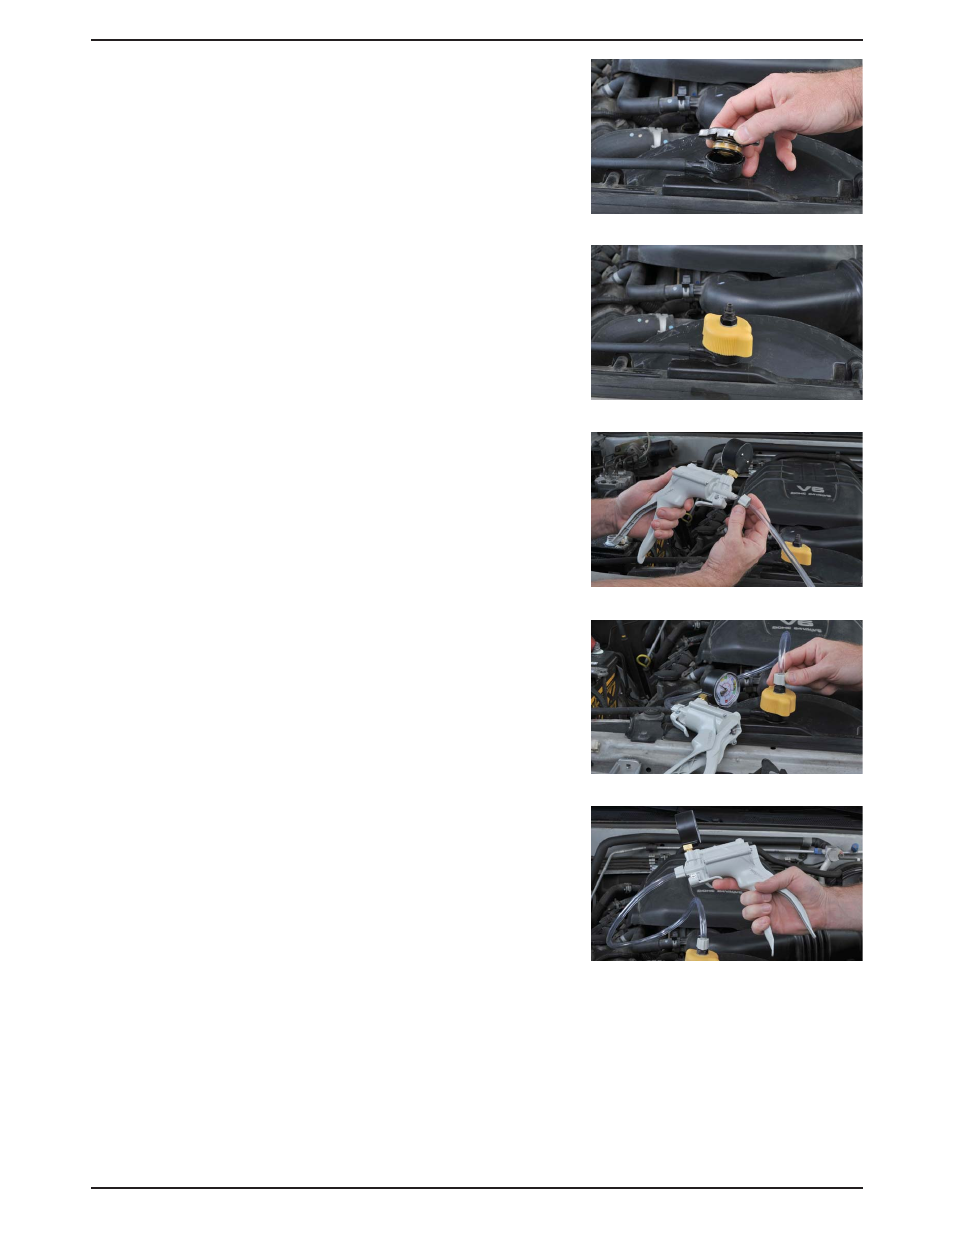
Dynamic Pressure Test (Engine On)
For diagnosing:
Cooling system leaks
Blown head gasket
Cylinder head damage
Cracked block
Set-up & Procedure:
1. Ensure the cooling system is cool and not pressurized.
Carefully remove the radiator or coolant bottle pressure cap
(Fig. 6).
2. Check to see that the radiator or coolant bottle is filled to
the proper level, and check hoses for visual damage or
leaks. Fill and repair as necessary prior to testing.
3. Select the correct Cooling System Adapter for the
application.
4. Apply water or coolant to the rubber gasket and/or o-ring
on the adapter, and install the adapter in place of the
pressure cap (Fig. 7).
5. Secure one end of the clear hose to the pressure pump
using the compression nut (Fig. 8).
6. Secure the second end of the hose to the cooling system test
adapter using the compression nut (Fig. 9).
7. Note the operating pressure of the cooling system
indicated on the cap or in the vehicle repair manual.
8. Start the vehicle engine and monitor the pressure gauge.
An immediate and rapid pressure buildup is an indication of
a breach between a cylinder and the cooling system, most
likely due to a blown head gasket. Immediately turn off the
engine and release the pressure in the system by pressing
the Pressure Relief Lever located on pump (Fig. 10). Dis-
connect the test equipment and replace the head gasket.
If no immediate or rapid pressure buildup is indicated,
operate the pressure pump to bring the system to normal
operating pressure. If the needle on the pressure gauge
vibrates rapidly, this is an indication of a smaller compres-
sion or combustion leak into the cooling system possibly
caused by a damaged block or head. Turn off the engine,
carefully release the pressure in the system by pressing
the Pressure Relief Lever located on pump (Fig 10).
Disconnect the test equipment and consider replacing
the head gasket.
9. If no abnormal pressure buildup is indicated, carefully
release the pressure in the system by pressing the Pres-
sure Relief Lever located on the pump (Fig. 10). Let the
engine run until it reaches normal operating pressure and
temperature. Turn off the engine and allow it to cool with
pressure still applied. Check for leaks as the engine cools.
A leak caused by a slightly loose hose clamp or a stuck
Fig. 9
Fig. 10