Static pressure test (engine off) – Mityvac MV4530 COOLING SYSTEM PRESSURE TEST KIT User Manual
Page 5
Static Pressure Test (Engine Off)
For diagnosing:
Cooling system leaks
Set-up & Procedure:
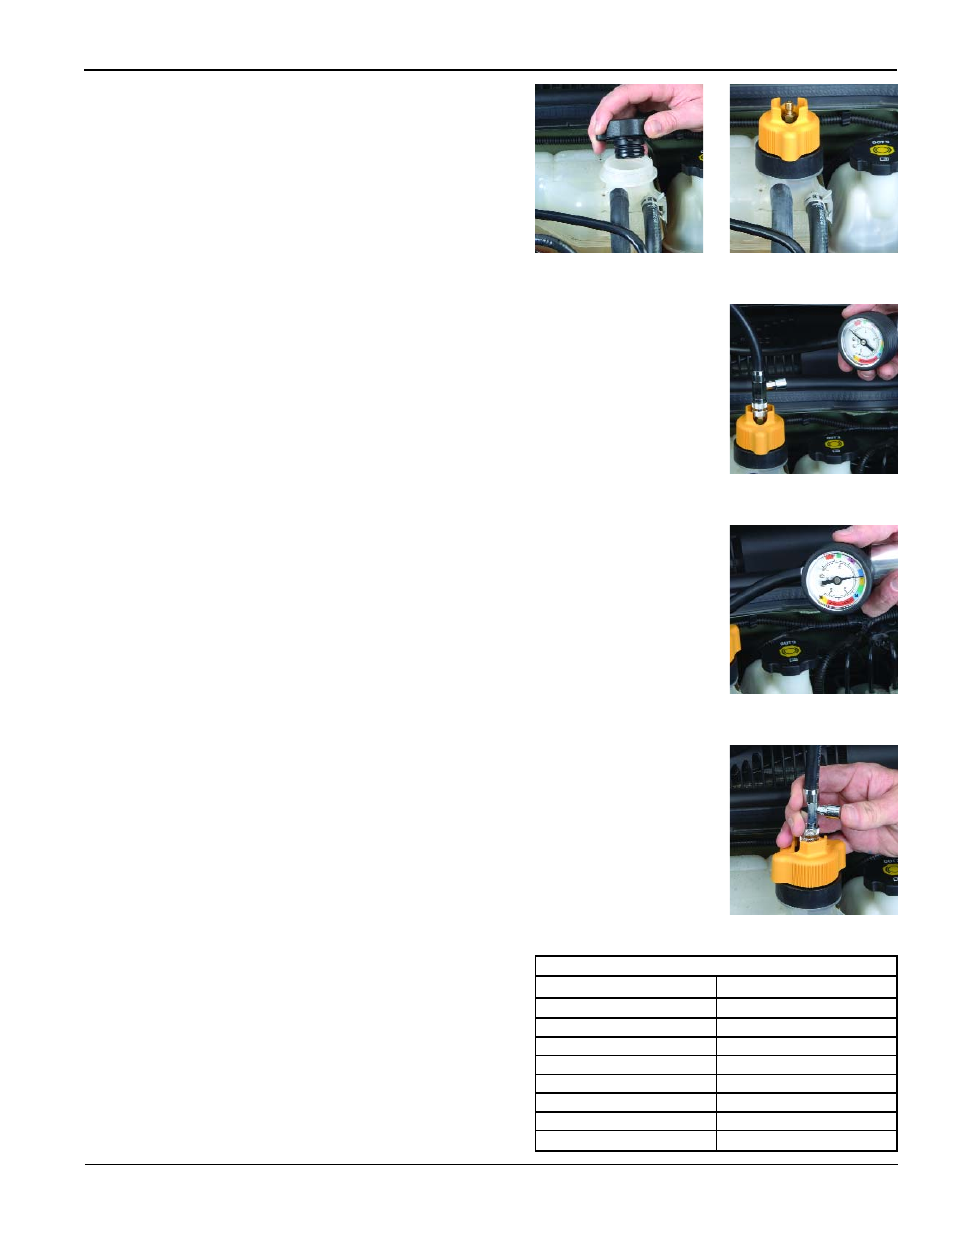
1. Ensure the cooling system is cool and not pressurized. Carefully
remove the radiator or coolant bottle pressure cap (Fig. 1).
2. Check to see that the radiator or coolant bottle is filled to the
proper level, and check hoses for visual damage or leaks. Fill
and repair as necessary prior to testing.
3. Select the correct Cooling System Adapter for the application.
Refer to the Adapter Selection Guide included in the kit.
4. Apply water or coolant to the rubber gasket and/or o-ring on
the adapter, and install the adapter in place of the pressure
cap (Fig. 2).
5. Install the Pressure Pump onto the System Adapter using the
quick-connect. Make sure the quick-connect sleeve snaps
forward to lock the connection (Fig. 3).
6. Operate the Pressure Pump until the needle on the pressure
gauge moves to the end of the colored band indicating the
appropriate pressure range of the cap (see Chart A) (Fig. 4).
7. Watch the gauge for a short period of time. If the pressure
reading drops, a leak is present.
8. With the system still pressurized, perform a visual inspection
of the entire cooling system. Check hoses and connections for
seepage, which would indicate a leak. Return to the gauge and
check the reading once more.
9. Most leaks are external, and visible seepage occurs. However,
a drop in pressure with no visible leakage can indicate a blown
head gasket or cracked block, where fluid leaks into the
combustion chamber. Visually inspect oil and transmission fluid
for signs of coolant. Proceed to the Dynamic Pressure Test for
better methods of diagnosing internal leaks.
10. When testing is complete, release the pressure in the system by
pressing the Pressure Relief Valve located on the pump hose near
the quick-connect coupler (Fig. 5).
11. Repair leaks if necessary, and retest.
12. Disconnect components, clean and store them properly.
13. Refill the radiator or coolant bottle to the proper level, and
replace the cap.
Form 822952
Page Number - 5
Fig. 2
Fig. 3
Fig. 4
Fig. 5
Fig. 1
Chart A: Cooling System Cap Pressure Test Ranges
Rated Pressure (PSI)
Pressure Test Range (PSI)
4
3 - 5
7
6 - 8
10
9 - 11
13 or 14
12 - 16
15 or 16
14 - 18
18
16 - 20
20
18 - 22
30
28 - 30