Mach III Clutch T6H1G-STL, T6H1H-STL, T6H2H-STL User Manual
Page 4
7/9/2013
TORQLIM_FLEXCOUPL_MANUAL
Page 4 of 5
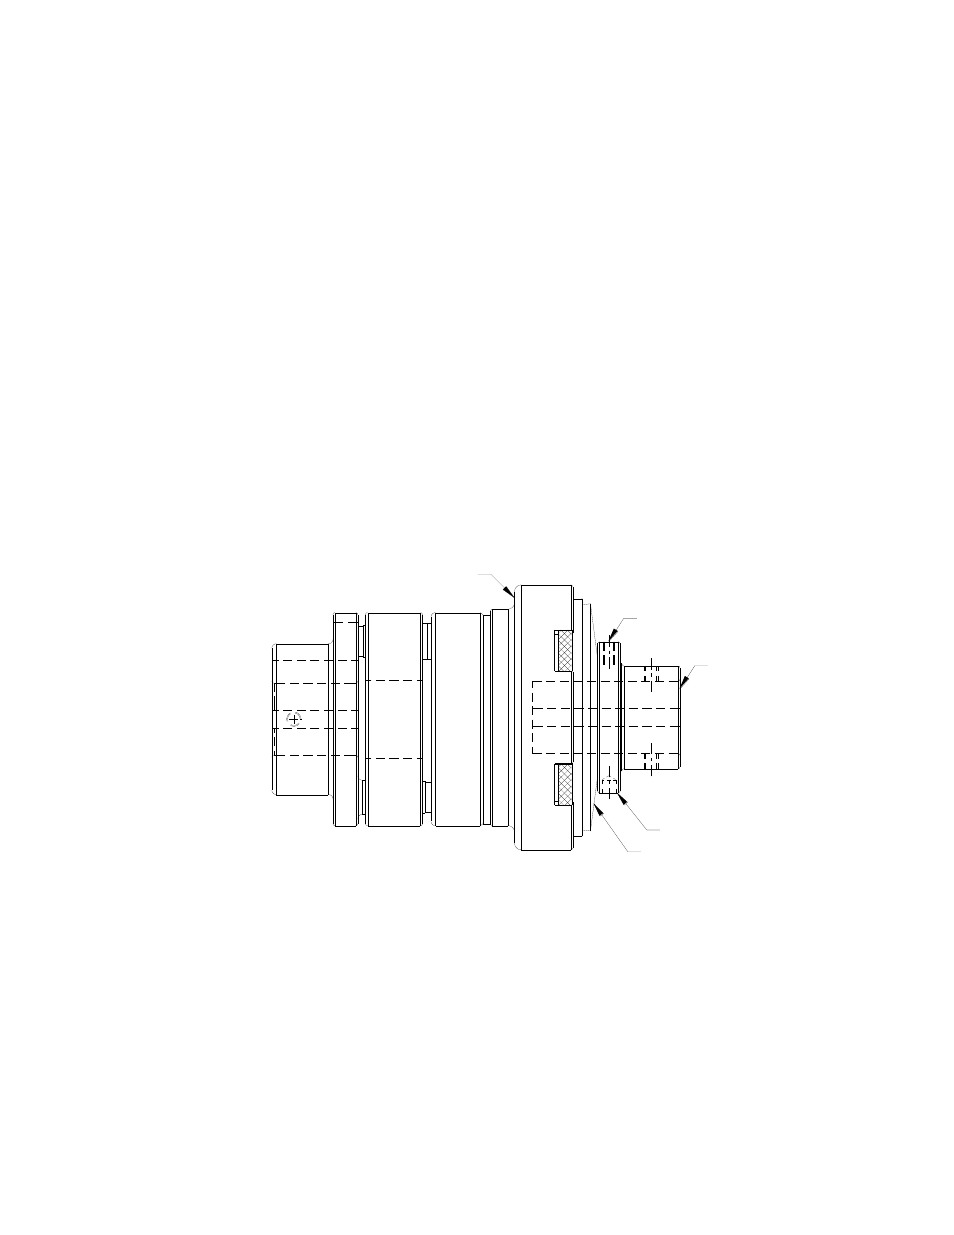
A
B
C
D
E
B. DRIVE SURFACE INSPECTION & FRICTION DISC REPLACEMENT
Inspect the surface of the steel or iron dive discs. This surface must be free from grooves, burrs
and foreign materials in order for the clutch to operate properly. If damage is pronounced,
please contact Mach III Clutch or your distributor about replacing the drive discs. In addition,
clutch should be inspected for discoloration (turning blue). If discoloration is present, the unit is
being operated beyond its capacity and Mach III Clutch should be contacted for assistance.
C. INSPECTION OF BEARINGS
Check bearings for external damage (missing seals, etc.). Make sure the bearings rotate freely
and smoothly by hand. If bearing replacement is necessary, consult Mach III or your distributor
for the bearing sizes and replacement procedures.
D. REASSEMBLY
Place drive discs, friction discs and spring over drive hub in their proper order making sure they
slide freely on the hub and in the slots. Replace adjustment nut with the shoulder fitting into the
bore of the spring. Adjust torque and tighten set screw.
See “torque Limiter Installation” portion of these instructions for the proper procedure for
reinstalling the clutch.
VII.
Torque Setting Instructions
A. Product Numbers: T3H2H-STL, T4H2H-STL, T5H2H-STL and non-catalog
variations of this torque limiter design.
(1) Make sure the nylon-tipped set screw (REF. C) in the outside diameter of the adjustment nut
(REF. A) is loose.
(2) Make sure the adjustment nut (REF. A) is snug against the disc spring (REF. B).
(3) Using a spanner wrench, tighten the adjustment nut (REF. A) against the disc spring
(4) Check torque value after each 1/4-turn increment of the adjustment nut (REF. A) while holding
adapter/sleeve (REF. D) stationary and turning drive hub (REF. E) with a torque wrench.
(5) Tighten the nylon-tipped set screw (REF. C) in the outside diameter of the adjustment nut
(REF. A).