Adjusting the transmitter frequency, Battery replacement – Lectrosonics UH400a User Manual
Page 11
Frequency Agile Plug-On UHF Transmitter
4. Set the Power Switch to NO PHTM briefly – just a
couple of seconds for the front panel LED’s to light
up, then turn the unit off.
5. Change the Frequency Select switches to one of the
following settings:
MODE SWITCH SETTINGS
100 Series
1,1
200 Series
2,2
Mode 3*
3,3
400 Series (Digital Hybrid) 4,4
IFB Mode
5,5
Mode 6*
6,6
*Contact factory for details.
0 1
2
3
4
5
6
7
8
9
A
B
C
D
E
F
0 1
2
3
4
5
6
7
8
9
A
B
C
D
E
F
Left Switch
Right Switch
1.6 MHz
100 kHz
6. Turn the transmitter on, four about 1 sec. then back
off.
7. Change the switches to 0,0.
8. Turn the transmitter on and verify the new compatibility
mode. The front panel -20 and -10 LEDs will blink:
• Once for 100 Series mode
• Two times for 200 Series mode
• Three times for mode 3 (contact factory)
• Four times for 400 Series mode
•
Five times for IFB mode
• Six times for mode 6 (contact factory)
The Compatibility Mode will remain as set until changed
with the above procedure.
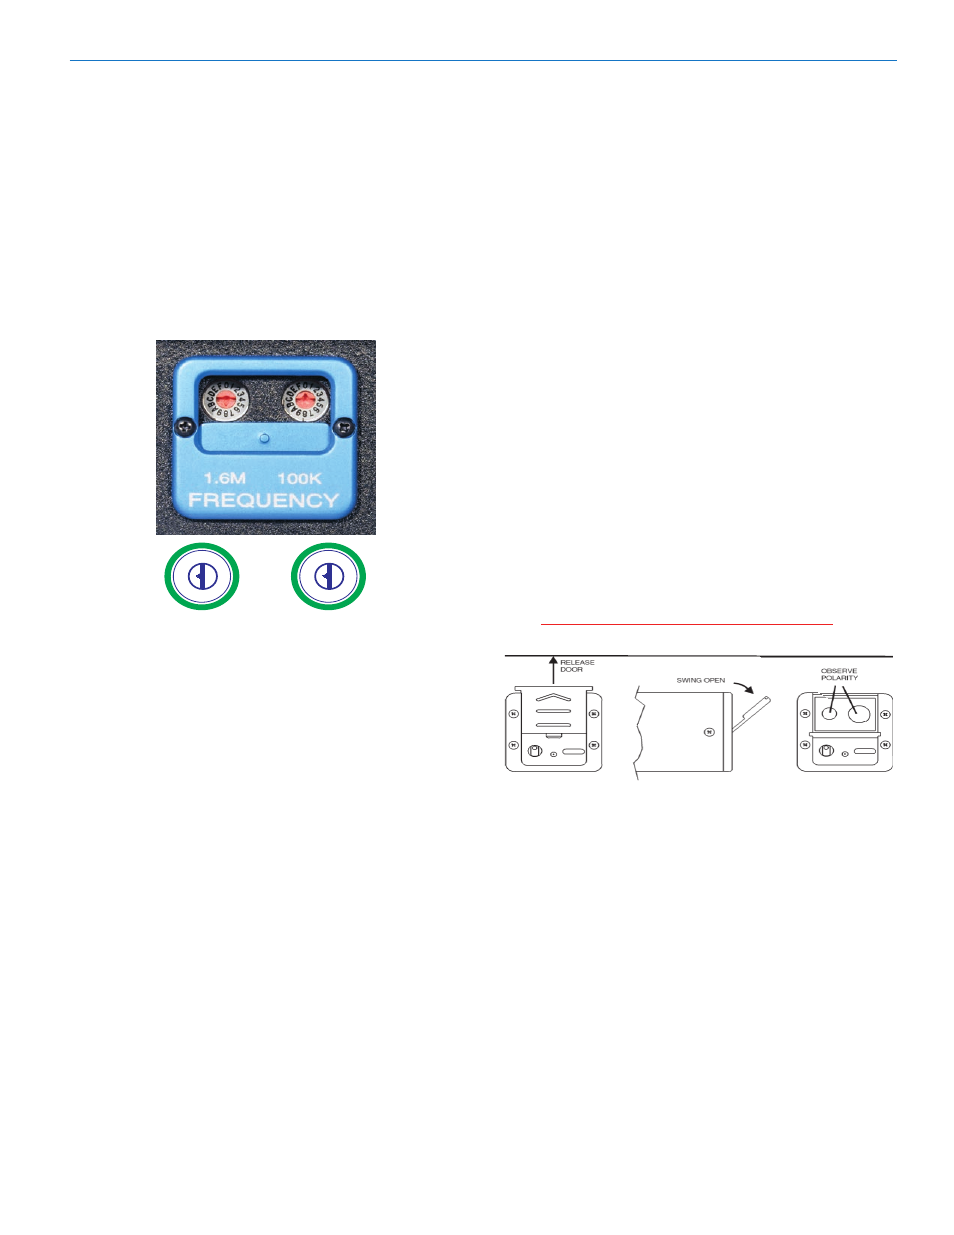
Adjusting the Transmitter Frequency
The receiver is normally used to find and verify a
clear frequency for operation. Some receiver models
have built-in scanning capability to quickly find a clear
frequency. In other cases you may need to use pre-
coordinated frequencies from the Lectrosonics tables
or someone else. Set the left and right switches on the
transmitter to match the receiver. The alpha-numeric
settings are displayed as a pair, ie. A-6, 8-5, 4-B, etc.,
with the left character for the left hand switch and the
right character for the right hand switch.
Battery Replacement
The transmitter is powered by a standard 9 volt battery.
Alkaline, Li Polymer rechargeable and lithium types can
be used. Standard zinc-carbon batteries marked “heavy
duty” or “long-lasting” are not adequate. They will
provide only about five minutes of operation. Similarly,
ni-cad rechargeable batteries only give one hour of
operation, and will also run down quite abruptly. Alka
line batteries provide about 4.5 hours of operation while
lithium batteries will run the unit for about 12 hours.
To open the battery compartment, press upward on the
cover door in the direction of the arrow as shown in the
drawing. Only slight, sliding pressure is needed to open
and close the battery door.
Swing the door open and take note of the location of
the positive (+) and negative (-) terminals. Insert the
new battery correctly and close the cover by reversing
the opening procedure. Note that the battery door will
NOT close if the battery is inserted incorrectly, since the
terminals will hit a protective polarity barrier. Don’t force
the battery door closed. If it is difficult to close, the bat
tery is in backwards.
The battery life will be affected by the amount of phan
tom power supplied to any microphones that require
it. A high drain 48 volt microphone can shorten battery
life by 40% or more. A light drain 18 volt microphone
will make little or no difference in battery life. The only
way to be sure is to test the transmitter and microphone
combination with a brand new battery.
CAUTION: Lithium batteries will expand and
swell if allowed to go into a deep discharge.
Battery Compartment Action
Be sure to remove them as soon as the battery
is depleted. Stuck lithium batteries can be
avoided by removing the label wrapping
around the battery before use. This will allow
the battery to swell but will still leave enough
room in the compartment for the battery to be
removed normally.
Rio Rancho, NM
11