Charging programs, Connect the cables, 12v 24v – CTEK MXTS 70 User Manual
Page 4
6 • EN
5
3
4
ChARGING PROGRAMS
Choose program by pressing the MODE-button.
Adjust parameters according to "CHARGING" (6–8).
Press START/PAUSE button to start the selected program.
The table explains the different Charging Programs:
Program
Battery Size
(Ah)
Explanation
Temp range
NoRmAl
40–1500Ah
20–750Ah
Use for WET and MF batteries.
-20°C–+50°C
(-4ºF–+122ºF)
Ca/Ca
40–1500Ah
20–750Ah
Use for Ca/Ca batteries. Use Ca/Ca-program to maximize charge with
minimum loss of fluid. Including RECOND step. Recond your battery once
per year and after deep discharge to maximise lifetime and capacity.
-20°C–+50°C
(-4ºF–+122ºF)
AGm/GEl
40–1500Ah
20–750Ah
For AGM and GEL batteries which are recommended to receive lower
voltage charge.
-20°C–+50°C
(-4ºF–+122ºF)
AGm PoWER
40–1500Ah
20–750Ah
Use for AGM batteries which are recommended to receive higher voltage
charge.
-20°C–+50°C
(-4ºF–+122ºF)
SuPPly
40–1500Ah
20–750Ah
Use as 12V/24V power supply or use for float maintenance charging when
100% capacity of the battery is required. Supply program activates step 7
without time or voltage limitation. Supply program enables the charger to
deliver 70A/12V or 35A/24V for 30 seconds.
-20°C–+50°C
(-4ºF–+122ºF)
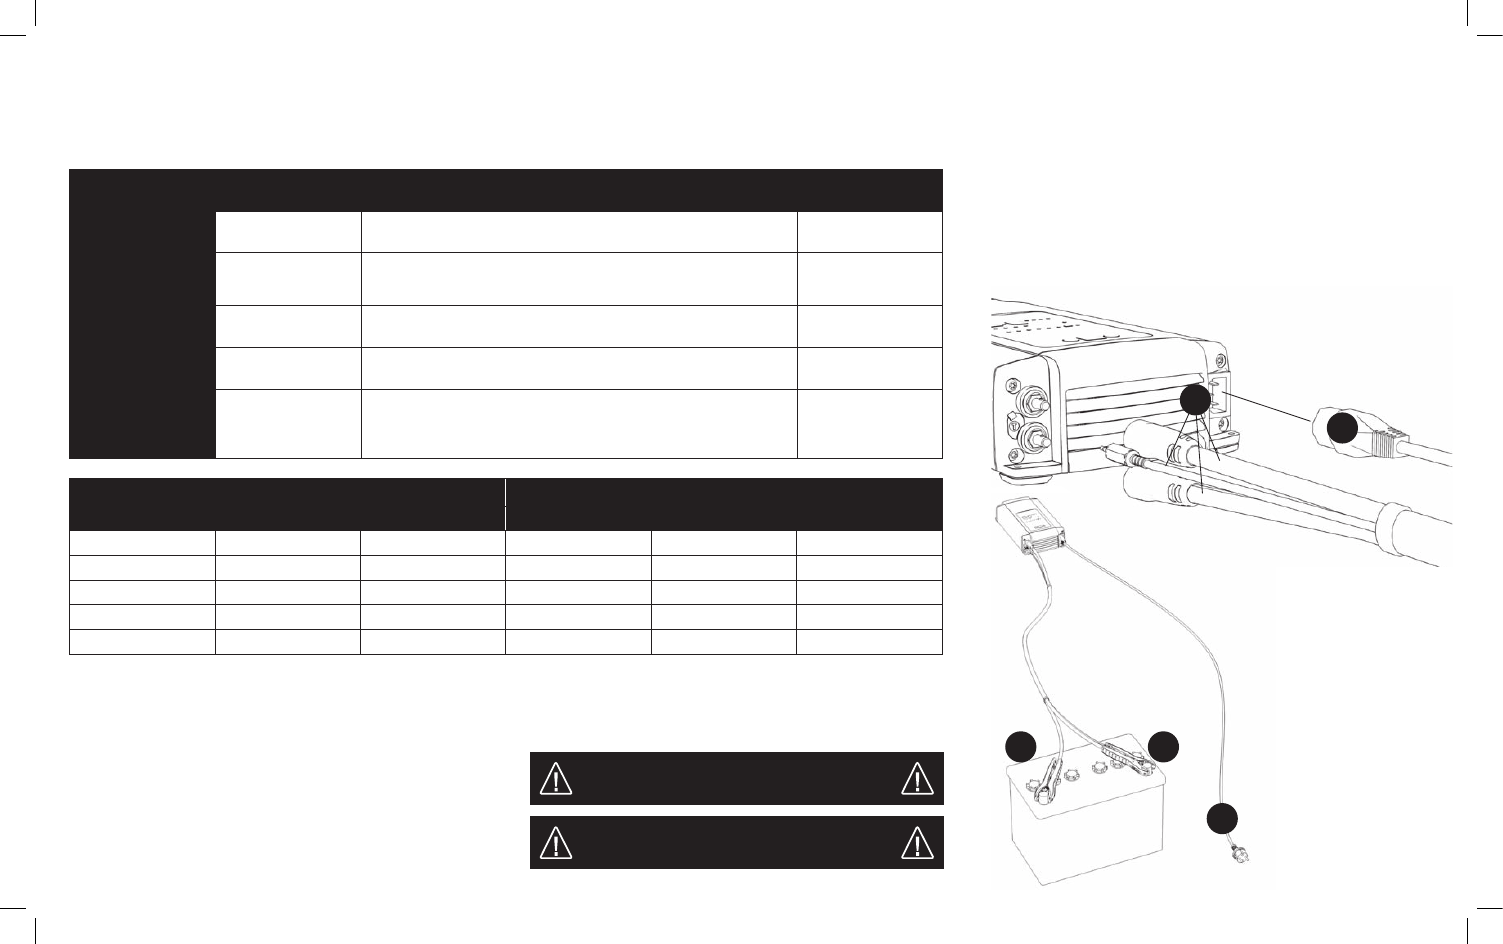
CONNECT ThE CABLES
If the battery clamps are incorrectly connected, the reverse polarity protec-
tion will ensure that the battery and charger are not damaged.
1. Connect the battery cable, including the temperature sensor, to the
charger
2. Connect the mains cable to the charger
3. Connect the red clamp to the battery´s positive pole.
4. Connect the black clamp to the vehicle chassis remote from the fuel pipe
and the battery.
5. Connect the charger to the wall socket
6. Disconnect the charger from the wall socket before disconnecting the
battery
7. Disconnect the black clamp before the red clamp
WARNING!
Risk for short circuiting the battery cables. Connect charger cables
to the charger before connecting the battery
WARNING!
Risk for electrical shock if touching positive and negative terminals
when charging
1
–
+
–
+
2
12V
24V
Current
Battery size Min
Battery size Max
Current
Battery size Min
Battery size Max
20A
40Ah
100Ah
10A
20Ah
50Ah
30A
60Ah
150Ah
15A
30Ah
75Ah
40A
80Ah
200Ah
20A
40Ah
100Ah
50A
100Ah
-
25A
50Ah
-
70A*
100Ah
-
35A*
50Ah
-
• Using higher current than recommended may result in batteries not being
completely charged.
•Using lower current than recommended will prolong the charging time.
• The currents are the maximum recommended current for battery charg-
ing. If a parallel consumer is connected then the current setting could be
increased with this current value.
• Some battery manufacturer could recommend different values. Please
check with the manufacturer if uncertain. The main recommendations are
that Gel batteries should be charged in the lower current range, Power
AGM’s in the upper range and most other battery types in the mid-range.
*) 70/35A Could only be selected for Supply program
Some vehicles may
have positively
earthed batteries
3. Connect the black
clamp to the battery´s
negative pole.
4. Connect the red clamp
to the vehicle chassis
remote from the fuel
pipe and the battery.
7. Disconnect the red
clamp before the black
clamp.
20015126D Manual MXTS70, All languages, Print file 003.indd 6
2011-10-11 13:01:30