Hydrotech Precision-PWS 8-8 OWNERS GUIDE User Manual
Page 57
57
7.
Remove the drain elbow assembly and ball valve assembly using a 12”
adjustable wrench. Save this to reinstall as part of the PWS AED-1.
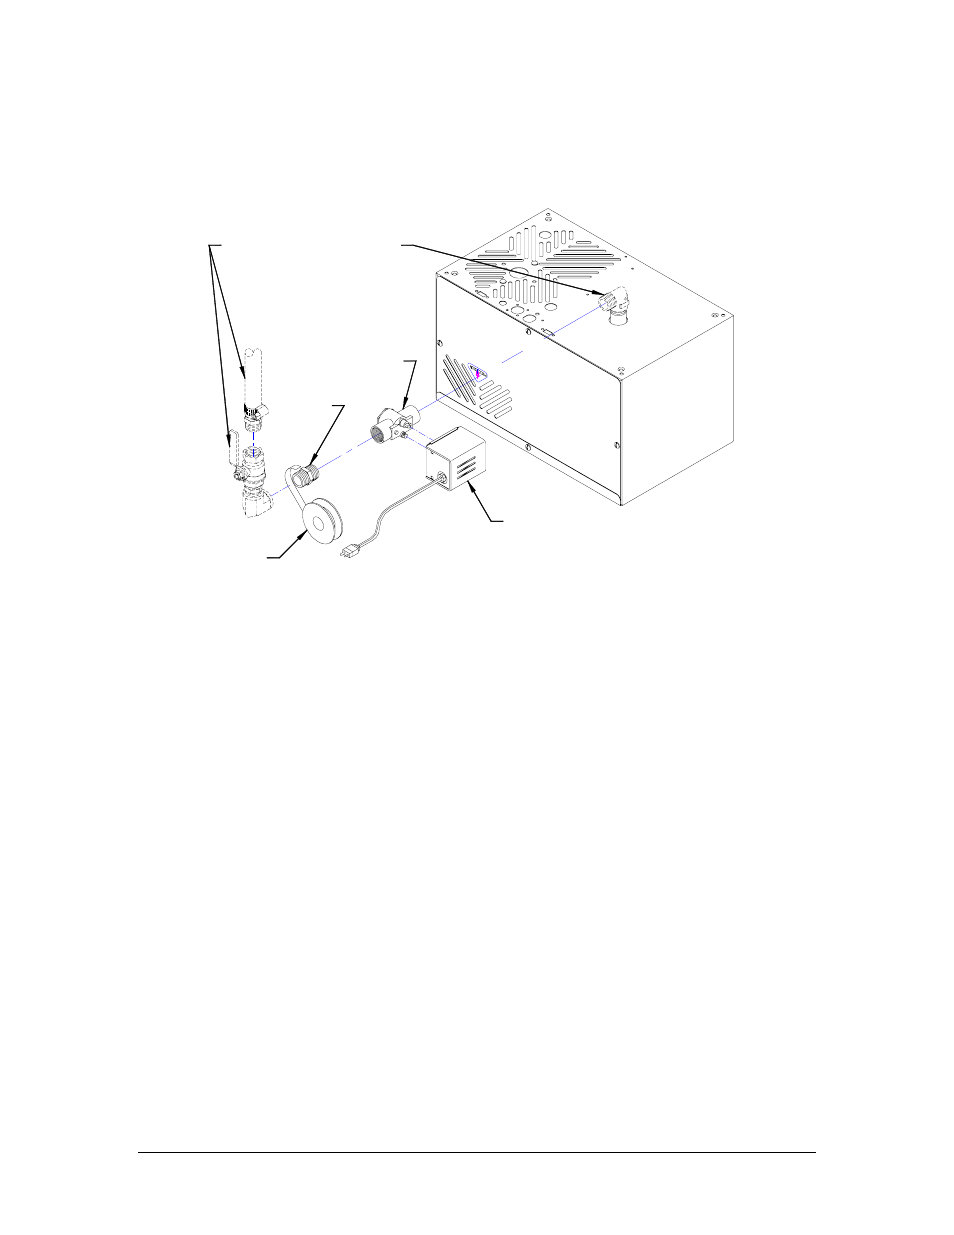
FROM THE EXISTING
MANUAL DRAIN VALVE
VALVE BODY
TEFLON TAPE
NIPPLE
VALVE
ACTUATOR
PWS AED-1 Plumbing Diagram
8.
Refer to the PWS AED-1 Plumbing Diagram above. Use Teflon tape on
all fittings to seal threads. Thread the Valve Body to the existing drain
elbow. An arrow on the valve indicates the direction of flow. Flow is from
the water distiller head down to the floor drain.
9.
Tighten the valve using a 10” adjustable wrench or a 1-1/4” open end
wrench so that the pins for the motor assembly box are facing the lid side
of the water distiller head.
10.
Install a ¾” MPT Close Nipple into the valve using a 10” adjustable
wrench.
11.
Attach the drain elbow and ball valve assembly that was initially removed.
Attach the barbed coupler onto the ball valve and tighten.
12.
After checking that all fittings are tight, return the water distiller head to the
upright position and reinstall on the charcoal filter canister and storage
tank. Reconnect the control cable plug on the storage tank to the control
cable receptacle on the bottom of the water distiller head by turning the
plug until the splines lock and then turn the locking ring until finger tight.