Hydrotech AP1 (115V) Air Pump & Retention Tank Kit User Manual
Page 4
3
SECTION 3: ASSEMBLY OF CHECK VALVE IN AIR PUMP
1.
Remove side 1/4” plug from outlet port (check valve port).
2.
Install check valve into outlet port. Arrow and flow should point away from Air
Pump toward injection point. See Figure 4.
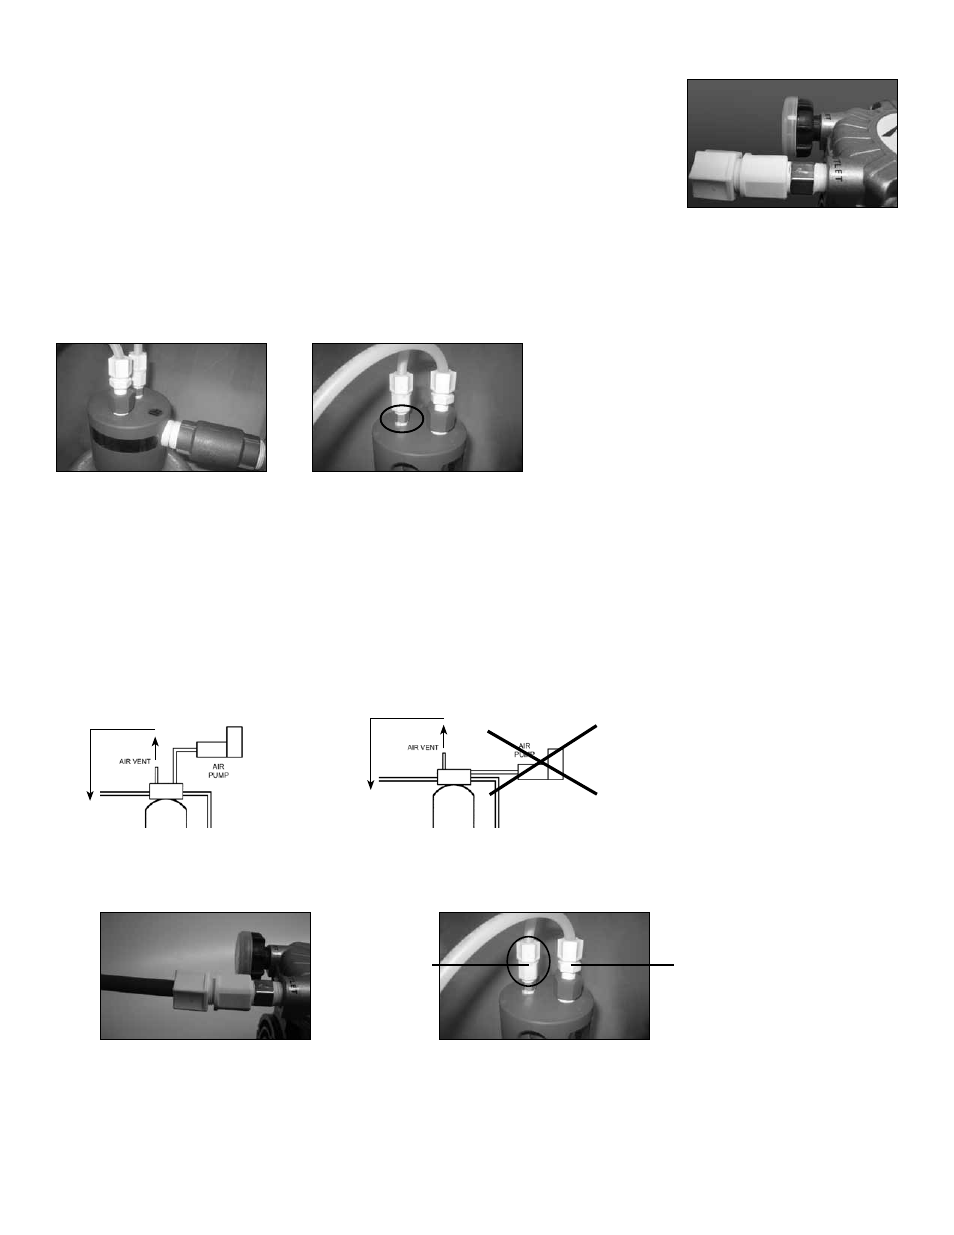
SECTION 4: ASSEMBLING RETENTION TANK
1.
Use teflon tape on male thread connections.
2.
Install sch 80 nipple into inlet side of vent head / diffuser. See Figure 5.
3.
Install check valve onto sch 80 nipple. See Figure 5.
4.
Install check valve into vent head / diffuser. Arrow and flow should point into retention tank. See Figure 6.
5.
Install air vent / shut off into vent head / diffuser. See Figure 6.
SECTION 5: INSTALLATION OF AIR PUMP
1.
Installer may choose to:
a) Secure air pump with tank feet
b) Mount on shelf
c) Suspend with straps
d) Mount on back plate of the Fleck 2510 control valve
2.
Pump must be installed above the injection point (see Figure 7). Compressed air will create condensate.
Mounting above the injection point allows condensate to flow down toward injection point. This will help reduce
moisture build-up from back flowing into air pump.
3.
Install a tubing connector on each check valve (at injection point and air pump). See Figures 9 and 10 below.
4.
Connect tubing from air pump to injection point.
5.
Ensure an Air Gap (not included) is installed at the lower end of the drain tubing. This will prevent back flow.
6.
Tighten all fittings making sure not to over-tighten.
7.
Turn water on. Check for leaks.
Figure 4
Figure 5
Figure 6
Figure 9
Figure 10
To Drain
From Air
Pump
Figure 7
To Drain
Figure 8
To Drain