Hellwig Sway Bar 7891 User Manual
Page 2
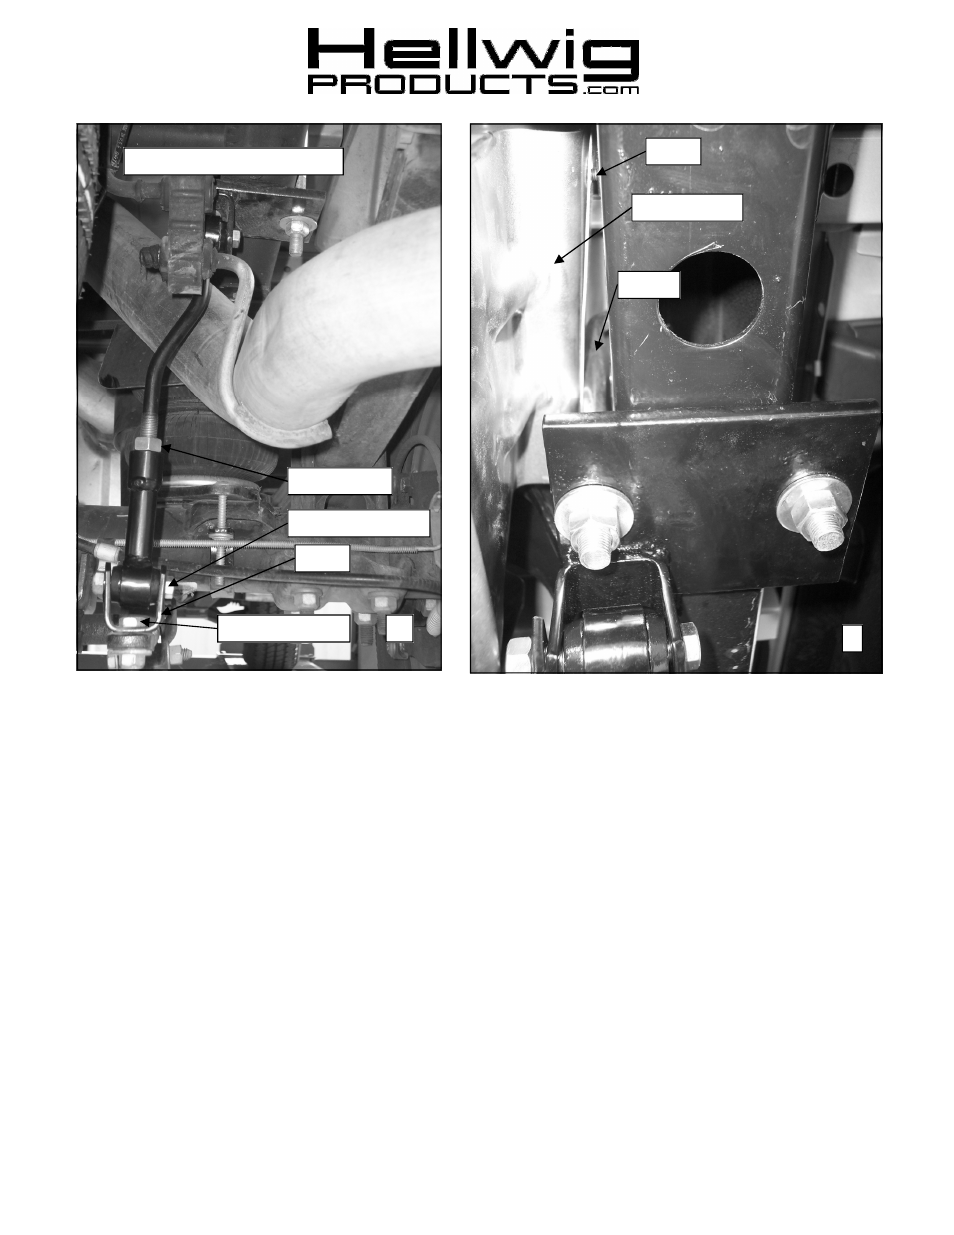
7. Attach clevis to end of sway bar with 1/2 x1-1/2” bolt, thick washer and locknut as shown in photo (3).. Torque to 50 ft-lb.
8. Assemble end links as shown in photos with 9/16” nut on the threaded half. Leave loose for adjustment. Insert hourglass
bushing first and then sleeve into the loops of the end link assembly. Lubricate the bushing and sleeve to ease assembly
9. Remove the 2 screws attaching the spare tire heat shield to the passenger side frame rail. Save for use later.
10. Locate existing spare tire crossmember on vehicle frame. Place square U-bolt over frame rail just behind crossmember with
legs of U-bolt pointing downward. On passenger side the inside leg of the U-bolt will fit between the heat shield and the rail
as shown.
11. Insert legs of U-bolt into slotted holes of the hanger brackets. Install hanger brackets with clevis inboard of frame rail and
toward front of vehicle as shown in photo 3. Attach using 1/2” lock nuts. LEAVE LOOSE for adjustment later.
12. Place end link into clevis with offset inboard. Attach end link to clevis with 7/16 X 2 1/4” bolt on driver side On passenger
side use the 7/16 x 2-1/2” bolt to attach end link and offset bracket to clevis as shown in photo 5 to space the heat shield
away from the end link. LEAVE LOOSE for adjustment later.
13. Attach end links to clevis on sway bar with 7/16 X 2-1/4” bolts and locknuts as shown on photo 3.
14. With sway bar loosely mounted, work bar back and forth in D-shaped poly bushings to center bar.
3
Clevis
9/16” Jam Nut
7/16 X 2-1/4” Bolt
1/2 X 1-1/2” Bolt
7891(R-7891)
07/09/10
4
Heat Shield
Screw
U-bolt
Note: Heat shield not shown