Hellwig Sway Bar 7868 User Manual
Page 2
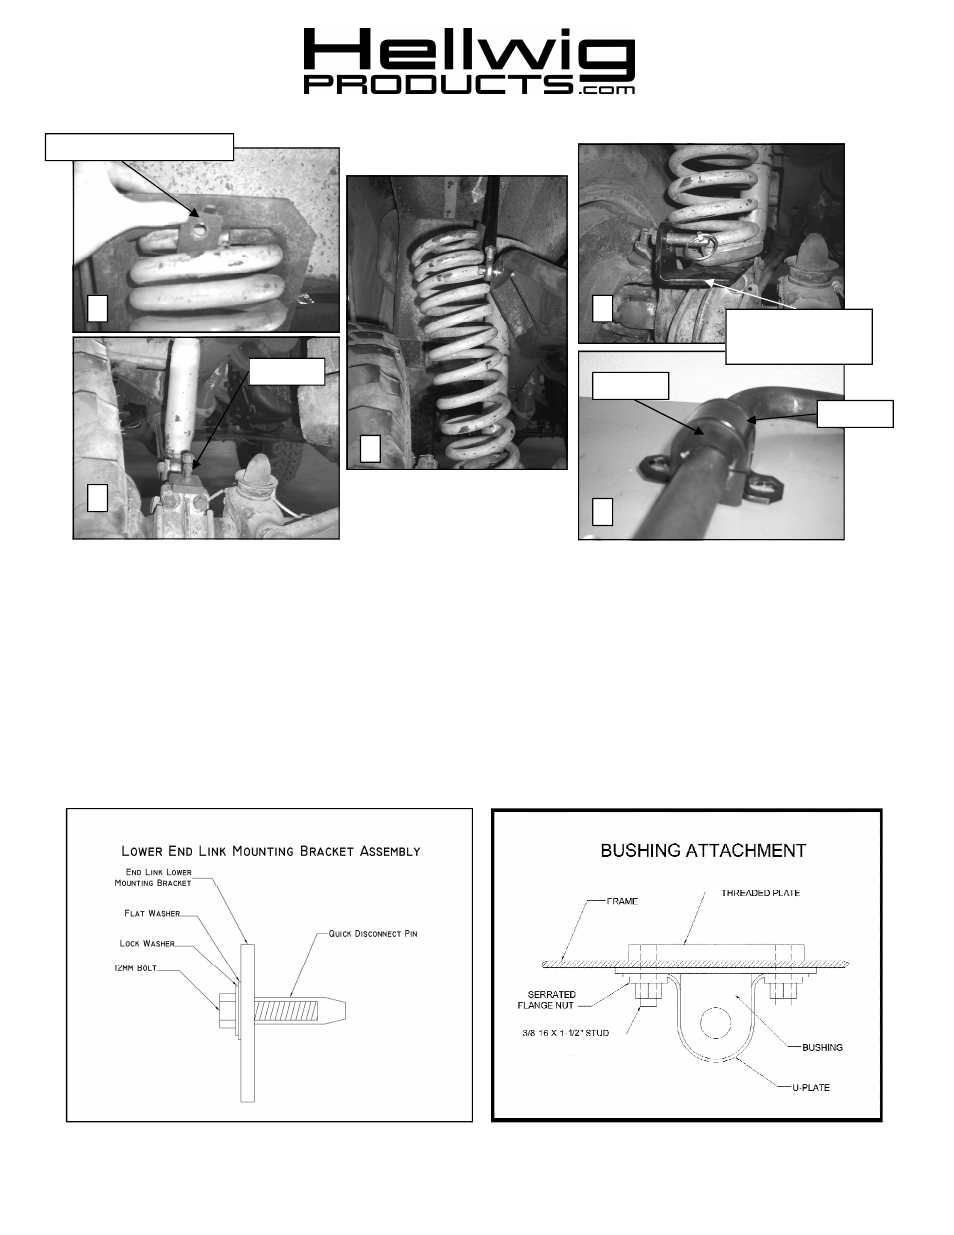
1.
With the vehicle sitting on the ground, remove the upper retaining clip from your coil spring by removing the two bolts. See
PHOTO 2.
2.
Jack the vehicle up by the frame until the wheel is at full droop,
support the frame with jack stands, pry the top of the coil
out of the upper coil bucket. See PHOTO 3.
3.
Remove the two bolts through the lower retaining plate to the radius arm from the center of the spring. Remove the entire
coil from the vehicle. See PHOTO 4.
4.
Assemble the lower end link mounting bracket by bolting the end link quick disconnect pin to the end link plate using the
12mm bolt and both the flat and lock washer according to the diagram below.
5.
Place the lower end link plate on the top of the radius arm as shown in PHOTO 5 with end link tab outboard. Line up the
two holes. Reattach the coil following the previous instructions in reverse with the lower end link mounting plate sandwiched
between the coil bucket and the torsion bar. We have included longer radius arm bolts and washers to compensate for the
additional width of the mounting plate. See PHOTO 5.
6.
Remove the jack stands and lower the vehicle back on its on weight and then repeat the previous steps to install the lower
559-734-7451 800-367-5480 FAX 559-734-7460
7868 (R-7868)
07/13/2011
4
3
2
5
6
Upper Retaining Clip
Lower End Link
Mounting Plate
U-Plate
Bushing
Bolts