Chapter 2 : connecting – Analog Way RKD500-T User Manual
Page 2
REMOTE KEYPAD (RKD500-T/RKD500)
PAGE 2
EDITION: 01/07
1-4. FRONT PANEL DESCRIPTION (continued)
FREEZE :
Freezes the MAIN or PREVIEW output (depending on the PREVIEW / MAIN button).
BLACK
1
:
Display a black screen on the MAIN or PREVIEW output (depending on the PREVIEW /
MAIN button).
Button turns ON = FREEZE activated.
Button blinking quickly = BACK activated.
NOTE: -The FREEZE will be inactivated after another push on the FREEZE button.
-THE BLACK will be inactivated after another push on the BLACK button or after
another pre-selection (PREVIEW).
FRAME : Frames
selection.
Button turns ON = FRAME displayed on the MAIN output.
Button blinking slowly = FRAME displayed on the PREVIEW output.
PIP ADJUST.
WINDOW :
PIP window adjustment (Button turns ON).
SOURCE
1
:
PIP source adjustment (Button blinking quickly).
POS :
Position adjustment of the PIP window or PIP source (Button turns ON).
SIZE
1
:
Size adjustment of the PIP window or PIP source (Button blinking quickly).
H :
Horizontal adjustment of the PIP or logo : Adjust with the knob (Button turns ON).
V
1
:
Vertical adjustment of the PIP or logo : (Adjust with the knob ) (Button blinking quickly).
LOGO ADJUST.
#1 :
Logo #1 selection for adjusting the position on the MAIN or PREVIEW output (depending on
the PREVIEW / MAIN button).
#2 :
Logo #2 selection for adjusting the position on the MAIN or PREVIEW output (depending on
the PREVIEW / MAIN button).
ON/OFF
1
:
Displays ON or displays OFF the logos # 1 & 2 on the MAIN or PREVIEW output (depending
on the PREVIEW / MAIN button).
VOLUME :
Volume adjustment of the MAIN output (Adjust with the knob ).
Button turns ON = Volume adjustment in progress.
MUTE
1
:
Audio mute of the MAIN output (Adjust with the knob).
Button blinking slowly = Mute activated.
Button turns OFF = Mute inactivated.
CONTROL
Allows to scroll thru the different menus (in Control mode).
EXIT - MENU:
Switches between Status and Control mode.
ENTER:
Validates a selected item.
1
This function can be selected only when Fn is activated.
1-5. REAR PANEL DESCRIPTION
DC-IN:
DC power connector.
RS-232: RS-232
communication
port.
LAN:
Optional LAN communication port.
Chapter 2 : CONNECTING
2-1. CONNECTING THE RKD500 WITH THE RS-232 PORT
c Turn OFF the controlled device (rear panel switch of the Octo / Quattro).
d Connect the RS-232 connector (DB9 female) of the controlled device to the DB9 male connector of the REMOTE
KEYPAD with the supplied DB9 M/F cable.
e Turn ON the controlled device (rear panel switch).
NOTE: The REMOTE KEYPAD is powered by the contolled device via its DB9 (RS-232) connector.
- Speed transmission: 9600 bauds, 8 data bits, 1 stop bit, no parity bit, no flow control.
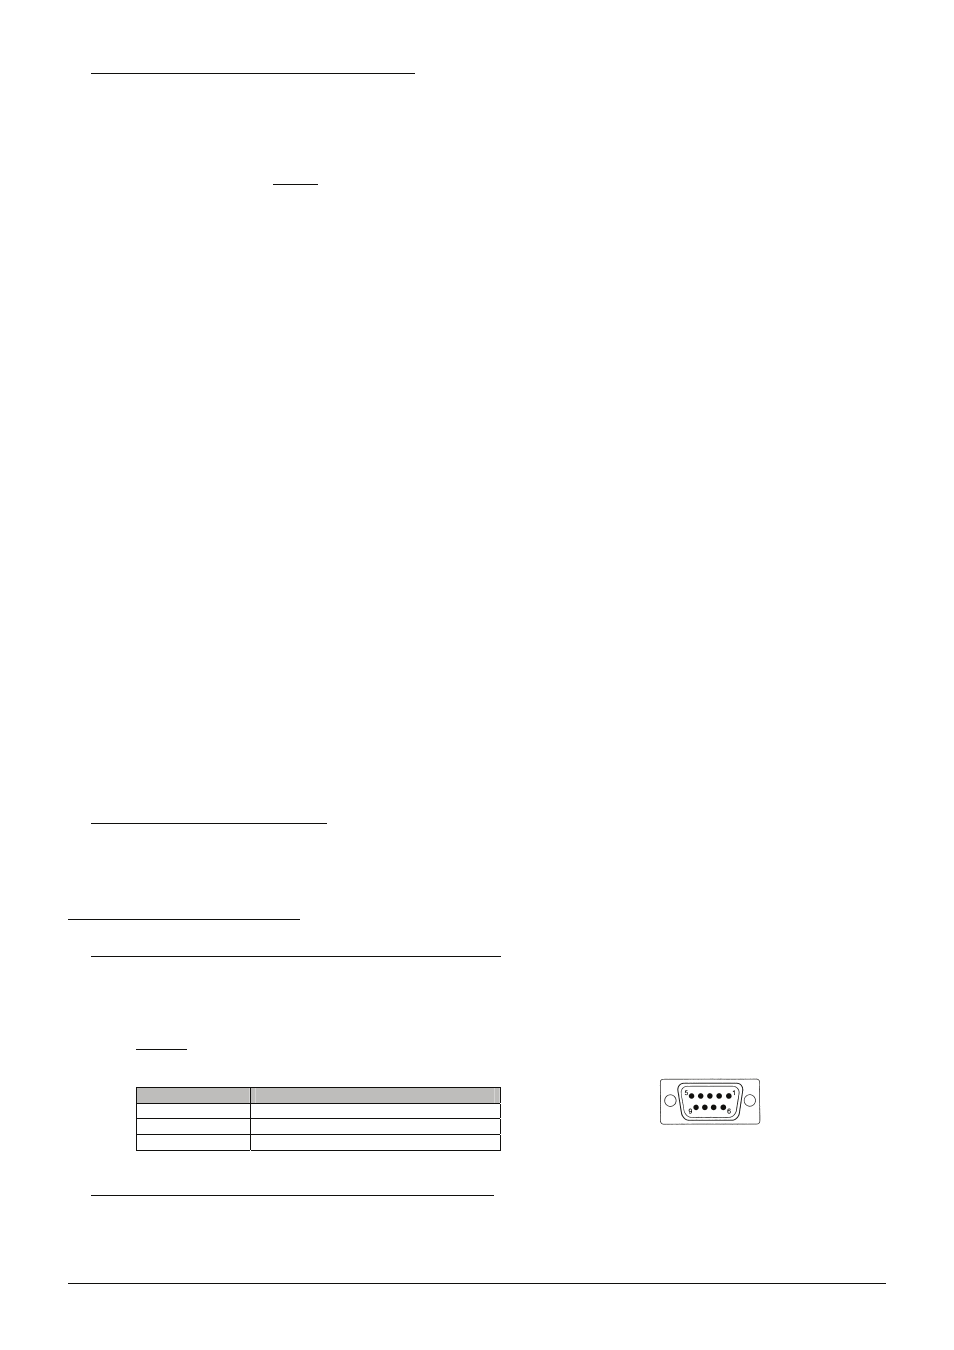
- Pin-out:
PIN #
FUNCTIONS
2
TRANSMIT DATA (Tx)
3 RECEIVE
DATA
(Rx)
5 GROUND
(Gnd)
2-2. CONNECTING THE RKD500 TO A NETWORK (LAN)
c Connect the power supply to a power outlet and to the DC-IN connector (rear panel).
d Connect the REMOTE KEYPAD to your network according to your installation.
DB9 female (Rear panel of
the controlled device)