Installation – CHIEF NW1D User Manual
Page 4
NW1 Racks Doors
Installation Instructions
4
INSTALLATION
NOTE:
The door may be attached on either the left or right of
the rack.
IMPORTANT ! : If the door is to be attached with the
handle on the right side, the grounding wire already
installed on the door must be removed and reinstalled on
the opposite end of the door before the door is installed.
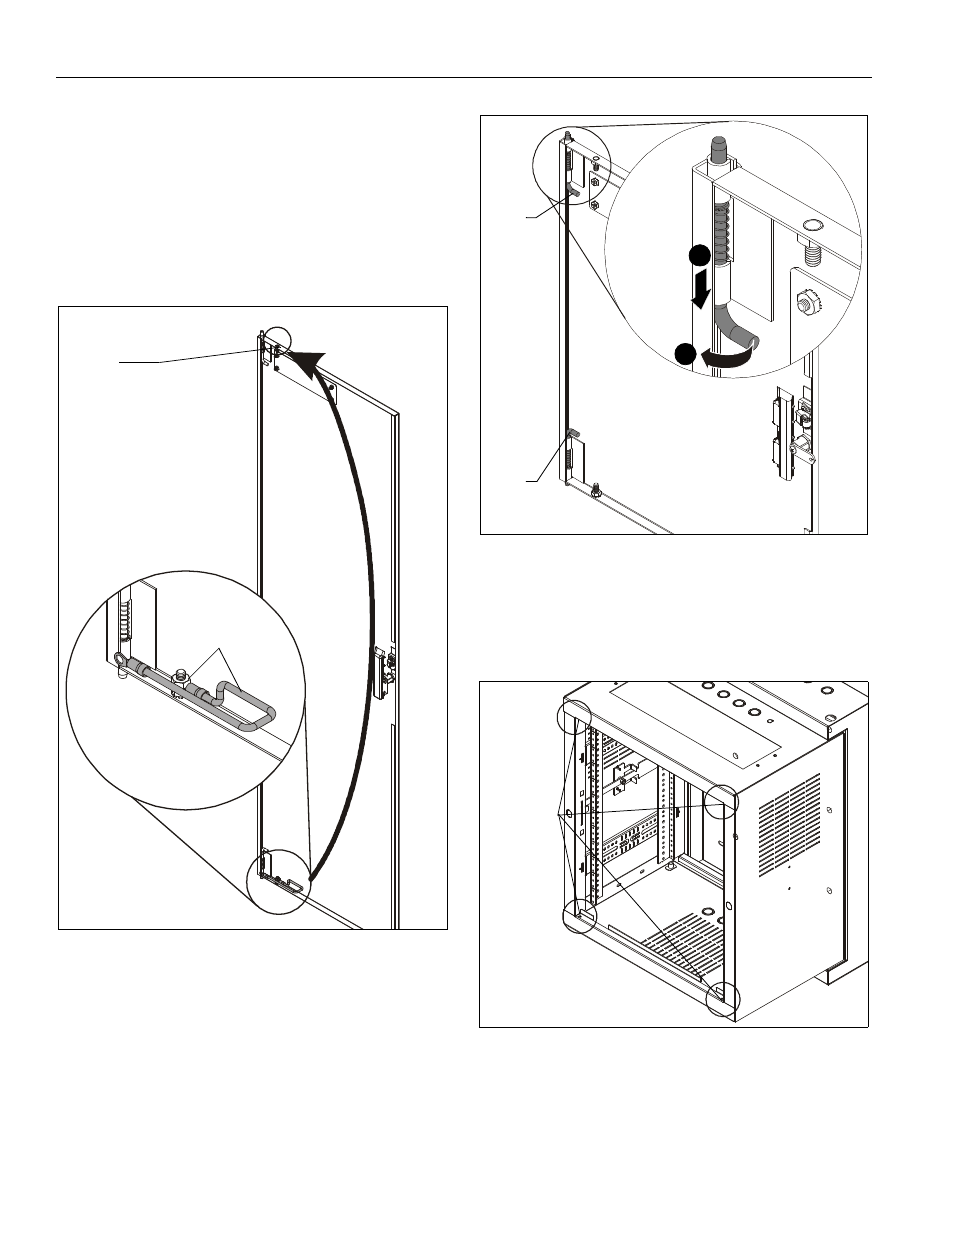
The grounding wire should be on the BOTTOM of the
installed door. (See Figure 1)
Figure 1
1.
Rotate two spring handles (one at bottom and one at top) on
inside of door. (See Figure 2)
Figure 2
2.
Pull down on upper spring handle, and push up on lower
spring handle. (See Figure 2)
3.
Insert door (A) into rack, aligning the spring handle ends
with the holes in the top and bottom of rack. (See Figure 3)
Figure 3
4.
Push spring handle ends into rack, and re-latch spring
handles.
Move to
grounding
screw
Remove nut and
move grounding
NOTE: Door will
be flipped before
installation.
(view from back of door)
wire
Upper
spring
handle
Lower
spring
handle
1
2
Door
attachment
holes