CHIEF KSA1017 User Manual
Page 5
Installation Instructions
KSA1017
5
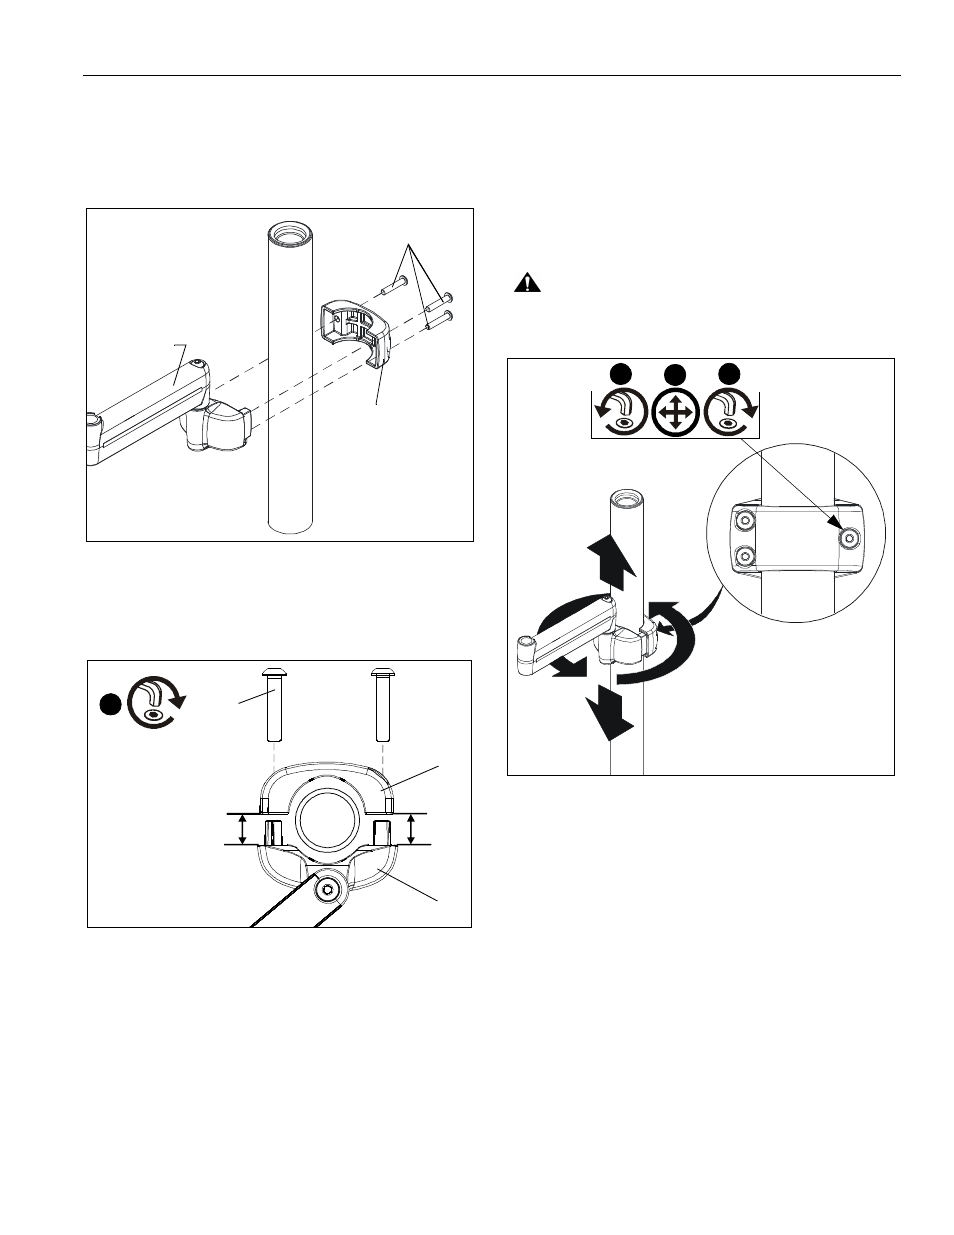
8.
Place pole mount clamp (A) with swing arm against pole in
approximate mounting location. (See Figure 4)
9.
Loosely fasten three 1/4-20 x 1-1/4" button head cap screws
(C) into pole clamp back (B) and place against pole aligning
with pole clamp front (A). (See Figure 4)
Figure 4
IMPORTANT ! : Equally tighten screws (C) against pole
clamp front (A) and the pole clamp back (B). (See Figure 5)
Figure 5
10. Secure pole clamp back (B) to pole clamp front (A) and pole
by tightening three 1/4-20 x 1-1/4" button head cap screws
(C) using 5/32" hex key. (See Figure 5)
11. Reattach display following instructions included with the
mount.
Adjustments
The KSA-1017 allows for both vertical and horizontal position
adjustment on pole.
1.
Loosen single (right) rear button head cap screw (C) on pole
clamp back (B). (See Figure 6)
2.
Move KSA-1017 to desired position. (See Figure 6)
3.
Tighten single (right) rear button head cap screw (C) on
pole clamp back (B).
CAUTION:
ALWAYS use two people when adjusting
KSA-1017 position.
Figure 6
(C) x 3
(B)
Swing arm with
(A) attached
(C) x 3
(B)
(A)
Keep equal
distance between
mount and
clamp when
tightening
10
2
1
3