CHIEF KSA1014 User Manual
Page 4
Model: KSA-1014
Installation Instructions
4
MOUNT INSTALLATION
Existing Mount Preparation
If the KSA-1014 Accessory is being installed on an
existing Chief K- Series static or height adjustable mount
the existing mount needs to be modified before
installation.
To prepare the existing mount:
1.
Disconnect all cables and wiring from display.
1.
Remove display, if present, from existing mount
following the instructions supplied with mount.
2.
Loosen button head cap screw securing display end
of mount to mount arm using a 5/32" hex key.
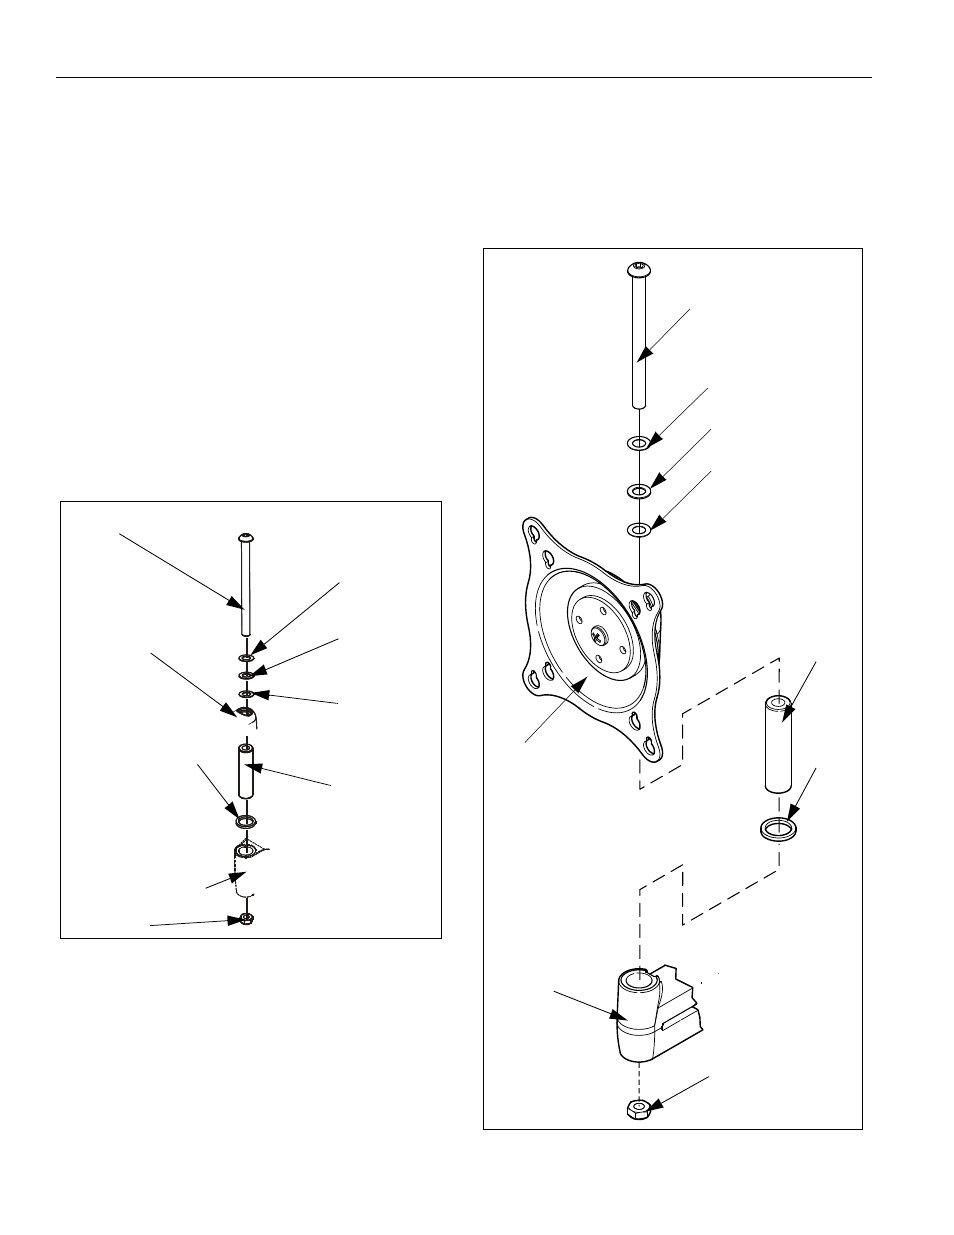
3.
Uninstall button head cap screw, one nylon washer,
and two flat washers from swing arm and set aside for
reuse. (See Figure 2)
4.
Remove large nylon washer, pivot pin, and Nylock nut
from existing mount base and set aside for reuse.
(See Figure 2)
Figure 2: Prepare Existing Mount
Centris Cup Installation
To install the KSA-1014:
1.
Place pivot pin (30) into mount end. (see Figure 4)
2.
Place nylon washer (20) on top of mount end.
3.
Assemble two spacers (70) and one UHMW washer
to BHCS (40 or 50).
4.
Install threaded end of BHCS (40 or 50) through
Centris Head (10), pivot pin (30) Nylon Washer (20)
and through mount end.
5.
Slide Nylock nut (60) up into bottom of mount end.
6.
Hold Nylock nut (60) in position and thread Nylock nut
(60) onto bottom of BHCS (40 or 50). (See Figure 3)
Figure 3: Centris Head Installation
Nylock Nut
Flat Washer
Swing Arm or other
Large Nylon Washer
Existing Mount Base
Flat Washer
button head cap screw
Nylon Washer
Pivot Pin
mount end.
10
20
30
40 or 50
60
70
80
Existing Mount
70