Display installation – CHIEF STLU User Manual
Page 7
Installation Instructions
STLU
7
NOTE:
Prior to installing display, the rotation radius should be
adjusted. Once the display is connected, it will no
longer be possible to adjust the rotational stop without
removing the display from the mount.
9.
Use the 5/32" security hex key (W) to loosen rotational stop
adjustment screw until desired radius is achieved. (See
Figure 3) and (See Figure 5)
WARNING:
TO REDUCE THE RISK OF BURNS, FIRE,
ELECTRIC SHOCK, OR INJURY TO PERSONS, rotational
stop must be in place prior to display installation! If stop is not
in place, the cables may be damaged if the display is over-
rotated! Always make sure rotational stop is in place before
proceeding with installation!
Figure 5
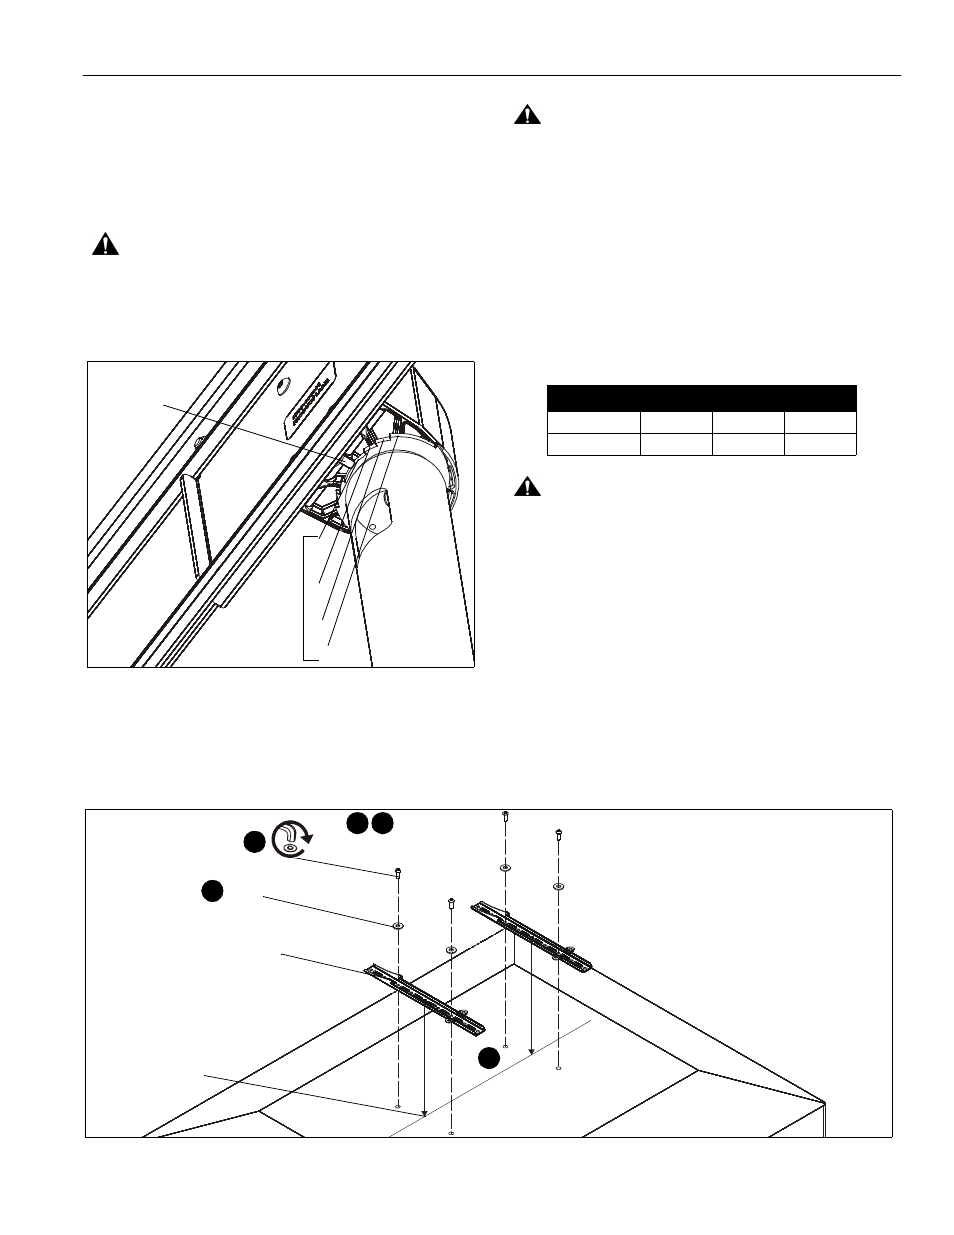
Display Installation
1.
Lay display face down on protective surface.
CAUTION:
Using screws of improper diameter may
damage your display! Proper screws will easily thread into
display mounting holes.
2.
Select screw diameter by examining hardware (M-R) (8mm,
6mm, 5mm, or 4mm) and comparing with mounting holes
on display. (See Figure 6)
3.
Select washers:
•
Refer to the Table 1-1 to determine which
washers (S and T) to use for display installation.
NOTE:
No washers are required with installation using M8
diameter screws.
CAUTION:
Using screws of improper length may damage
your display! Proper screws will have adequate thread
engagement without contacting bottom of display mounting
holes.
4.
Select screw length: (for M4 screws only)
•
Using your hand, insert M4x12mm button head
security screw (N) through vertical interface
bracket (D), washers (T and U), into display
mounting hole. Do NOT thread screw into hole at
this time.
•
Proper screw length requires base of screw head
to protrude above flat washer a distance equal to
or greater than the screw diameter. If screw
length is inadequate, use M4x16mm screw (P).
Select shortest screw which will protrude the
required distance.
(view from beneath)
rotational stop
adjustment screw
15
30
45
90
rotation
radiuses
Table 1-1: Washer Usage
M4
M5
M6
#10 (T)
X
1/4-20" (U)
X
X
X
Figure 6
center of display
(N-S) x 4, 6 or 8
(T and/or U, if required)
(D) x 2
5
6
2
4
3