Step 5 – Hunter 28573 Frosted Dual Use Bowl Light Kit User Manual
Page 3
asm0001.eps
95420-3.eps
95420-4.eps
Step 2
Steps 3-4
Steps 6-7
1. Disconnect power to the ceiling fan by turning off the circuit breakers
both to the outlet box and to its associated wall switch location.
2. Align the three holes in the gasket with the three holes in the switch hous-
ing mounting plate. Partially install two screws.
3. Place the keyhole slots in the upper rain shield over the two partially
installed screws and turn the upper rain shield counter clockwise.
4. Place the keyhole slots in the upper switch housing over the two partially
installed screws and turn the upper switch housing counter clockwise.
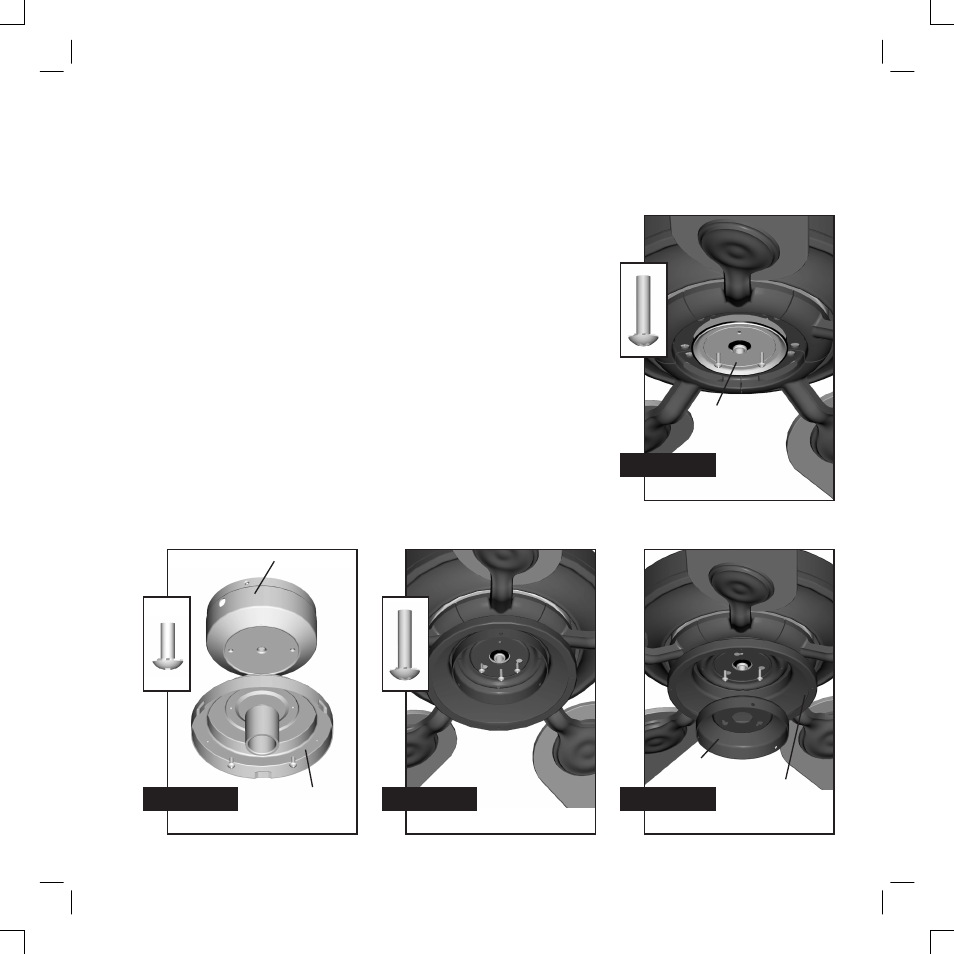
5. Install a screw into the third hole. Securely tighten all three screws.
6. Feed the two wires from the fitter through the center hole in the lower
switch housing.
7. Attach the fitter to the lower switch housing with the two screws. Secure-
ly tighten the two screws. WARNING: Improper installation could cause
the light fixture to fall.
8. Remove the wire nut from the black/white wire in the lower switch hous-
ing. Use this wire nut to connect the black/white wire from the lower
switch housing to the black wire from the light fixture. Remove the wire
nut from the white wire in the lower switch housing. Use this wire nut to
connect the white wire from the lower switch housing to the white wire
from the light fixture.
95420-5.eps
Step 5
Gasket
Upper
Rain
Shield
Upper Switch
Housing
Lower Switch
Housing
Fitter
41770-01.indd
5/17/2005, 5:26 PM
3