Hunter 59031 48 Fantasy Flyer User Manual
Page 9
9
42813-01 • 11/27/13
Hunter Fan Company
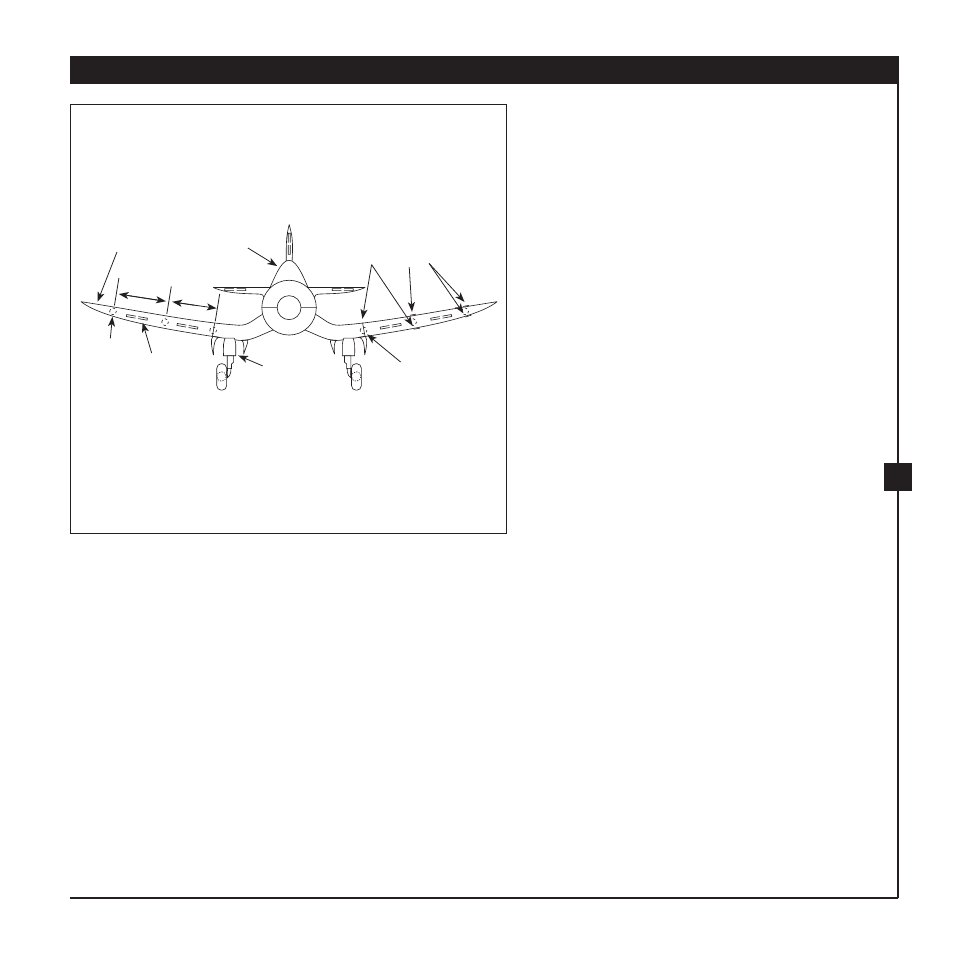
3-15. Turn each wing over and mark the
approximate dimensions on the back side of
the decal.
3-16. Hold each decal in place on the ceiling and
mark the ceiling at each location shown in
Step 3-15. Use the marks on the back of the
decals as a guide.
3-17. Drive
2 metal disk into the ceiling for each
wing using the marks just placed in the
ceiling as a guide. Peel off one side of the
backing on the remaining disks and strips.
3-18. Press the strips onto the decal and the disks
onto the clips just driven into the ceiling.
See Step 3-15.
3-19. Remove the remaining peel-off backing
from all strips and disks. Lift the corner
of the Landing Gear decal carefully and
remove the backing from the two disks
where the wings join.
3-20. Place each wing into position, making sure
you are aligned with the metal disk, and
press into place.
3-21. After the decal has been installed on ceiling,
add two strips of black decal tape over
the
joint between the wing and body of the
plane.
Step 3-15
12”
11”
Disk
Strip
Canopy/Tail
Decal
Mark Ceiling in These
Locations For Each Wing
(Hide Marks Under Wing)
Wing Joint
Line
Landing Gear
Decal
Wing Decal (2)