3 • installing the plane decal - cont – Hunter 59031 48 Fantasy Flyer User Manual
Page 8
8
Hunter Fan Company
42813-01 • 11/27/13
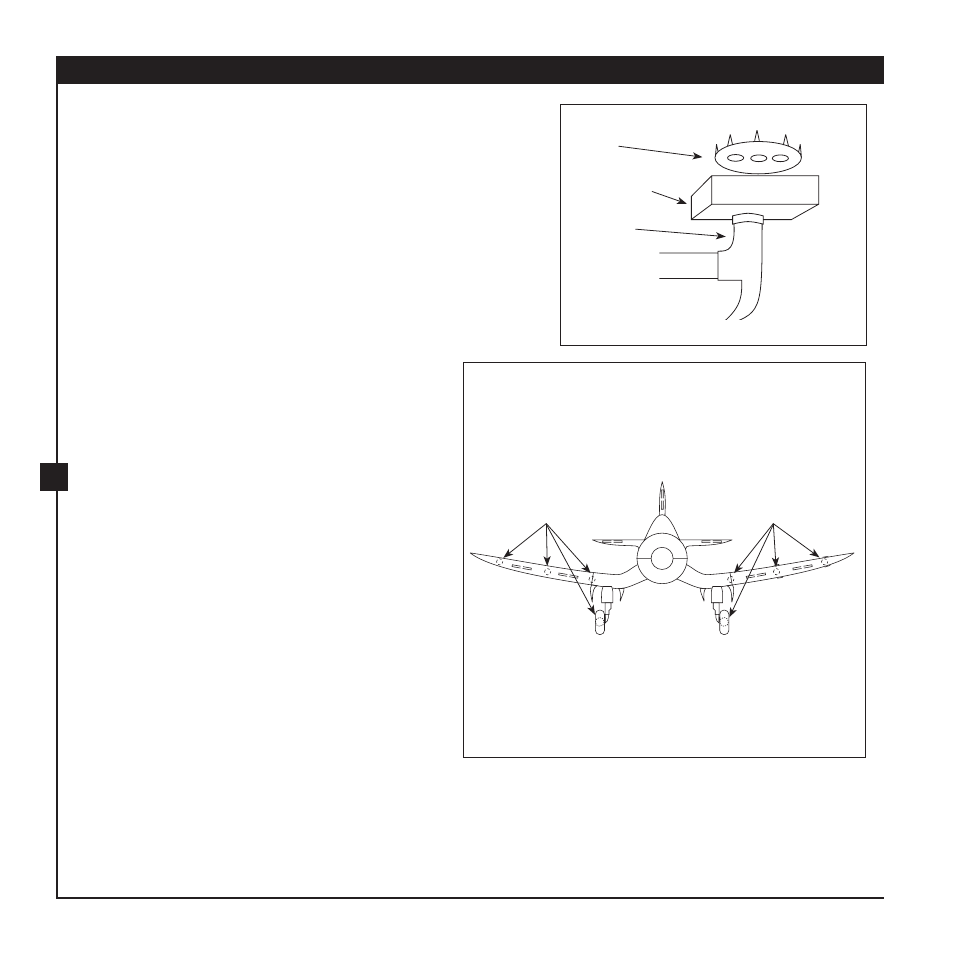
3-6. Loosen the wood screws and remove the
decals.
3-7. Use a
wood block to drive the metal disk into
the ceiling.
Note: Metal Disk will leave a permanent marks in
ceiling
3-8. Locate one metal disk between the two lines
marked for each wheel and center one metal
disk over each line marked where the wings
join the Landing gear decal.
3-9. Add the strips of the pressure sensitive
rectangle tape to the back side of Canopy/
Tail decal. Locate strips then, peel off one
side of the backing and press into place.
3-10. Add a disk of pressure sensitive round tape
to each of the 4 metal disk that have been
driven into the ceiling. Leave the peel-off
backing on the other side of the disks and
strips until instructed to remove.
3-11. Peel the backing from the strips on the
Canopy/Tail decal and from the disks under
the wheels. Do not remove the backing from
the disks where the wings attach.
3-12. Slide the Landing Gear decal back under
the ceiling plate and align corners with lines
marked on tape. Press decal in place at
wheels.
3-13. Slide the Canopy/Tail decal under the ceiling
plate, align with the landing gear decal and
press into place on the ceiling.
3-14. Tighten wood screws securely. Remove the
two pieces of tape that mark the corners.
3 • Installing the Plane Decal - Cont.
Step 3-9
Hammer
Step 3-7
Wood Block
Metal
Disk
Pressure Sensitive
Round Tape
Pressure Sensitive
Round Tape