Hunter 28822 52 Tobago User Manual
Page 16
16
42216-01 • 05/02/12 • Hunter Fan Company
8 • Completing Your Installation With or Without a Bowl Light Fixture (continued)
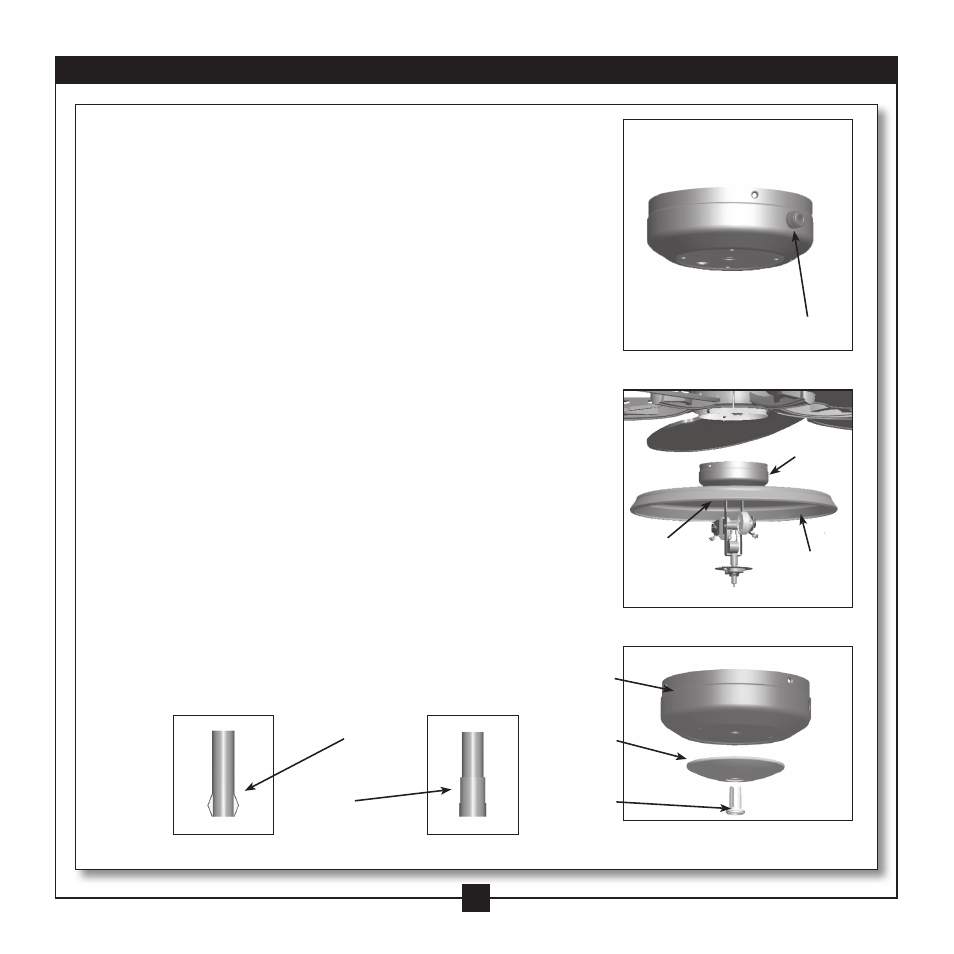
Uninstalling the Light Fixture
8-14. To uninstall the light fixture, first disconnect the plug connectors
between the two black wires and the two white wires located in the
existing switch housing.
8-15. Remove the reverse switch by unscrewing the switch nut on the
outside of the lower switch housing.
8-16. Remove the fan switch by unscrewing the switch nut located under
the light kit shroud.
8-17. Install the reverse switch assembly into the optional lower switch
housing by feeding the pull chain and then the threaded barrel of the
reverse switch through one of the holes in the side of the optional
switch housing. Secure the switch by installing the switch nut on the
outside of the switch housing. Hand tighten the nut in a clockwise
direction until snug.
8-18. Install the fan switch the same way that the reverse switch was
installed in the previous step (8-20).
8-19. Once both switches have been installed in the optional switch
housing, install the dummy terminals (included in the sack parts)
on the two disconnected wires in the lower switch housing.
8-20. The switch housing cap and the plug button should already be
installed in the optional switch housing. If not, install them now.
8-21. Once you have uninstalled the light fixture and installed the
wiring in the optional switch housing, continue with step 8-6.
Male Dummy
Terminal
Female Dummy
Terminal
Step 8-20
Cap
Plug Button
Switch Nut
Optional
Switch
Housing
Step 8-15
Step 8-16
Lower Switch
Housing
Switch
Nut
Shroud