Leaner model grain cart tarp installation – J&M GRAIN CARTS Leaner Setup User Manual
Page 12
STEP - T3.0
STEP - 1.0
STEP - T4.0
-11-
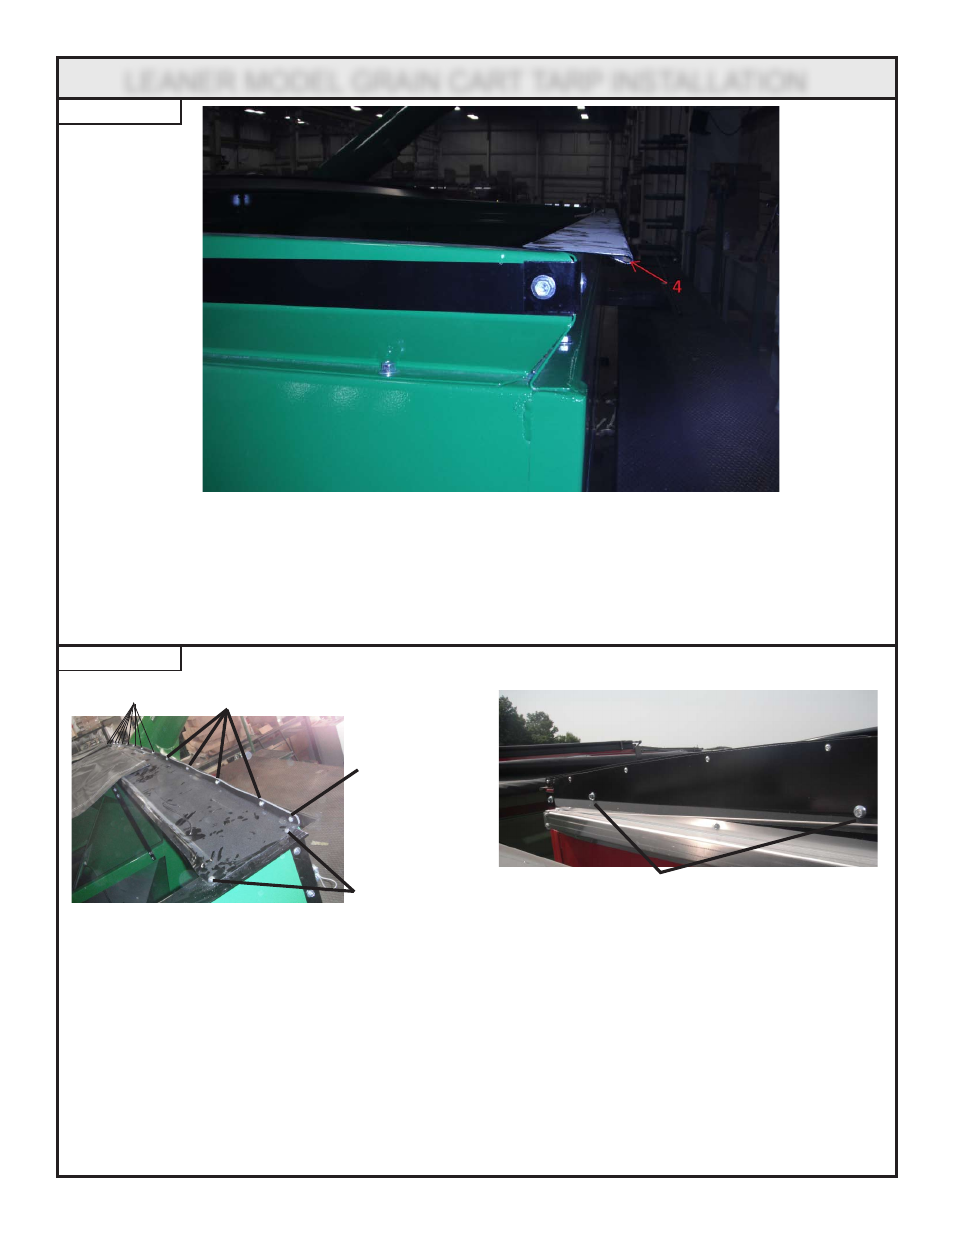
Use a pair of vise grips or extra set of hands to temporarily hold the 2 pieces of drip edge (Detail
#4) to the newly flipped out sideboards with the bolt holes lined up. Bolts in a later step will secure
the drip edge. (The drip edge should be centered from the front to the rear of the cart.) Make sure
that the drip edge is flush to the inside of the sideboard.
Bolt together each sets of the end caps using 1/4”-20 x 1/2” button SKT cap bolts and 1/4”-20 serrated
flange hex nuts. One set of end caps will have a windlip sticking up and the other will be sticking down.
The endcap that has the 1” wind lip sticking up is the front endcap.
Use two 1/4”-20 x 3/4” hex bolts, two 1/4”-20 centerlock hex nuts, four 3/8”-16 x 1” serrated flange hex
bolts and four 3/8”-16 serrated flange hex nuts to attach each of the end caps. The end cap is pre-
drilled, however, 1/4” holes will need drilled through the top of the sideboards and 3/8” holes will need
drilled through the endboards to match the endcaps hole pattern.
1/4” x 1/2”
1/4” x 5/8”
1/4” x 5/8”
Drilled and installed
after end cap is
bolted to Grain Cart.
1/4” x 3/4”
3/8” x 1”
LEANER MODEL GRAIN CART TARP INSTALLATION