Generic pid controller calibration – MoTeC DBW-4 User Manual
Page 11
MoTeC DBW-4
11
Introduction
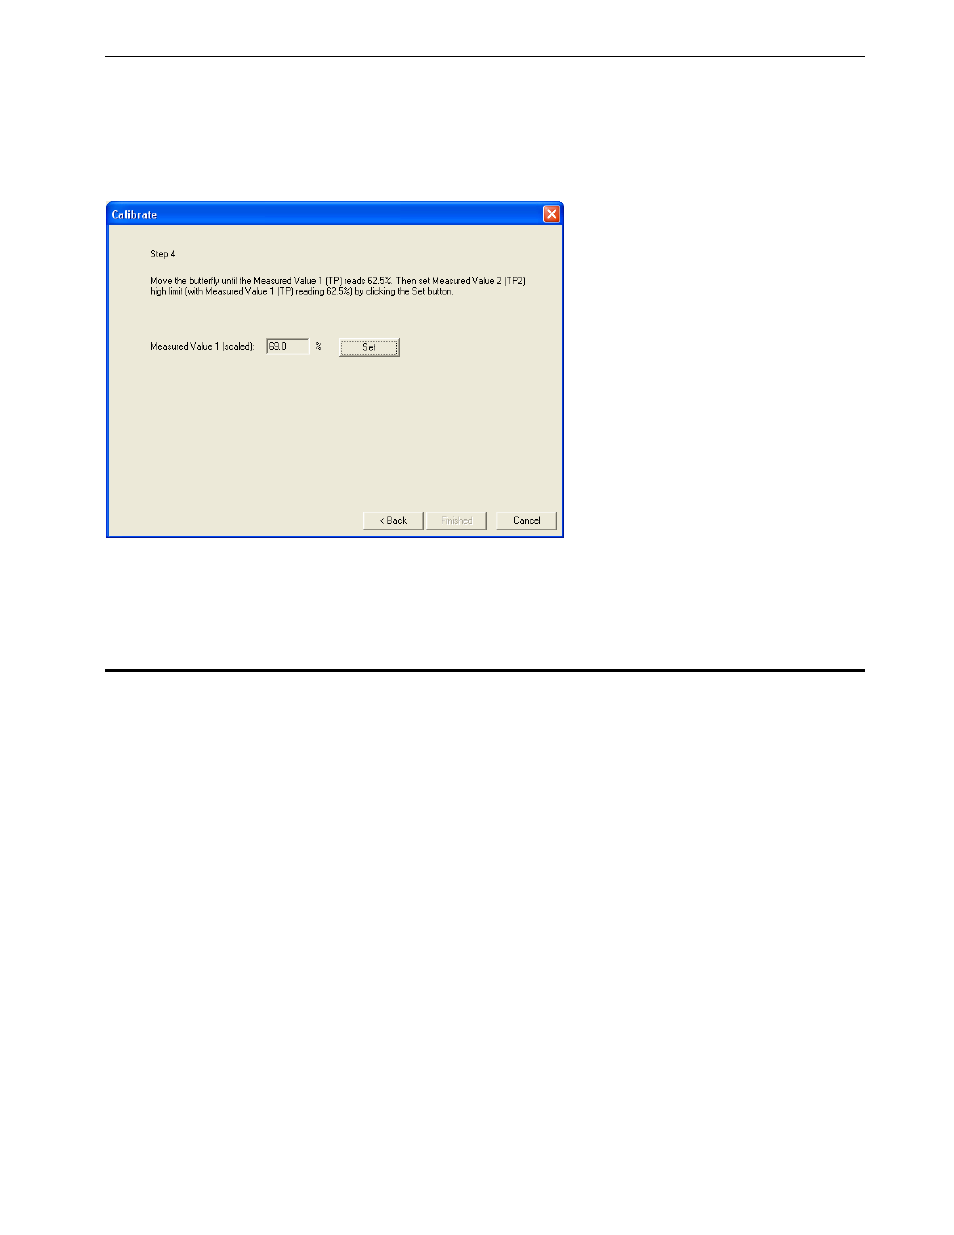
This step is only applicable for DBW throttle bodies with a “knee” characteristic for the Meas2 (TP2) sensor (eg.
Meas2 Max % Target = 62.5%), where the high limit is measured separately for measure value 1 (TP) and measured
value 2 (TP2).
Set the high limit for the measured value 2 (TP2) by following the instructions displayed (see below). It is important to
position the butterfly as close to the target (eg. 62.5%) as possible when setting measured value 2. Note that the Set
button can be pressed again if the butterfly position was set incorrectly. When the measured value 2 high limit
position has been set, click Finished to continue.
Step 8:
When all calibrations have been performed, send the configuration to the DBW-4 by pressing the F5 key.
Generic PID Controller Calibration
To calibrate a generic PID controller, the high and low limit positions must be measured and included in the
calibration. The procedure calibration procedure described here should be repeated for each PID controller
connected to the DBW-4.
Step 1:
Run the DBW-4 software and load the appropriate configuration file for the connected device, or enter the
appropriate PID parameters.
Step 2:
Connect the CAN cable from the PC to the DBW-4 and apply power to the DBW-4. Ensure that only the sensor
wiring (TP, +5V and 0V) is connected to the device and that the wiring to the actuator is disconnected before applying
power.
Step 3:
Click on the Tab (PID1 to PID4) for the controller to be calibrated. Ensure that the Group type for the controller is set
to “Other”. Press the Calibrate button to begin the calibration. After reading the displayed safety warning and
checking the actuator wiring, click Next to continue.
Step 4:
Set the low limit for the measured position by following the instructions displayed (see below). For indication
purposes, the raw position value will be displayed as the actuator position is changed. Note that the Set button can
be pressed again if the measured position was set incorrectly. When the low limit position has been set, click Next to
continue.