Conveyor tension setting – DE-STA-CO Rite-Link Conveyors 75mm, 115mm and 150mm LINKS User Manual
Page 7
CONVEYOR TENSION
SETTING
GENERAL INFORMATION
To maintain and guarantee accuracy and
performance of the conveyor, DE-STA-CO uses
a state-of-the-art, chordal action compensating
conveyor design. DE-STA-CO rejected spring-
actuated tensioned conveyors that use either tail
shaft or secondary tensioning because these old
designs contribute to indexing inaccuracies.
Once the Rite-Link conveyor is properly tensioned
at the factory, no further adjustment is required in
the field for the duration of expected bearing lift.
We are including instructions for adjustments,
should it become necessary to replace bearings,
or if the tension is lost because of extraordinary
conditions (e.g., extreme thermal expansion).
It is recommended that the DE-STA-CO factory
be consulted prior to starting with the actual
adjustment. Failure to do so may void all
warranties for the conveyor.
CONVEYOR RE-TENSIONING
1. Read the section in general information
regarding warranty.
2. Remove the UHMW plastic guards.
3. Remove the radial guides at the take-up
end of the conveyor.
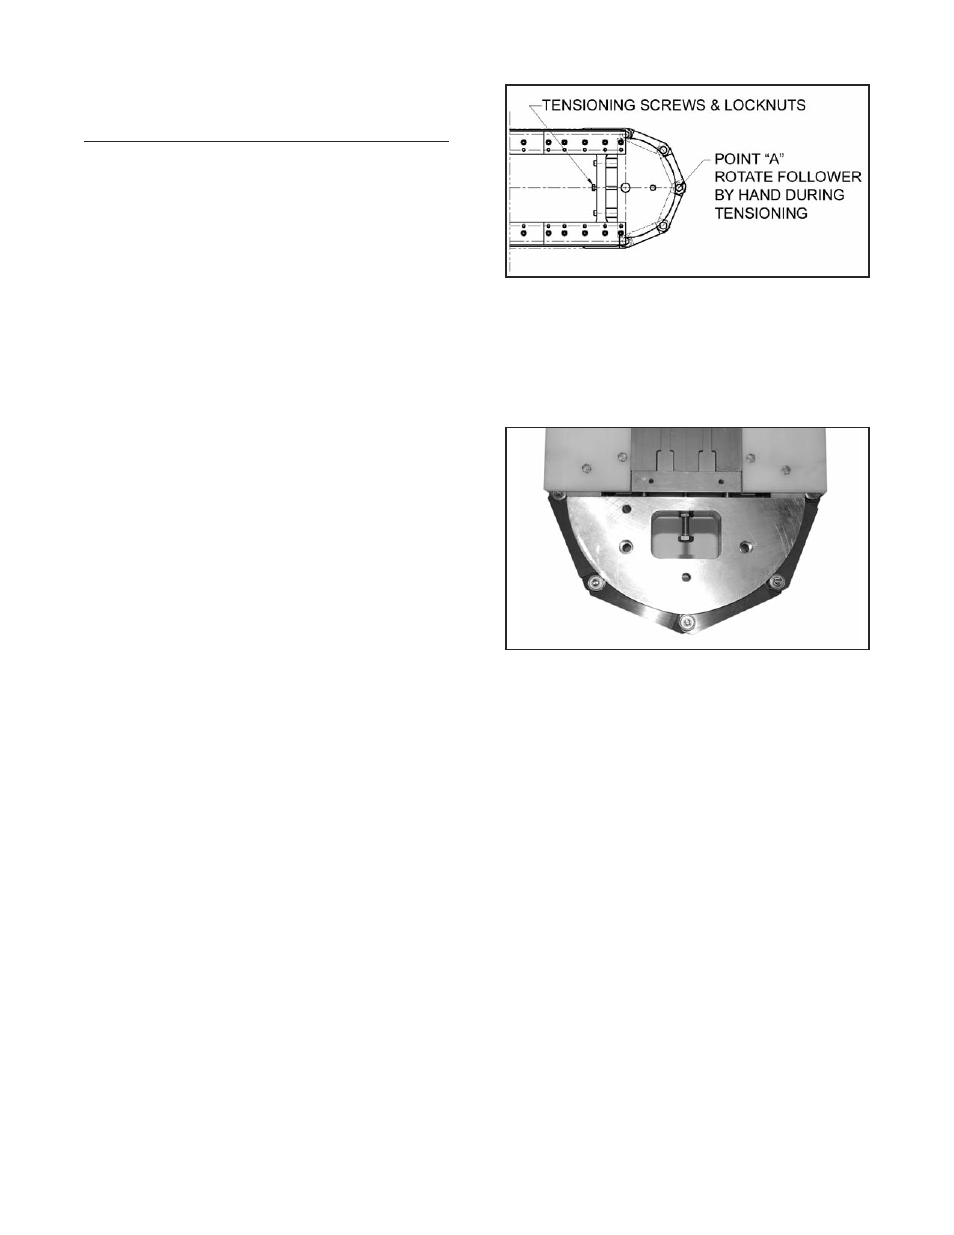
Figure2Conveyorre-tensioning
4. Hand crank the index drive input reducer until a
link pin bearing is positioned at the high point of
the take-up cam (point “A” as shown in Figure 2).
Figure3
5. Slowly tighten the tensioning screw until it
becomes impossible to turn the link pin bearing, at
point “A”, by hand. It should still be easy to turn
the bearing using pliers. If it is difficult with pliers,
you have overtightened.
6. Tighten jamb nut.
7. Re-install the radial guides and UHMW
plastic guards.
6