Step 3 – AVTECH Dial Out Plugin Bundle User Manual
Page 3
AVTECH Software
•
Phone 401.628.1600
•
Sales 888.220.6700
•
Support 401.628.1650
•
Web AVTECH.com
7. Open AVTECH’s ‘Device ManageR’ application software. Click on the ‘Settings’ tab towards the bottom of the left
menu. Here you find the ‘External Modems’ option. Click ‘External Modems’ and continue to Step 3: Configuring
The AirLink GL6110 GSM Modem w/USB.
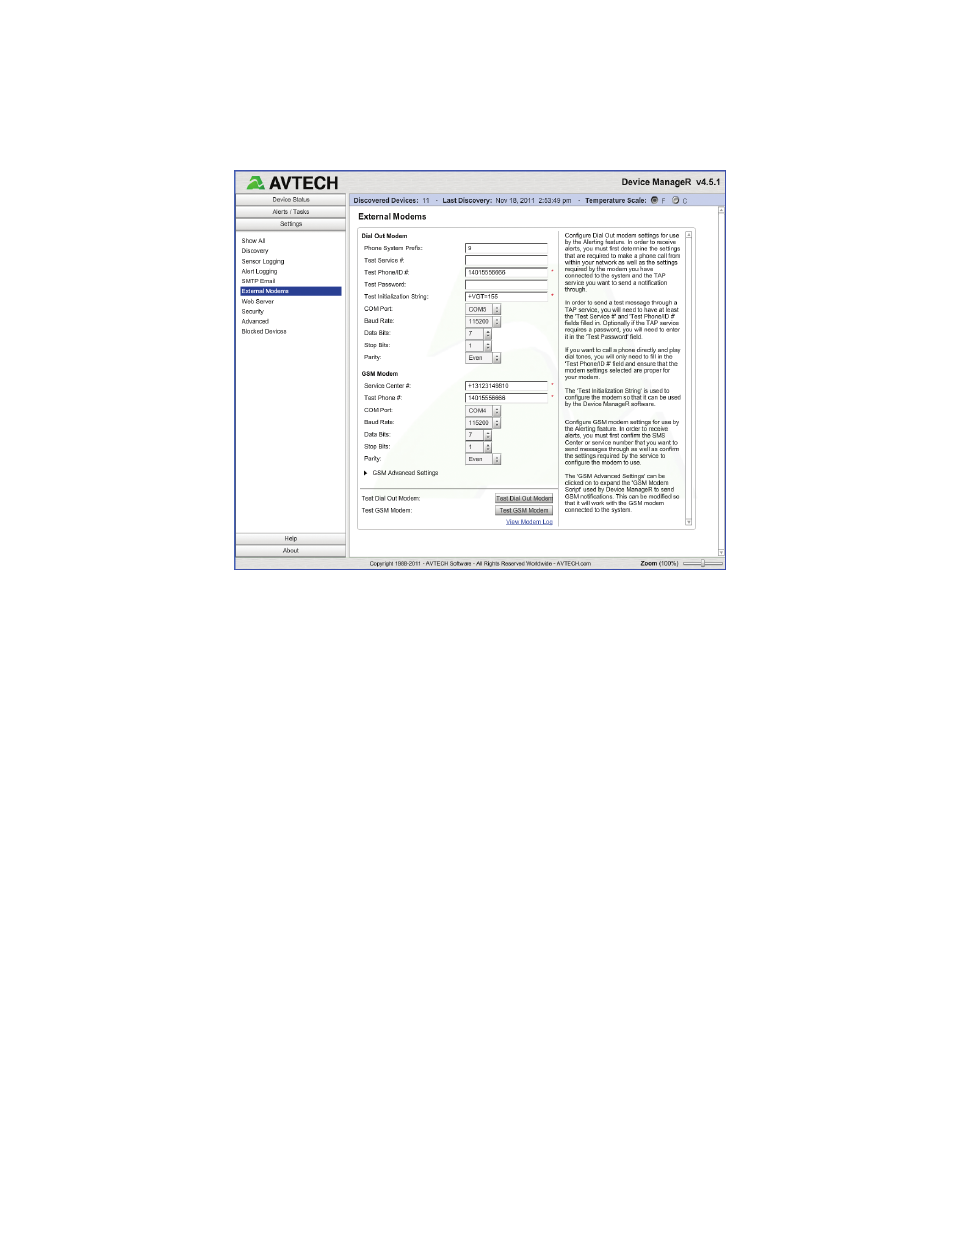
AVTECH’s Device ManageR (ADM) Application Software (‘Settings’ –> ‘External Settings’)
Step 3:
Configuring The AirLink GL6110 GSM Modem w/USB
NOTE: The above screen shows the default settings AVTECH recommends for use with the AirLink GL6110 GSM Modem
w/USB. This is NOT the default settings you will see when first opening the ‘External Modems’ section of the ‘Settings’
screen. The COM port is unique to each installation of a modem and will therefore have to be re-set. Most GSM modems will
want to use the following settings:
Baud Rate: 115200
Data Bits: 7
Stop Bits: 1
Parity: Even
1. Once the ‘GSM Modem’ section of the ‘External Modems’ settings of Device ManageR has been configured to
the settings required by your GSM modem and the service provider used for your SIM card, you can test your
configuration by clicking the ‘Test GSM Modem’ button. This will send a test message to the number defined in the
‘Test Phone #’ field (‘GSM Modem’ settings). The ‘GSM Advanced Settings’ (near the bottom left of the screen) can
be clicked to expand the ‘GSM Modem Script’ used by Device ManageR to send notifications. This can be modified
so that it will work with the GSM modem connected to the host PC.
2. Test your GSM modem now. Once you have received the text alert notification, as expected, you can then go on to
create a GSM action object which will be used to send SMS notifications when alerts occur. To create a GSM action
you will need to navigate to the ‘Alerts / Tasks’ section of Device ManageR. Click the ‘Actions’ tab, then ‘Add’ to
configure this new action. Once the ‘Add New Action’ dialog box appears, click on the ‘Action Type’ drop down
and select ‘Send Via GSM’.