AVTECH Report Generator Plugin User Manual
Page 2
AVTECH Software
•
Phone 401.628.1600
•
Sales 888.220.6700
•
Support 401.628.1650
•
Web AVTECH.com
These keywords can be used in both the subject and body of an email, however it is suggested to only use the
short keywords within a subject (keywords that only return a number instead rather than a list) due to space
limitations. To begin using the Report Generator Plugin you must first set up a schedule for receiving reports.
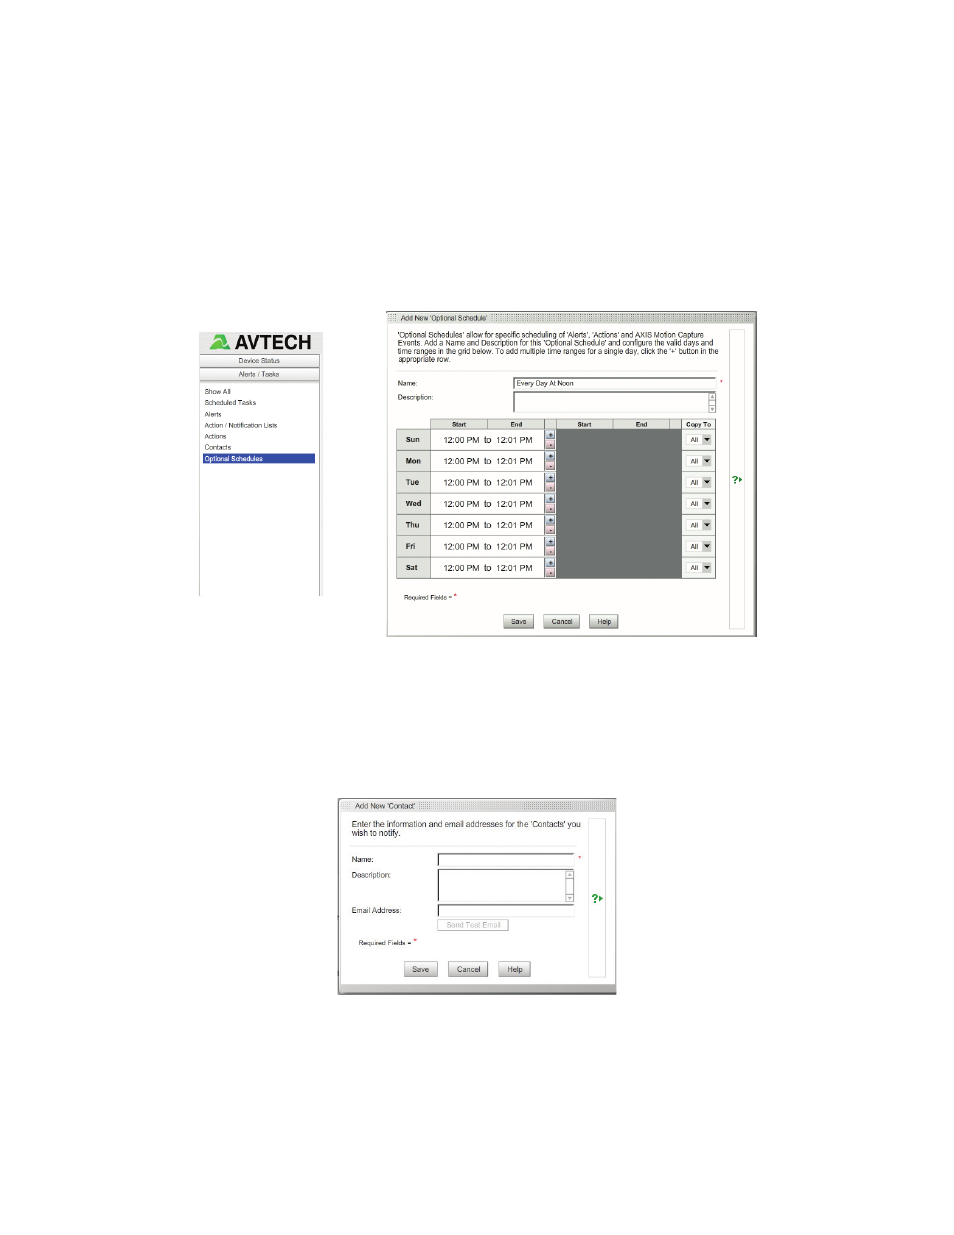
3. To create a ‘Schedule’ click on the ‘Alerts/Tasks’ tab in AVTECH’s Device ManageR software. Then click the
‘Add’ button under the ‘Optional Schedules’ section. An ‘Add new Optional Schedule’ screen should pop up.
Name your schedule as desired (e.g.‘Every Day At Noon’, ‘Weekly at 5:00’, etc.), then set the range for the
desired times you wish to receive these reports for. Once this time range is set you can then click on the ‘Copy
To’ drop down to set this same time range for the desired days of the week. Click ‘Save’ to save this schedule.
4.
AVTECH’s Device ManageR (ADM)
Application Software - Alerts / Task Tab
(ADM) - ‘Optional Schedule’ (Day / Time)
Next you will need to make sure that the person who should be receiving these reports is set up as a contact
under the ‘Alerts/Tasks’ tab. Click on ‘Contacts’ –> ‘Add’ and fill in the name and email address for the
contact you would like to add. This could also be an alias for a group such as ‘IT Team’. Make sure to set up
each contact separately if more than one contact is desired.
5.
ADM - Add New ‘Contact’
Now that your schedule and contacts are set up, will need to create the action that will send the desired
Report. Click on the ‘Actions’ section under the ‘Alerts/Tasks’ tab, then click ‘Add’. This will take you to
the ‘Add New Action’ screen. Name your new action, add a description if desired, then select the ‘Send
Email Report To Configured Contact’ option from the ‘Action Type’ drop down. Once you have the action