American Expedition Vehicles JK High Steer Kit User Manual
Page 4
3
2. Add the supplied u-bolt and nuts (visible in Fig. 4).
3. Insert the supplied spacer tube between stock track bar bracket and new bracket (Fig. 2-B), lining it
up with the original track bar bolt hole. (This may require slight prying or tapping with a hammer.)
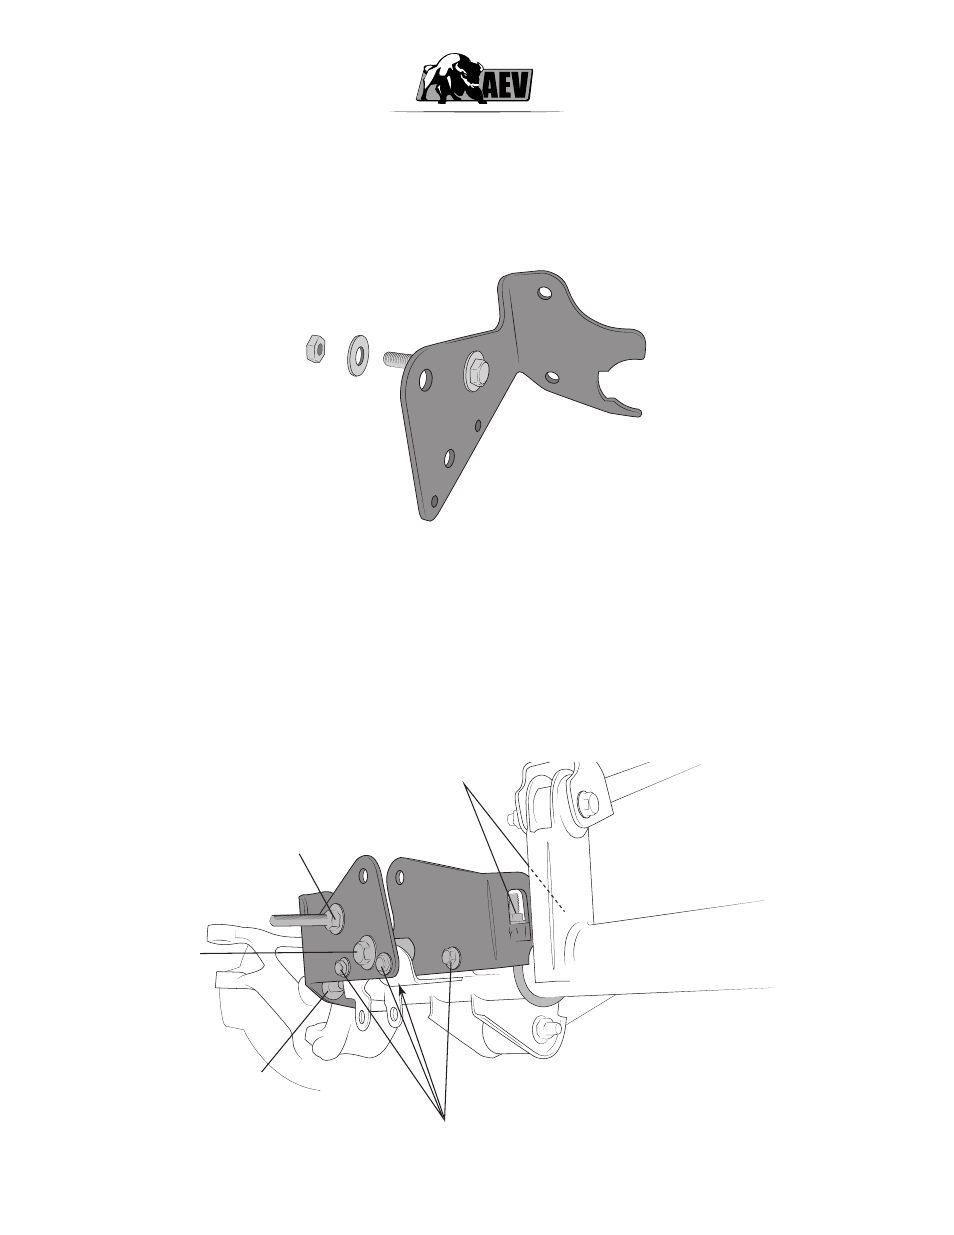
4. Pre-assemble the second bracket as shown (Fig. 3) with the supplied bolt, washers, and free-spinning nut.
Figure 3
5. Install this bracket in front of the stock track bar bracket on the axle and line up the small holes with
the corresponding ones on the axle bracket. Insert the remaining two 3/8”x 1.0”L bolts and washers
from the front through the brackets, add nuts and hand tighten.
6. Insert the 1/2” x 1 1/2”L bolt through the factory stabilizer tab on the side of the axle and the corre-
sponding bracket hole and add the locking nut.
7. Place 9/16” x 3 1/2”L bolt through original trackbar hole, both brackets, and supplied spacer tube.
8. You may now tighten all fasteners.
22 ft/lbs
40 ft/lbs
100 ft/lbs
100 ft/lbs
22 ft/lbs
Figure 4
- JK WINCH MOUNT (10 pages)
- JK WINCH MOUNT CALL OF DUTY (5 pages)
- JK snorkel Kit (9 pages)
- Fuel caddy (7 pages)
- JK Roof Rack (11 pages)
- Rear Vision System (10 pages)
- JK Rear Bumper/Tire Carrier (19 pages)
- JK Front Bumper Skid Plate (4 pages)
- JK Heat Reduction Hood (4 pages)
- Jk WASHER Nozzle Kit (1 page)
- JK Tubeless Front Bumper (10 pages)
- JK Differential Cover (4 pages)
- JK Replacement Tow Loops (5 pages)
- JK Hi-Lift/Pull-Pal Mount (6 pages)
- JK Pump Kit, Rear Bumper Water Tank (4 pages)
- JK Slider - Rear Differential Skid Plate (2 pages)
- Moab/Call of Duty Rear Bumper Water Tanks with Pump Kit (20 pages)
- JK Builders Rear Corner Guards (10 pages)
- Full Rail Kit for JK Roof Rack (4 pages)
- JK Cargo Liner (1 page)
- JK CORDURA Rear Seat Covers (4 pages)
- JK Jack Base (1 page)
- JK Rear Track Bar Kit (12 pages)
- JK Geometry Correction Front Control Arm Drop Brackets (5 pages)
- ProCal Module User Guide (10 pages)
- ProCal Module Quick Reference Guide (2 pages)
- JK 2.0 Spacer Suspension (13 pages)
- JK DualSport XT Suspension 2.5 (11 pages)
- JK DualSport SC Suspension 3.5/4.5 (17 pages)
- AEV-Nth JK Suspension Systems (14 pages)
- JK Hemi Builder Kit - Installation Guide for 07-11 JK Wrangler (36 pages)
- JK HEMI Builder Kit - Installation Guide for 12+ JK Wrangler (37 pages)
- JK Pintler Beadlock Wheels (3 pages)
- 4.0L Universal Oilpan Skid Plate (3 pages)
- Tummy Tucker – TJ Wrangler NON-Rubicon (11 pages)
- Tummy Tucker – TJ Rubicon models (13 pages)
- Brute Double Cab Tonneau Cover (6 pages)
- Preparation of the Jeep body tub (15 pages)
- Brute Frame (20 pages)
- Cab Closeout (6 pages)
- Brute Bed (7 pages)
- Brute Hardtop (8 pages)
- TJ Highline Body Kit (13 pages)