Alpha Technologies AlphaNet IDH4 for XM2, XM2-HP, and XM2-300HP Series - Quick Start Guide User Manual
Page 6
6
746-257-B0-001 Rev. A (2/2014)
IDH4L Installation / Replacement Procedure in XM2-300HP Power Supplies, continued
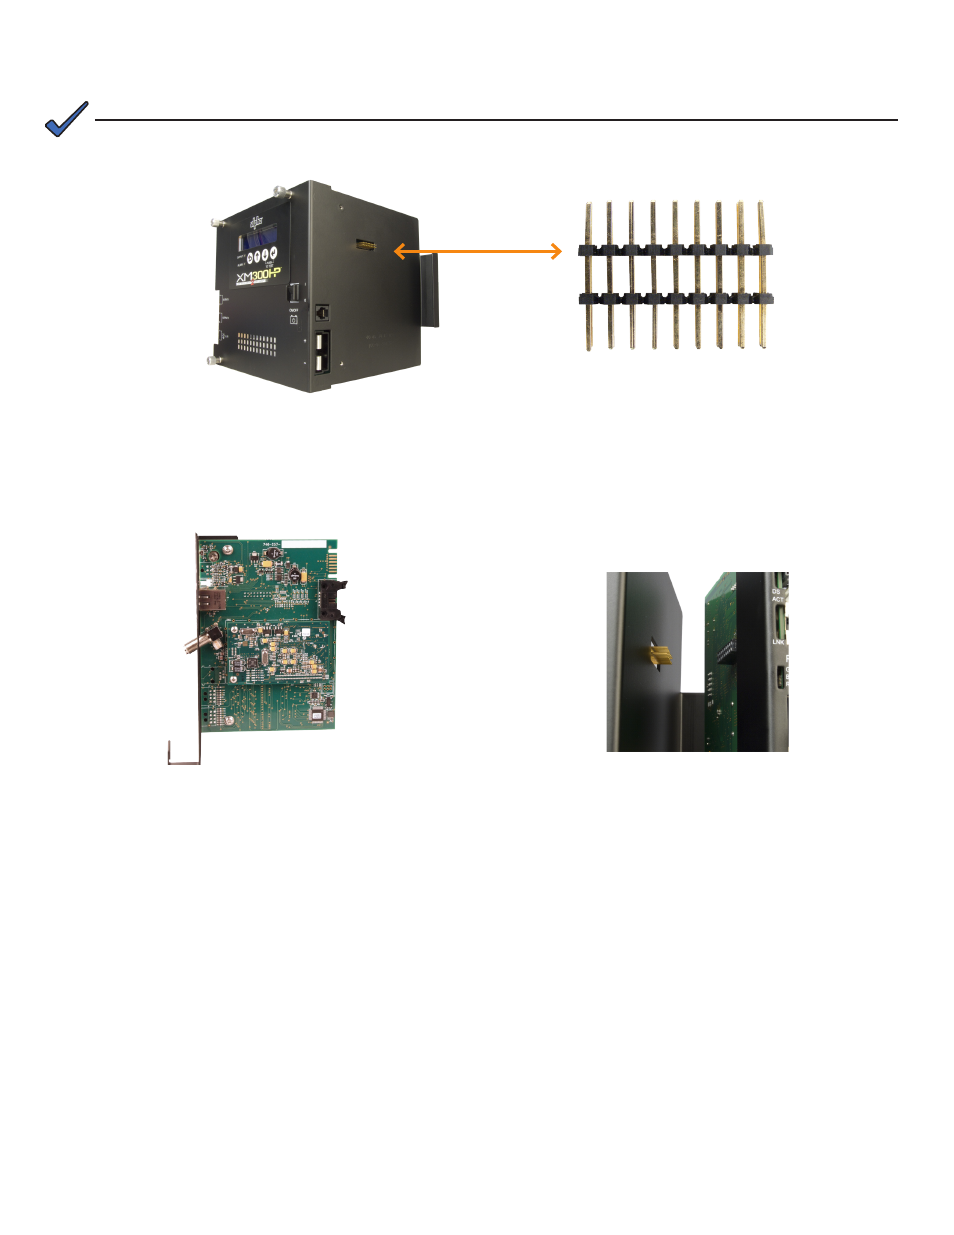
7. Plug the supplied 18-pin jumper into the header on the Inverter Module.
Fig. 9, Installing 18-pin Jumper
(Alpha p/n 540-581-19)
To prevent damage to the IDH4L, do not reuse the existing 18-pin connector. Instead, use the jumper supplied with
the transponder.
NOTE:
8. Attach the IDH4L to the sheet metal with the supplied 6-32 screws.
9. Line up the 18-pin jumper with the header on the Inverter Module and connect the unit to the inverter module.
10. Fasten the IDH4L to the Inverter Module by tightening the two captive screws. It is recommended that the screws be
tightened alternately, a few turns at a time so the transponder aligns in parallel to the Inverter Module.
11. Reinstall the Inverter Module and make front panel connections (tamper, temperature sensor, battery, RF, etc.).
12. If not yet done, record the cable modem MAC address from the front of the unit and report it to the network manager
for network provisioning. For Dual IP applications, the CPE MAC address should also be recorded.
Fig. 11, IDH4L Inverter Module Connection
Fig. 10, IDH4L Attached to Sheet Metal